Since people are exploring needleweaving for this months Stitch explorer challenge I thought I might show you another needle woven stitch called Needle woven picot.
It is great stitch that you can make short or quite long. They are very effective if worked on mass or if you work them in a circle they form flower like motifs. The ‘leaves’ stand free from the fabric in a 3D manner.
My main tip is to use a blunt tapestry needle so that as you weave the threads you do not split them by accident.

Place a pin in your work with the pin emerging from the fabric where you want the base of your picot to be.
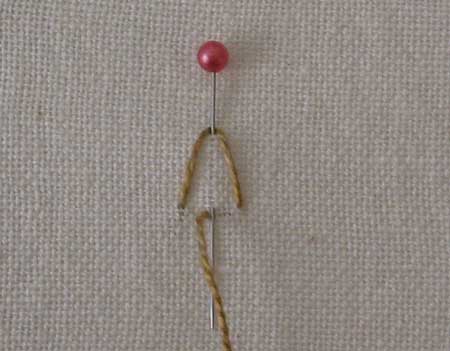
Bring the thread out at the base to the left of the pin. Take the thread behind the pin and back into the fabric on the right hand side as illustrated. Bring the thread out, a little to the left, at the base of where the pin emerges from the fabric.
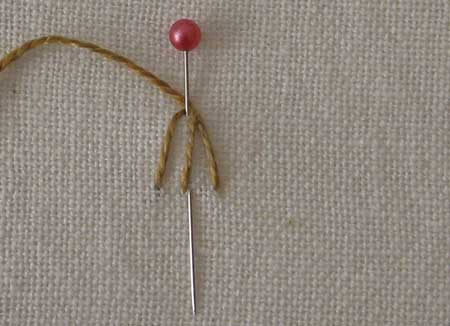
Take the thread and wrap it behind the pin. Have the thread cross the pin so that it wraps from the right side to left as illustrated in the photograph.
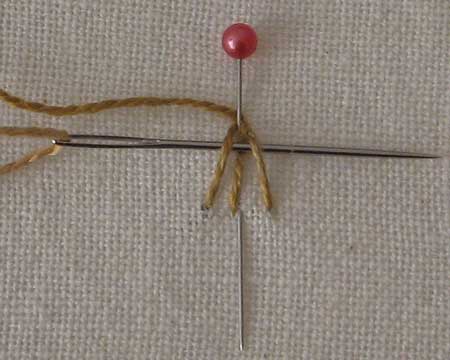
Begin weaving by sliding the needle from left to right picking up the two outer threads. You do not pick up the middle thread.
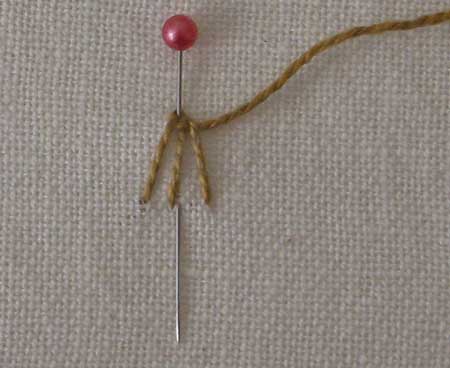
Pull the thread through firmly but not too tight.
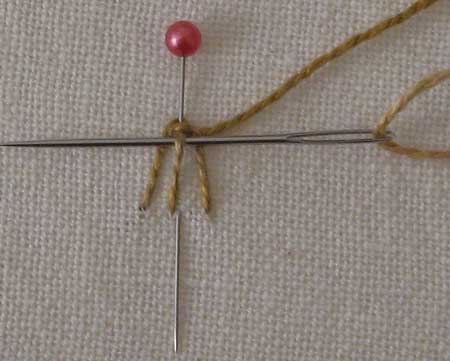
Turn the needle and continue weaving by sliding the needle from right to left picking the middle thread. The two outer threads are not picked up.
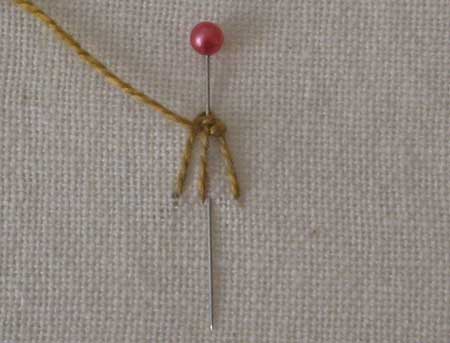
Pull your thread through and continue in this back and forth motion until you have woven to the base. As you weave use the needle to pack the picot so that it firm.
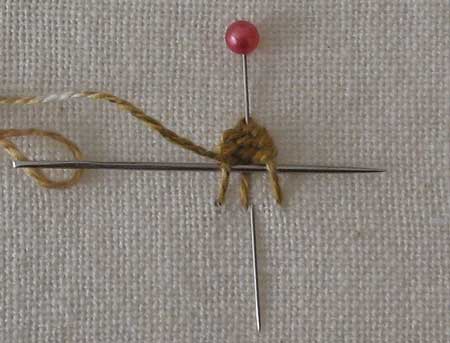
Continue weaving until the picot is packed firmly to the base.
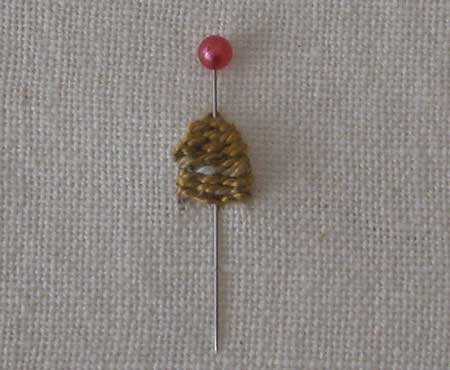
Take the thread to the back and secure with two small back stitches. Remove the pin and you have a freestanding needle woven Picot which pops up from the fabric.
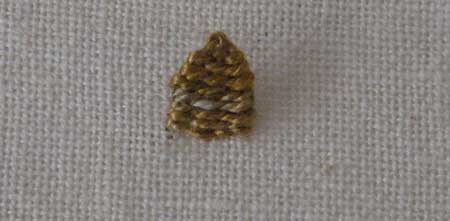
Also see How to work closed needle woven picot leaf stitch


I've been doing cross stitch for quite sometime, but I've never into embroidery but it seems that I became interested with this stuff the moment I've seen this site. It just happened that my daughter who is in first year high school had this subject and we are trying to see how the stitches are being done. This site is a great help to us. I'll try to start my embroidery project as soon as I'm done with my cross stitch project. That will be soon. You have just inspired me. Thank you very much.
Thank you for this great tutorial!!
MERCI
Megan since direction of weave is not important I think it would fine to weave it what ever way is comfortable. I can only say try it and see
For left handers – do we go in the opposite direction to weave?
Hi Sharon,
Thanks a lott ..I was searching for this tutorial.. tried it n and it came well.
Regards
Lakshmi
great photo-documentation 🙂
thank you
I’ve been incorporating some of these into my embellished quilts. I love the texture they add to my appliqued mushrooms here: http://kristinlaflamme.com/musings/?p=843, and on "Seaweed?" here: http://www.kristinlaflamme.com/galleryolderwork.html