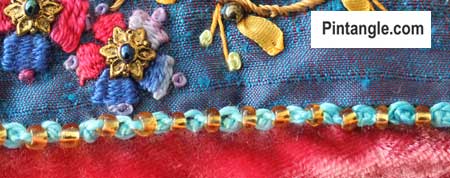
As a variety of Oyster Stitch, Beaded Oyster stitch is quick and easy to work. Also, since oyster stitch is a member of the chain stitch family it is very versatile. It will follow a curve well and although it looks complex, is not difficult to work.
This stitch forms a pretty edge for items, such as:
- needlebook covers,
- the edge of a fabric book page,
- fabric postcards or
- around the edge of Christmas tree decorations.
Tip! With this stitch, the beading is done during the stitching process, not added afterwards. The trick is to use a size 26 tapestry needle. Since the eye of a tapestry needle is long you can thread perle #8 and Perle #5 through the long eye. However, the needle itself is thin, which means you can add a bead to your working thread as you stitch.
The step-by-step instruction samples have been worked using perle # 5 thread
Step-by-step instructions on how to work Beaded Oyster Stitch
You start an Oyster stitch
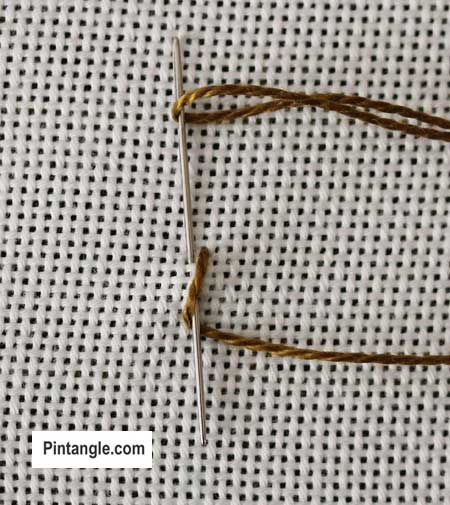
Bring the thread to the front of the fabric. Insert the needle a little to the left, take a bite of the fabric pointing the tip of the needle downwards. Cross the working thread over the needle, then wrap the thread under the needle like you would do to create a twisted chain stitch.
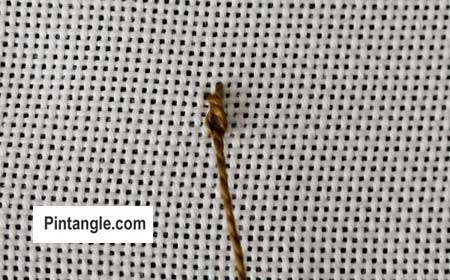
Pull the needle through the fabric so it is snug, with the loop flat but not so tight that it pulls the fabric.
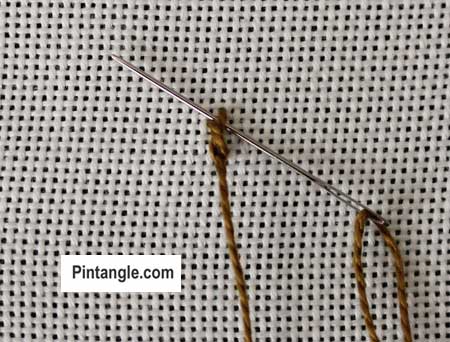
Without picking up the foundation fabric, slide the needle under the right-hand top thread, above the loop that has formed.
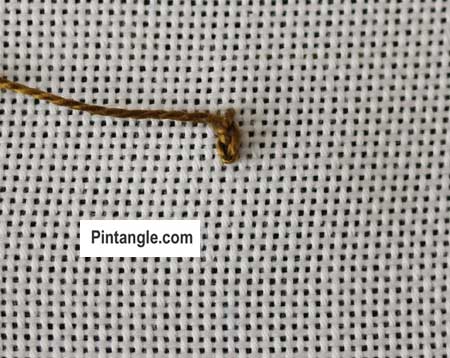
Pull the thread through.
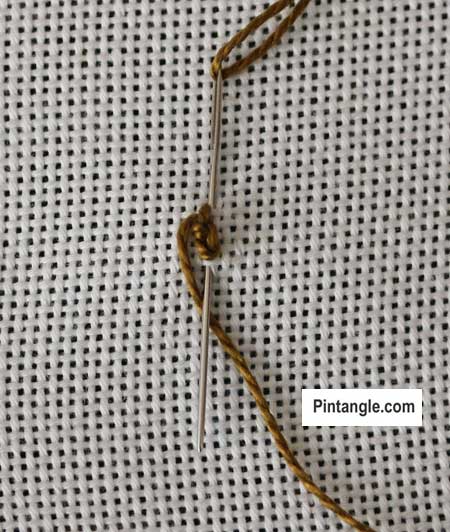
Insert the needle into the fabric at the top of the stitch. Point the needle downwards, slide it behind the knot, so that the needle exits the cloth at the base as illustrated.
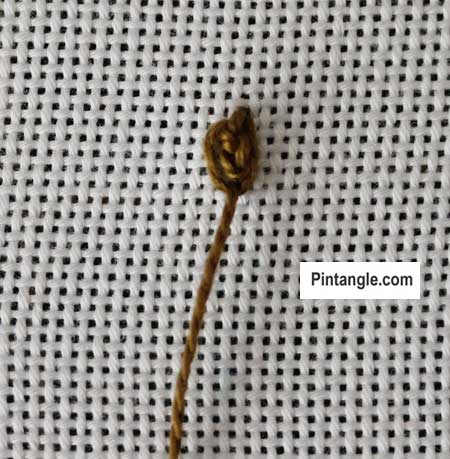
Loop the thread under the needle (as you would for a chain stitch) and pull the needle through.
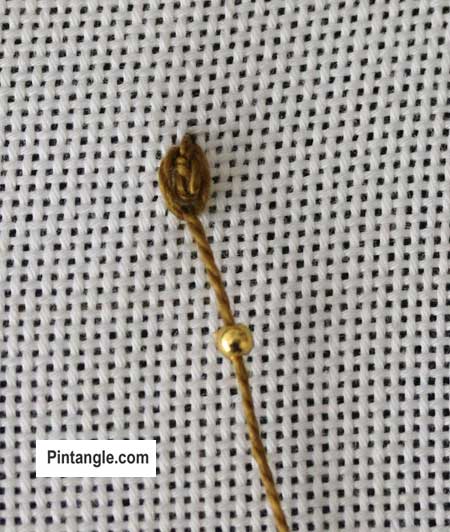
Add a bead to your working thread
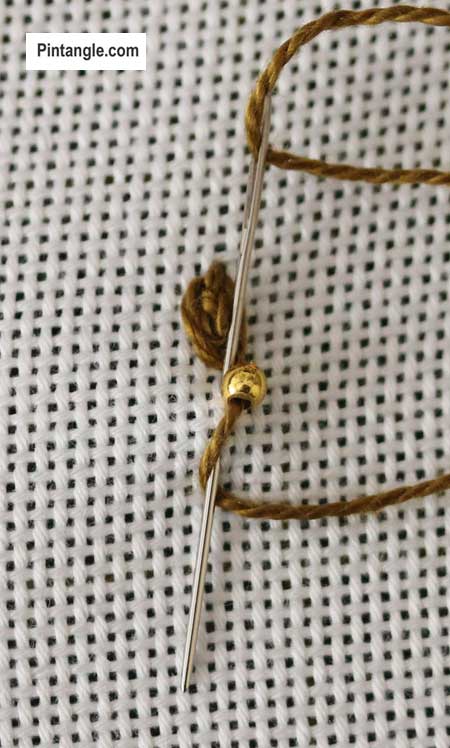
Repeat the process of creating your oyster chain and continue along the line. The first wrap made to create the twisted chain feels a bit clumsy but once you have established a rhythm it is a beaded stitch that works up easily.
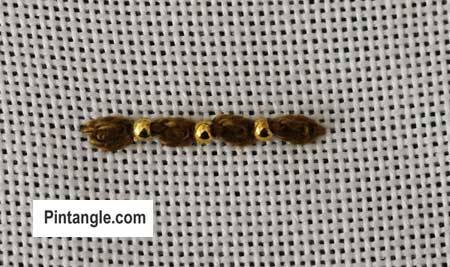
Take a look at the Oyster stitch page to see get ideas on how to use this variety as Beaded Oyster Stitch can be used to add a dramatic flare in many of the situations where you would use Oyster stitch or chain stitch.
Follow Pintangle and have it delivered to your inbox
You can have Pintangle including TAST delivered to your inbox — just type in your email address and click on the Subscribe button below. Then check your email inbox for a confirmation email and click the link to confirm your subscription. If you don’t see a confirmation email, check your spam folder — sometimes the computer puts it there.
Enjoy Beaded Oyster stitch!
Have you seen my Stitchers Templates?
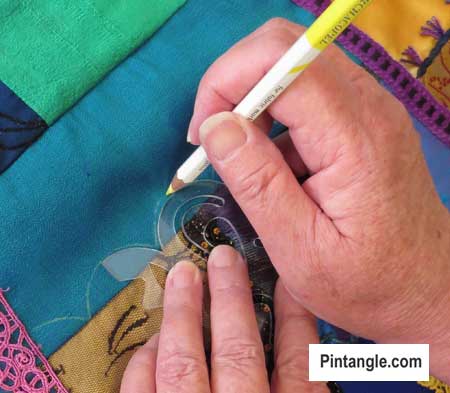
Create your own designs with Sharon’s easy-to-use stitchers templates. Combine shapes to create hundreds of patterns and designs to embroider. It is the ultimate mix-and-match fun for stitchers of all skill levels. I created them to be as versatile as possible. I include four multi-patterned templates in each set. You will find them easy to use, totally clear to help you position them on your work, and they are nice and compact to fit in your sewing box. Each set comes with an e-book filled with patterns and designs that you can create and use as a jumping-off spot for your own designs. They are available now in our shop here!
Happy stitching!


Thanks for introducing this stitch. My trials are here.
http://hobbysewing.blogspot.com/2020/09/tast-19-beyond-tast-19.html
Thank-you Sharon, your variations and precise instructions make following your stitches a joy rather than a stressor, you always leave room for individual creativity and I love that.
Marilyn – thankyou that is a lovely comment to read – you made my morning!
Just got on your site. It is wonderful. Thank you
Love it, wow, I’m going to learn a whole bunch of new stitches!!
Thank you, thank you, Sharon. i have studied other instructions for the oyster stitch and they never made any sense. It’s so simple!
Thats great news Christine – as Oyster stitch is very handy!
Thank you for providing all this wonderful information. I just found your site and love it. I have just returned to embroidery after many, many years, most of what I had learned escapes my memory. Again many thanks.