Bullion Buttonhole an interesting variety of buttonhole. This stitch consists of buttonhole stitch where the upright bars are worked as a bullion stitches. Since it is based on buttonhole you can use it to edge items or as a interesting border. Bullion buttonhole can look very interesting if you thread a thin ribbon or novelty thread under it.
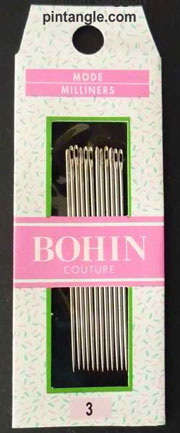
Tip: For all bullion stitches use milliners needles as they are the secret weapon in creating wonderful bullion stitches. People either love or hate bullions, but most of the problems associated with working them is that people use the wrong needle.
I recommend milliners or straw needles because most embroidery needles have an eye that is wider than the shaft of the needle. Milliners or straw needles have an eye and shaft that are the same width which makes sliding the wrapped bullion knot along the needle easy.
If you are not near a needlework store you can buy Milliners Needles online (this is an affiliate link which means if you shop here I get a small commission at no extra cost to you. That is not why I recommend them!)
How to work Bullion Buttonhole
This is a version of buttonhole that has a bullion as the vertical stitch. It makes sense to be familiar with both basic buttonhole stitch and bullion knot stitch before you embark on this. So if you need a refresher work a few of both stitches on some scrap fabric and attempt this when your hands have a bit of muscle memory.
Samples worked in DMC perle #5 cotton using a #3 Milliners needle on 26 cnt linen.
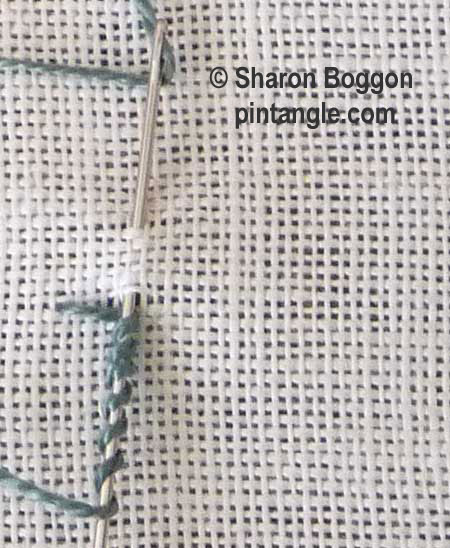 The same as basic buttonhole bullion buttonhole stitch is worked from left to right over two imaginary lines.
Bring the thread out on the lower line. Insert the needle on the upper line making a straight downward motion and then loop the thread under the needle point as you would with regular buttonhole.
Wrap your needle 5 or 6 times. Make sure the wraps side side by side. Don’t wrap too tight as that will make it hard to pull your needle through. On the other hand loose wrap will make for a sloppy knot.
Pull your needle through while loosely holding the wraps between your thumb and forefinger. As you pull your needle through the bullion stitch will point towards the top imaginary line.
Some of the wraps may be a little wobbly. Tickle the bullion’s tummy with the point of your needle. Run it smoothly up an down the underside of the bullion. Do this a couple of times as this will even out wobbly wraps.
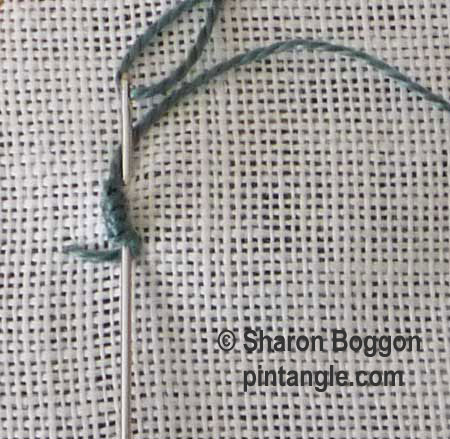 Your thread should emerge from the bottom of the bullion. Move along the row, repeating the same stitches.
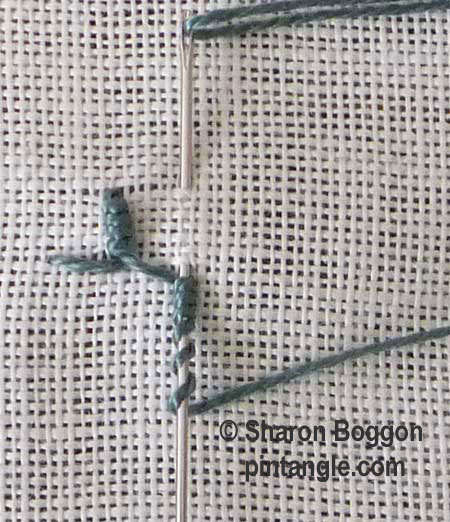 By altering the lengths of the upright bullion stitches this variety of buttonhole can be very decorative
Like regular buttonhole stitches, rows of the stitch can be built up to create patterns.
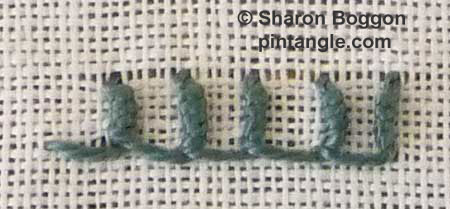 Bullion buttonhole is a fun stitch to work once you establish a rhythm and if you want to add even more texture it looks good when you add beads.
Follow Pintangle and have it delivered to your inbox
![]()
You can have Pintangle delivered to your inbox by using the subscribe feature in the sidebar. Enter your email address, and when you get the confirmation email make sure you say yes. Then you are all set!
If you are on a mobile or tablet you will need to scroll to the bottom to find the subscribe feature.
Have you seen my book?
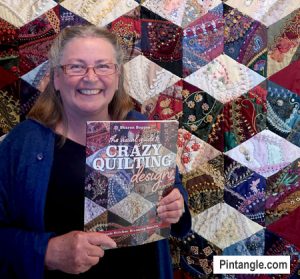
My book The Visual Guide to Crazy Quilting Design: Simple Stitches, Stunning Results shares detailed practical methods about how to design and make a crazy quilt. From fabric choice, to balancing colour, texture and pattern, in order to balance and direct the eye around the block. I cover how to stitch, build decorative seam treatments in interesting and creative ways. My book is profusely illustrated as my aim is to be practical and inspiring.


Finally posted something: http://airynothing.net/Blogs/anblog/2013/06/30/tast-67-68-69-70
Voici mes quelques points pour ce 71 ième point. http://carrementcrazy2.canalblog.com/archives/2013/06/30/27538830.html
Amitiés
MC
Just a few stitches from me:
http://queeniepatch.blogspot.jp/2013/06/tast-71-bullion-buttonhole-stitch.html
Still playing catch up. Today I wrote about the buttonholed double chain:
http://fat-quarter.blogspot.nl/2013/06/buttonholed-double-chain.html
My efforts for wk 70 & 71.
http://stitchinfingers.ning.com/photo/wk-70-and-71?context=user
Barbara
Here is my take — http://210920746822434353.weebly.com/1/post/2013/06/take-a-stitch-tuesday-2013-stitch-71.html
Thanks, again, Sharon; I learn so much from you!
Hi Sharon,
I started with this week’s samples, they are here-
http://jizee6687.wordpress.com/category/tast-2013/23-71-bullion-buttohole-stitch/
Thank you,
Chitra
Hi Sharon,
I have not been able to work on this challenge for the past few weeks. I’ll start with the stitch samples now.
my earlier sampler of this stitch is here-
http://jizee6687.wordpress.com/category/tast2/11-bullion-buttonhole-st/
Thank you,
Chitra
Here’s my sample for TAST 71 http://hokkaidokudasai.blogspot.jp/2013/06/tast-71-bullion-buttonhole.html
I’ve been using other recent stitches on another project and posted about that here http://hokkaidokudasai.blogspot.jp/2013/06/a-few-more-stitches-in-mystery-bag.html
I expect to finish this bag in a day or two.
Thanks!
Congrats on being so busy with your stencils! That is awesome. I tried the stitch and I am wondering if it looks different enough from the regular buttonhole to warrant the extra work. That sounds so lazy, maybe I should have used a different thread. http://princessbubblescreates.blogspot.ca/
This is one of the stitches I learned in TAST 2010 and never used again. So I’m glad you repeat it this week. Here’s my weekly post with old bullion buttonhole stitches:
http://fat-quarter.blogspot.nl/2013/06/old-bullion-buttonhole-stitches.html
I am new to crazy quilting, and while I want to do it, I have a few questions and don’t know anyone who can answer them. Do you sew the pieces of the blocks together first by machine before you start the crazy quilting? I have a block that I did put together, but haven’t started the crazy part yet so I was just wondering if I am starting the right way. Thanks!
Yes I piece a block then embroider it. When all blocks are embroidered I join them to a quilt.
Sharon,
In your link to the buttonhole feather stitch, there were some comments about the dyed threads. You provided a link to a weaving site. When purchasing thread where it is not listed as #8 perle cotton or #12 wool…..what are the numbers we look for. For example I have seen thread listed as 16/2…how do those numbers compare to embroidery threads?
Thanks,
Deb
Deb for many fibers the thread sizes are slightly different and I have never found a chart that directly translates weaving sizes to the thread sizes embroiderers use -for me it has always been a case of taking the risk buying the yarn and using it!
I am interested in buying a set of your stencles could you please let me know where & how I can do this.
Hi!
I am way behinf but still slowly making progress 🙂
I did a blogpost on my last few stitches, you can read all of it here: http://hetkabinet.blogspot.nl/2013/06/tast-update.html
Or on my Flickr: http://www.flickr.com/photos/hetkabinet/sets/72157628775088487/with/9070822186/
Thanks and enjoy your week off!