
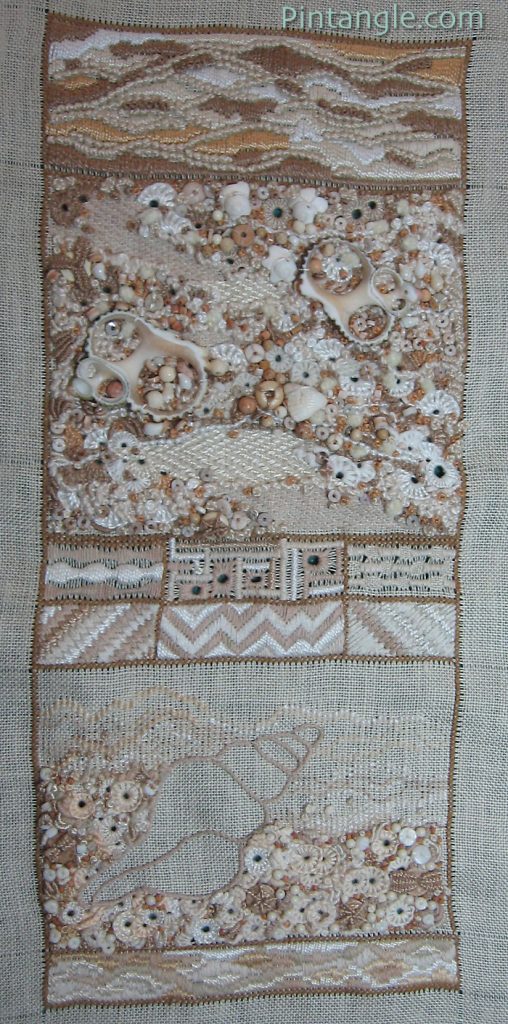
As you can see it is this encrusted highly textured sampler is fresh off the hoop and still to be blocked. Today I plan to share how I designed and stitched this sampler. This bone sampler is both surface embroidery, combined with textured stitches and beadwork. It is a contemporary modern sampler I designed along a beach theme. It is worked on 28 count linen using a mix of threads which include, cotton, silk, wool, linen, and rayon in varying weights and thicknesses. There is also a liberal use of beads, and shells.
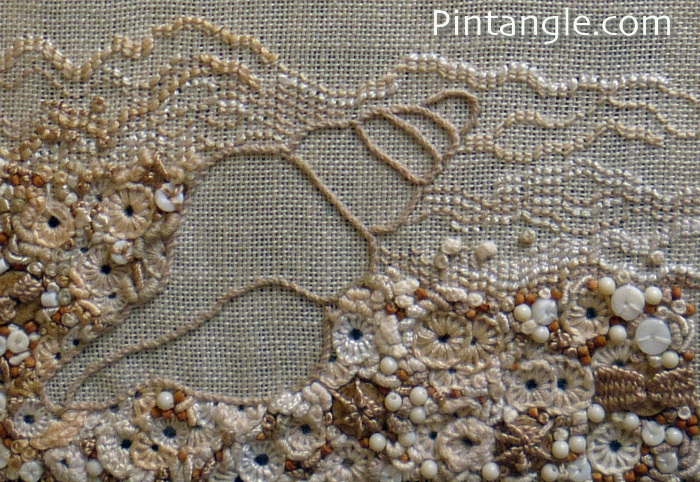
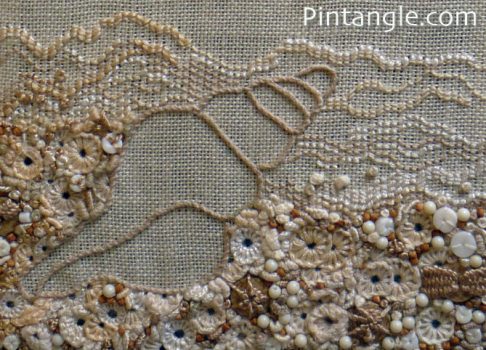
Today I am mainly going to talk about the seashell section of the sampler. Designs like this work because there is a negative space and a contrast of low relief against the highly textured areas. Contrast is an important element in this form of stitching. Although it is monotone it is contrasts of tone and texture that make the surface of this embroidery interesting. The importance of contrast in a design is not to be underestimated. Contrast is a term used to cover both obvious or subtle shifts. The contrast can be between light and dark, flat and high relief, shinny and dull. How many contrasts can you think of that can be applied to textiles?
Texture is another form of contrast. Changing threads introduces different textures. Threads can be shinny or dull or threads can be shinny against a matt fabric these are both contrasts of texture. Add beads or sequins and you have introduced another texture. These shifts in texture are all techniques to add visual interest.

One of the first things I do after choosing fabric is to choose the threads I want to use. I make a selection and set them to one side. I don’t necessarily use all the threads I select. However, I make sure I have a good tonal range and selection of different textures to hand. I like to have the option as the project develops. As you can see I thought I might want more darks and a touch of colour. In the end I did not use everything as I stuck to a monotone palette but I always had the choice to take it in a different direction.
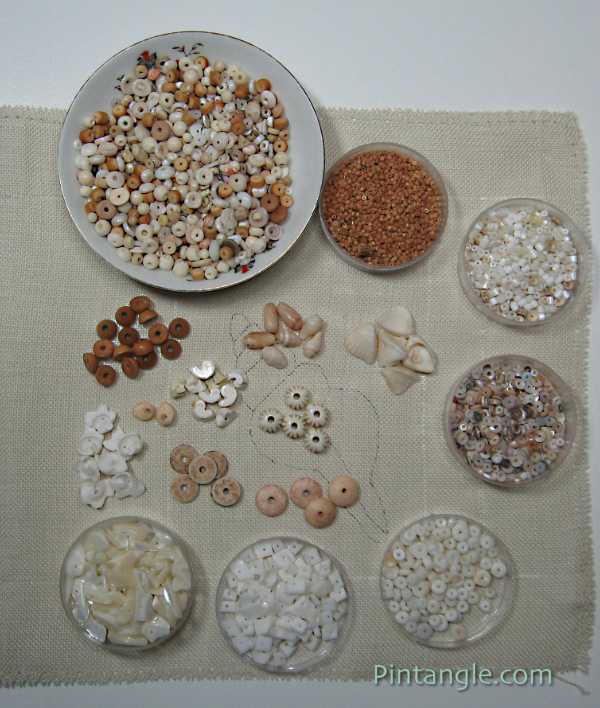
At the same time I also made a selection of beads. As I planed the design I paid attention to the texture and size of beads. I wanted to be able to contrast size, shape, colour tone, texture and use different materials. To do this I made a selection of beads that were made of wood, shell, glass, and bone.
The process
My ideas were worked out in my studio journal, working up a design over a few iterations. I transferred the outline of the shell to fabric. to do this, I used the method I described in this tutorial on How to Transfer Embroidery Patterns to Fabric. I outlined the shell in Whipped Stem stitch using a linen thread that has the same approximate thickness as cotton perle #5.
For the low relief area of the design I used Back stitch worked in wavy lines to indicate the ocean. So that the lines varied I stitched in range of threads. I used a mix of dull cotton and a slightly shinier cotton perle thread in a mix of shades and sizes I also changed the density of stitches in this area. Density is a design element that you sometimes see discussed in design books. I am not sure why it is not emphasised more strongly. I think in stitching it is a powerful tool. For instance, Blackwork is a traditional embroidery style that is based solely on changing density of stitches to build up designs.
When working encrusted highly textured embroidery think about changing the size of your stitches to add visual interest . If stitches are all the same size it visually flattens the area. Sometimes you see this type of encrusted work and it looks like a big blob of stuff plonked down on an area. Usually if you look carefully you will find there is not enough variation in size and colour tone. To make a densely textured area interesting change your stitches and change the scale you work them in and the threads you use.
Stitches to use in encrusted highly textured embroidery
Highly textured stitches used in this area of the sampler are stitches such as French knots and Bullion knots as they are highly textured. Other stitches used are Buttonhole wheels, Buttonhole Wheel Cup, Cast on stitch, Drizzle stitch, Ghiordes Knot, Woven Trellis Stitch, Whipped and Woven Spiders Wheel.

Tips for working encrusted highly textured embroidery
When working textured stitches use a milliners needle. A milliners needle has the same diameter from point to eye. This means the thread will slide along the needle easily.
Use a hoop as this will help with any tension problems.
Beads in encrusted highly textured embroidery
Using beads can be a very effective technique as they create a contrast of texture very easily. When adding beads to your embroidery once again stink of setting up contrasts of scale, shape and texture.
There is a huge range of beads on the market. Beads can be opaque, clear, transparent, or translucent, appearing to be iridescent, opalescent, or pearlescent. They can be made of glass, shell, pearl, plastic, wood, metal, ceramic, bone, polymer, and numerous other materials. Beads can be cut and shaped in different ways so that they are rounded, square, faceted, fluted or flattened. Their sheer variety is a constant source of inspiration.
Start incorporating beads in your design later rather than earlier. Once you start to add beads your stitching thread can catch on beads as you sew. It can be frustrating.
When I am working encrusted highly textured embroidery I start with the large beads first. This often establishes a point of focus. Then I add middle size beads which I use to lead the eye around a piece. Finally I add smaller sized beads towards the end tucking them in between stitches to fill in gaps.
This is the process to work this type of embroidery. I hope you try it out. let me know if you do!
My book for creative stitchers
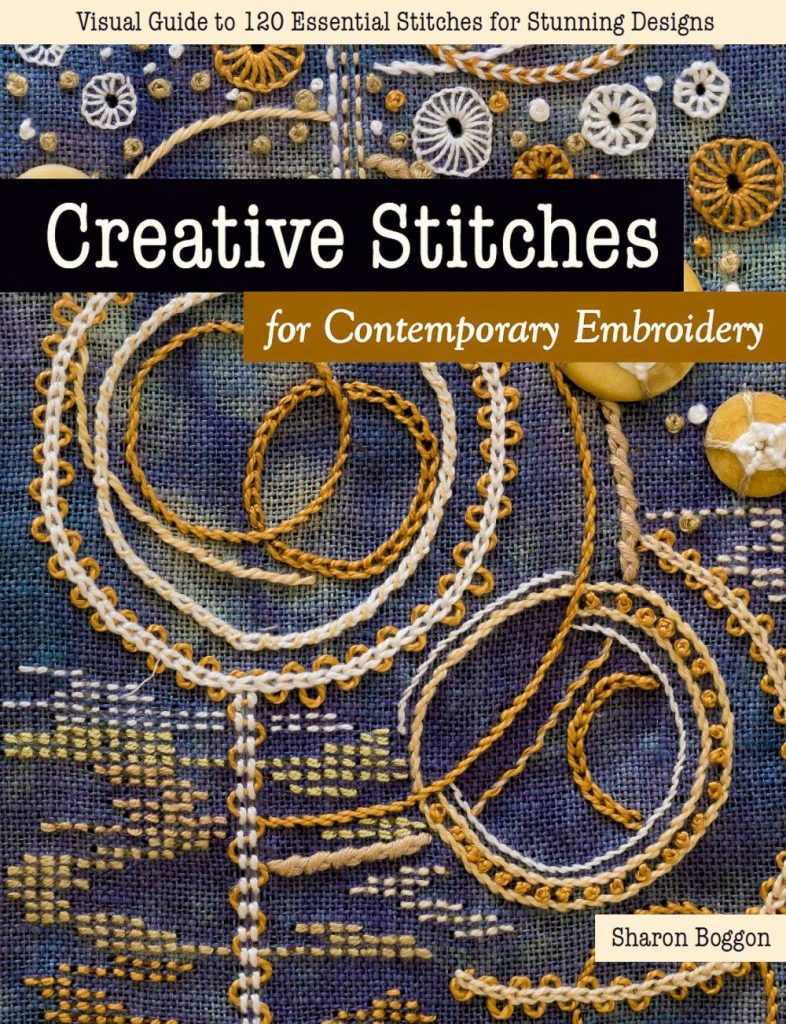
If you enjoy my site you will gain real value from my book: Creative Stitches for Contemporary Embroidery: Visual Guide to 120 Essential Stitches for Stunning Designs
Feeling stale? Wondering how to add sparkle to your embroidery? I have aimed Creative Stitches for Contemporary Embroidery to be suitable for both beginners and seasoned embroiderers. It introduces techniques to encourage your creative interpretations of stitches. I guide you towards discovering play-points in your embroidery by varying the height and width; by stacking stitches; or by filling multiple rows with the same stitch. With creative variations and demonstrations of tiny tweaks, You will be ready to head off down your own creative path and, of course, illustrated with plenty of eye candy!
Follow Pintangle and have it delivered to your inbox
You can have Pintangle delivered to your inbox — In the side bar use the Subscribe to Pintangle box or If you are on a mobile scroll to the bottom the of the page to find the Subscribe to Pintangle option. In either case type in your email address and click on the Subscribe button below. Then check your email inbox for a confirmation email and click the link to confirm your subscription. If you don’t see a confirmation email, check your spam folder — sometimes the computer puts it there.

What a wonderful job you have done of restoring your front gardens/walkway! The stitch work is lovely too; but I am not a needle and thread person. Gardening is my passion.
Kajin
The shell pattern was published with my Sumputous Surfaces class – I drew up a few versions for people to play with – perhaps you got it from there?
Your work is truly beautiful.
I felt a little bit funny when I saw the shell you embroidered – last summer, I gave myself a little challenge : embroider something à la Sharon B. I then proceeded to draw shapes, think about colors, etc. And I chose a shell exactly like yours! I can’t remember if I had seen it here or not – it is a troubling coincidence!
Oh ! It’s sumptuous.
This is stunning and gorgeous!!!! I love it!
I read your piece about WISPS and UFOS – figured out I don’t have any UFO’s and the read was very uplifiting ;-).
The term ‘UFO’ won’t exist now for some time!
Sorry I submitted that before reading it over and the English is horrible.
Sharon
I think you have misunderstood me – however Obviously I didn’t make sense but I guess you have answered my question. I was interested in whether you added the textured stitches before or after the large shell pieces – I just felt that it could be so very difficult to stitch inside those shells – not sure I could do it – however an experienced stitcher probably had no trouble.
Sharon’s sumptuous surfaces is a wonderful course – a not-to-be-missed experience!
Hi Marg
with this one I stitched the flat areas – ie the darning stitch areas then the larger shells shells on then I added textured stitches – I hope this explains what I did – I cover the process in my class Scrumptious surfaces
I have really loved this piece since I first saw it- but finished it is amazing Sharon. I look forward to the further exploration.
Do you mind me asking whether you stitched the bigger shell slices on before or after stitching the spaces inside them? (I hope that makes sense.)
I have been collecting shell pieces forever and now I know what I can do with them (if only I can find that stash!)
Hi all thanks for the lovely compliments – BizzieLizzie asked if I glued the shells on – NO!!! yikes everything is stitched – I am afraid I am old fashioned enough to glue and embroidery very separate.
I like this style and am goind to push it – explore it even further
Sharon – Fabulous!!! and to the community – Sharon´s courses are worth every penny! In fact she should charge much more!!!
I love the texture you have created with this piece. I love the beads and the knots and the mix of fiber and beads!
I wanted to let you know that even though I didn’t sign up for the take-it further challenge, I am participating vicariously. I love the motivation and thank you for that.
It’s my hope that one day, I will actually be able to keep a french knot from unravelling!!
Cheers, Denise
Hi Sharon – looks really lovely and crunchy. How have you done the pile of shells or beads within the larger shells, are they glued in or stitched into a void. I searched the beach when on holiday recently for shells with holes in to use in an underwater piece for display at our EG stand at the stitching show at G-Mex Manchester at the beginning of Feb. Do you drill holes in your shells? Keep posting the eye candy
this is wonderful! Another “something” I would like to try one day… I’ve just started crazy-quilting over Christmas with a few small samples, and I see how much time it takes (maybe just at the beginning? 🙂
I love the richness of this piece and how you can look at it for a long time and still find something you haven’t noticed before.
Your blog has provided a lot of inspiration for me, and also the links that you provide are very interesting.
Thank you!
Beautiful!
Oh Sharon, that is so beautiful and interesting! All the texture just pulls me right into the piece. One of these days, I’m going to try this type of design. Along with 50 other things I want to do!
Thanks Sharon, for sharing photos of your stitching. I really enjoy seeing it.
Spectacular! I wish I had time to take Sump. Surfaces this time, but I can’t. Please promise me you will teach it again later in the year??!! Cheers, Mara
Superb, as always Sharon. I like the way you used those large shell fragments. I had to look twice before I realised what those complicated shapes were. You put a lot on there, it must weigh a fair bit!
That sure is eye candy. I really like the way you integrate the shells with the embroidery, and what a great way of creating a modern sampler.
Very fine work, thanks for sharing…
I swear your childhood in the bush comes through in your stitching…even if this is the beach!
Sharon, the detailed photo looks so realistic, I’ve seen the high tide line on a beach look just like that, with small pieces of shell and debris inside lager shells. I’m in absolute awe when embroiderers can interpret the natural world with such acuracy and detail in fabric and thread. Thanks for sharing, and well done on finishing another WISP.
Hooroo,
Christine in cooler and overcast Sydney
http://missmuffettwo.blogspot.com/
Ugh. if only I wasn’t already studying.. I love the way you build up the beads stitches and larger shell objects.. and keep such balance in the colors and texture 😀
This is great – Im really looking forward to Sumptuous Surfaces!
What a wonderful piece.