Many are enjoying my tutorial on How to work a needle woven picot, as the stitch produced is very leaf like.
The needlewoven picot I demonstrated has an open base but if you work needlewoven picot with a closed base you get an even more life like leaf!
So I thought I would write a tutorial on how to work a closed base needlewoven picot. You can make them quite long and they look very effective if worked on mass. If you work them in a circle they form flower like petals.
Use a blunt tapestry needle so that as you weave the threads you do not split the threads by accident.
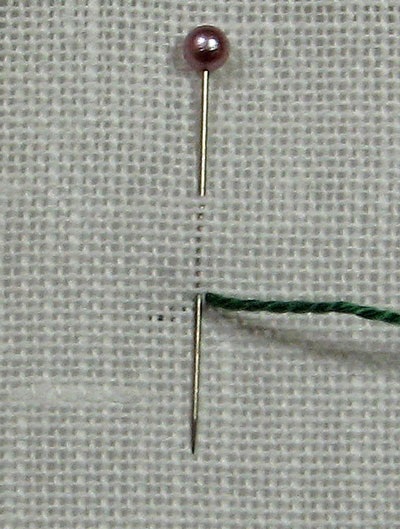
Place a pin in your work with the pin emerging from the fabric where you want the base of your picot to be.
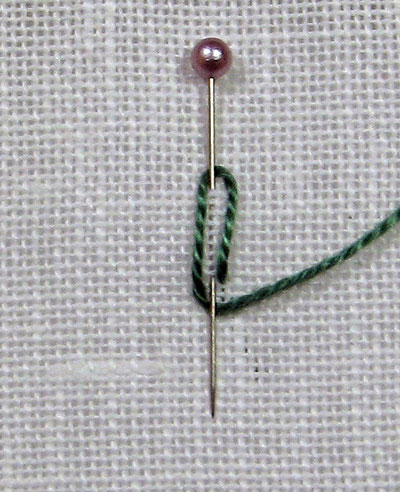
Bring the thread out at the base to the right of the pin. Take the thread up and behind the pin side as illustrated.
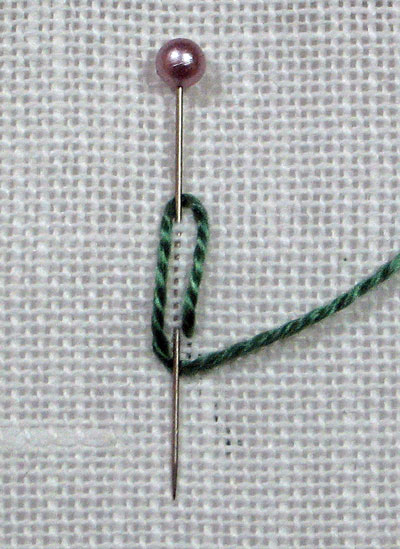
Bring the thread out, a little to the left, at the base of where the pin emerges from the fabric. Take the thread and wrap it behind the pin.
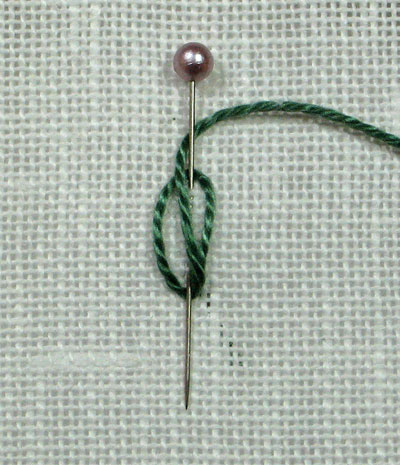
Have the thread cross the pin so that it wraps from the left side under the pin to the right as illustrated.

Begin weaving by sliding the needle from the right to the left, picking up the two outer threads. You do not pick up the middle thread.
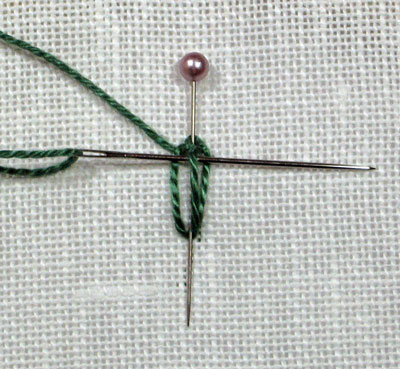
Pull the thread through firmly but not too tight. Turn the needle and continue weaving by sliding the needle from left to right picking the middle thread. The two outer threads are not picked up.
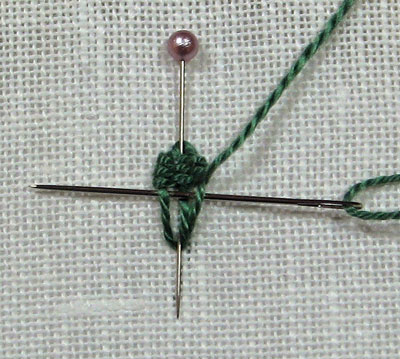
Pull your thread through and continue in this back and forth motion. As you weave use the needle to pack the picot so that it firm.
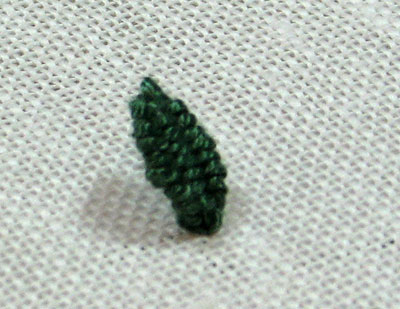
Continue weaving until the picot is packed firmly to the base.
Take the thread to the back and secure with two small back stitches.
Remove the pin and you have a freestanding needle woven closed base picot.
It looks like a leaf!
Have fun and enjoy this stitch!


j'adore
wow tnx
Thank you! I've seen something like these before somewhere and wondered how to do it.
Wow this is just great idea…nice work
Thanks Sharon, I’ve just stitched a lovely little sunflower using the open picot for the petals and the closed for the leaves.
I have posted my Casalguidi and woven stitch to my Flickr. and the Stitch Explorer pool.
The Casalguidi was not hard at all to do and didn’t take as long as I thought it might.
Maureen
http://www.flickr.com/photos/crazyqstitcher/
Terrific! Thanks, Sharon …
Wow, that is so neat. I am going to try that on one of the projects I am working on right now.