
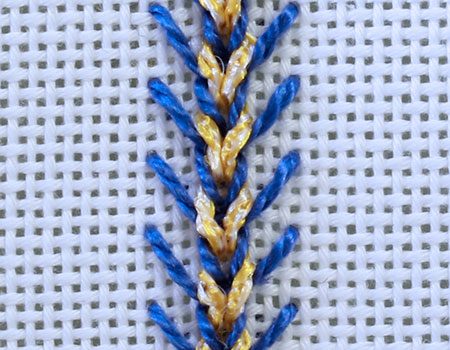
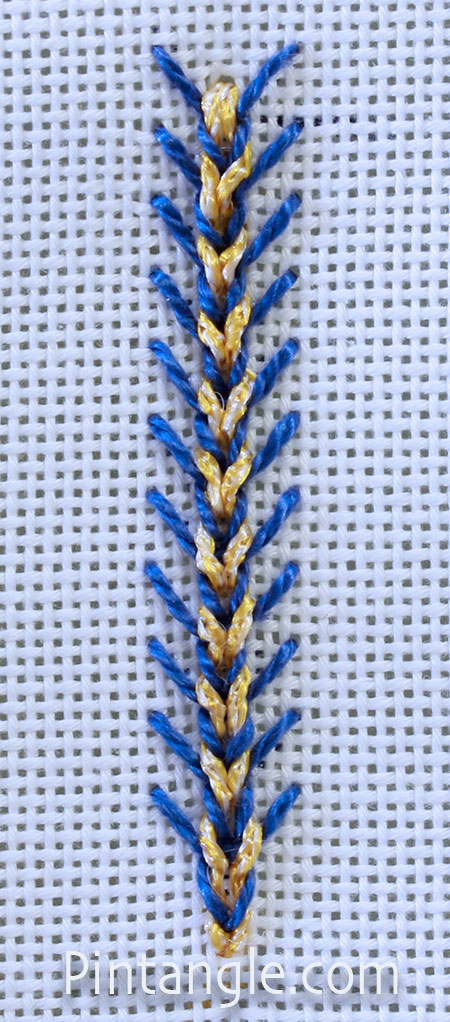
Whipped Wheatear is similar to Double Whipped Chain stitch. In this variety of Wheatear stitch, you can simply whip the wheatear up the central spine as you do in Double Whipped Chain Stitch (check out the tutorial if you are not sure which version I mean)
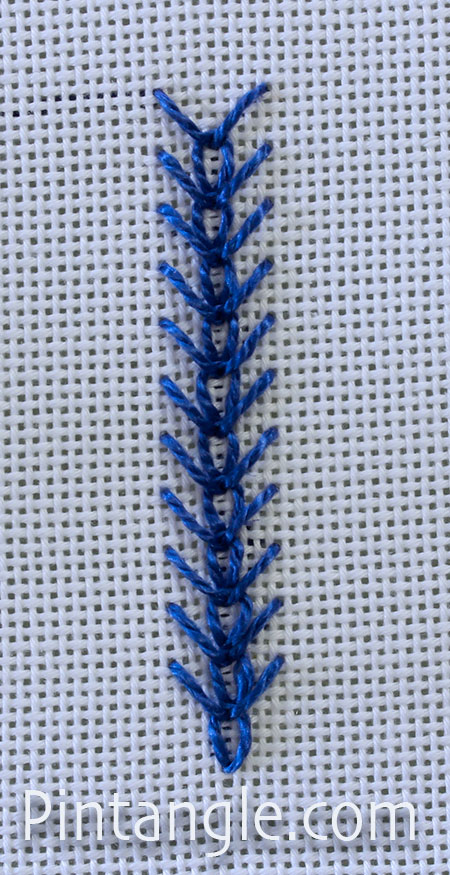
Whipped Wheatear stitch creates a strong spiky line that follows a curve well. The thread you use to whip the foundation line of chain stitches can be a different colour or a contrasting texture. Since you are simply whipping the central chain stitches and not taking your thread to the back of the fabric on the second journey, you can use many interesting novelty threads or tricky metallic threads. Alternatively, if you simply want a full, strong line up the centre of a spiky line, in, for instance, a design that has a plant-like or organic feel to it, you can use a thread of the same colour.
You need to know Wheatear stitch as the foundation line is Wheatear. If you need a refresher, check out my tutorial here.
How to work Whipped Wheatear Stitch
In this variety of Wheatear stitch, you work in two journeys. First, you lay down a line of Wheatear stitch, then you whip both sides of the chain. You do this by working up one side of the line, then working the other. It produces a stitch that looks totally different and is particularly effective if you use a different colour thread.
Work a foundation row of Wheatear stitch.
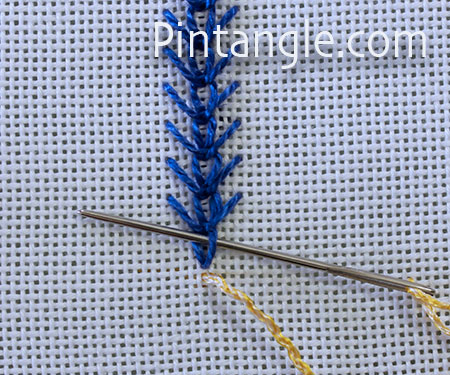
To whip the stitch, use a blunt-ended tapestry needle to avoid splitting the Wheatear stitches on the foundation row. Bring your needle out at the start of the line and pass it under one side of the first chain stitch. With your needle under the side of the wheatear stitch and pointed towards the centre line, pull your needle through. At this stage of the process, take care not to pick up any of the fabric.
Take the needle up to the second Wheatear stitch and repeat. Make sure that with each whip stitch you point the needle towards the middle of the stitch and that you pick up only one side.
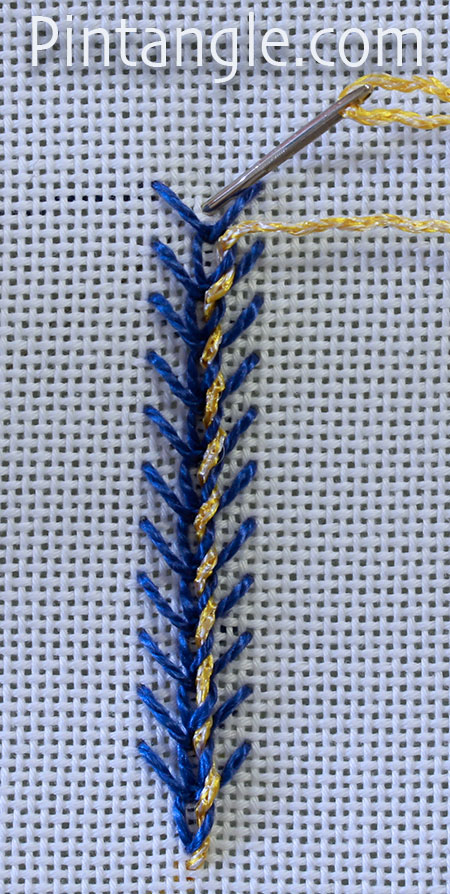
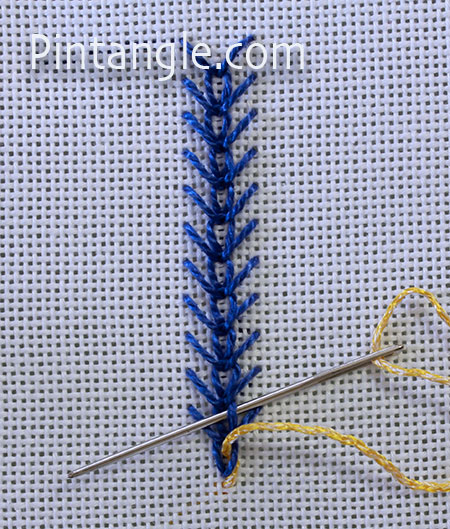
Continue whipping the side of each chain stitch until the end of the line. Now take your thread to the back of the work. Finish the line by tying the thread off at the back of your work.
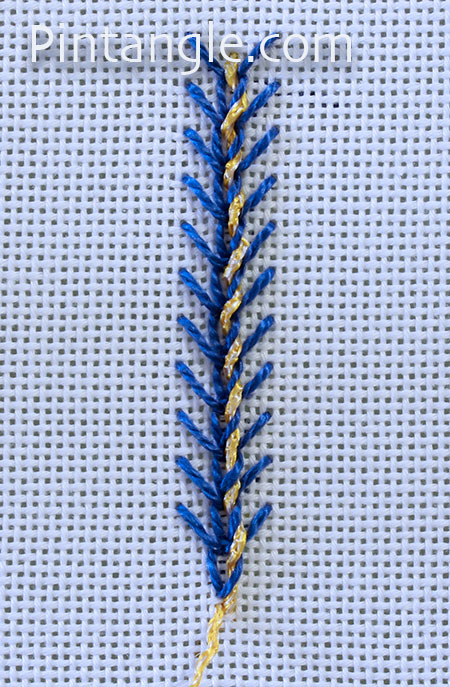
For the next journey, bring your needle out at the start of the line.
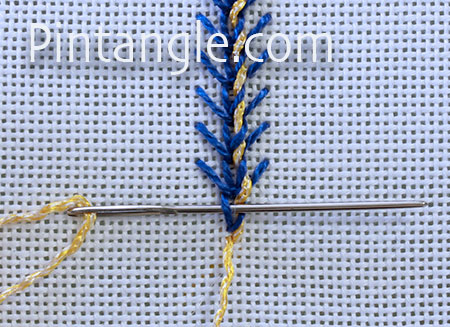
Repeat the same whipping action along the other side of the foundation wheatear stitches. Once again, point your needle to the middle line of the stitch as you pass your needle under each chain stitch. Do not pick up any of the fabric as you work your way along the line.
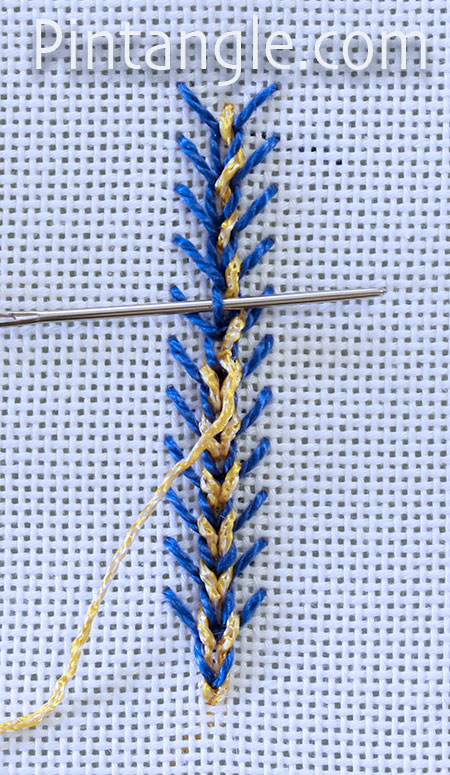
Continue until the line is completely worked.
As you can see, Whipped Wheatear Stitch is fun, quick, and easily worked.
If you explore Whipped Wheatear stitch and use Instagram, hashtag it #pintangle. I would love to see it!
Floral-themed Stitchers templates for hand embroiderers
With this set of stitchers templates, you can create your own floral-themed designs. You can easily combine petal and leaf shapes with the curved edges of the templates to create all sorts of floral and organic motifs. You will be able to create hundreds of different patterns to embroider. It is the ultimate mix-and-match fun for stitchers.

The set comes with an e-book with instructions and is filled with patterns and designs that you can create and use as jumping-off spots for your own designs.
They are available now in the shop here
Enjoy your stitching!

Happy New Year!
That is a nice addition to my collection of stitches. I am eager to try it soon!
Thanks Queenie I thought it was fun too