

Looped Cretan Stitch
 I discovered Looped Cretan stitch in an old embroidery book by Edith John titled Creative Stitches.
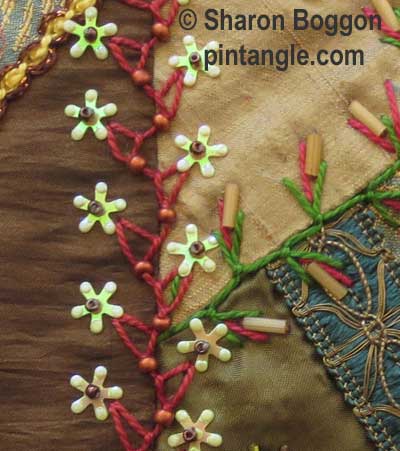
It is called Looped Cretan and the beaded version is my adaption which includes adding a bead. It is really useful to know the foundation stitch which is, of course, Cretan stitch. Both samples are worked using a cotton perle #5 thread. With the beaded version, the beading is not done afterwards but during the stitching process.
Tip! Use a size 26 tapestry needle. Since the eye of a tapestry needle is long you can thread perle #8 and perle #5 through the long eye. However, the needle itself is thin which means you can add a bead to your working thread as you stitch. This choice of needle is key to success with this type of beaded embroidery.
How to work Looped Cretan Stitch
Work from top to bottom between 2 imaginary lines.
 Bring the needle through the fabric at the start of the line on the top left side. Move across the line and insert your needle on the right edge. With your needle angled and pointing towards the centre of the line, make a small stitch.
 Keeping the thread under the needle as illustrated, pull it through your fabric. It should look like a shallow unsecured fly stitch.
 Insert your needle on the right edge in the same place, as illustrated. Angle your needle downward as illustrated, and make a small stitch.
 Keeping the thread under the needle as illustrated pull it through your fabric to create a loop. This loop is like adding one buttonhole stitch. It is also this extra loop on the Cretan stitch that gives this stitch its name.
 Move across the line and insert your needle on the left edge. With your needle angled as illustrated and pointing towards the centre of the line, make a small stitch. (As you would for regular Cretan stitch)
 Keeping the thread under the needle as illustrated pull it through your fabric.
 Insert your needle on the left edge in the same place, as illustrated. Angle your needle downward and pointing towards the centre of the line make a small stitch. Keeping the thread under the needle as illustrated pull it through your fabric to create a loop.

 Move across to the right and repeat this process. Continue working downward, back and forth until the line is worked.
Uses for Looped Cretan Stitch
As you can see this is a decorative and interesting stitch and would be useful working in trailing lines as part of a floral motif.
Like Cretan, you can work Looped Cretan stitch close together to form a very different pattern in the movement of the stitch. You can vary the length of the wings or the angle of the wings to create interesting effects. Why not try increasing the width of the wing, then return to the established line to created an alternating pattern of wider wings?
You can work this Looped Cretan stitch in a circle to create other organic-like forms.
It is very versatile and I hope readers enjoy experimenting with it.
How to work Beaded Looped Cretan Stitch
You work this stitch using the same method as Looped Cretan stitch but add a bead to your working thread. I have added a bead after each loop is created but you can add beads at any of the steps and each creates a different pattern.
Use a size 26 tapestry needle as this type of needle is thin enough to take the bead yet the eye is large enough to take perle #8 or perle #5 thread.

Getting started
Work from top to bottom between 2 imaginary lines.
Bring the needle through the fabric at the start of the line on the top left side. Move across the line and insert your needle on the right edge. With your needle angled and pointing towards the centre of the line make a small stitch. Keeping the thread under the needle as illustrated pull it through your fabric.

Insert your needle on the right edge in the same place, as you did at the first step, as illustrated. Angle your needle downward as illustrated and make a small stitch. Keeping the thread under the needle as illustrated pull it through your fabric to create a loop.
 Add a bead to your work thread and tuck it up against the last stitch.
 Move across the line and insert your needle on the left edge. With your needle angled as illustrated and pointing towards the centre of the line make a small stitch. Keeping the thread under the needle pull it through your fabric.
 Insert your needle on the left edge in the same place, as illustrated. Angle your needle downward and pointing towards the center of the line make a small stitch.
 Keeping the thread under the needle as illustrated pull it through your fabric to create a loop.
 Add a bead to your work thread and tuck it up against the last stitch.
 Move across to the right and repeat this process. Continue working downward, back and forth until you have worked the line.
Have you seen my book?

My book The Visual Guide to Crazy Quilting Design: Simple Stitches, Stunning Results shares detailed practical methods about how to design and make a crazy quilt. I cover everything from fabric choice, to balancing colour, texture and pattern. This way you can balance and direct the eye around the block. I cover how to stitch, build decorative seam treatments in interesting and creative ways. My book is profusely illustrated as my aim was to be practical and inspiring.
My Crazy quilters templates
Don’t forget your Stitcher’s Templates!
As someone who loves crazy quilting and embroidery, I designed these templates with other stitchers in mind. With my templates, you can create hundreds of different patterns to apply to your stitching and crazy quilting projects. They are easy to use, totally clear so you can position them easily. They are compact in your sewing box. And we laser cut them ourselves in our own studio workshop to ensure the highest quality.
For more information, see what they look like, find out about the free ebook of patterns visit the information pages in the shop where you can also purchase them.


Thanks for the opportunity to learn this new stitch. My trials are here.
http://hobbysewing.blogspot.com/2020/09/tast-12-beyond-tast-12.html
It’s beautiful! I always hate Cretan Stitch, but you turned it into something nice. =)
Here are mine — again the beads obscure some of the detail but I don’t have any needles that will take both perle cotton and smaller seed beads
http://210920746822434353.weebly.com/1/post/2014/04/wipocalypse-april-2014-the-blood-moon-and-an-eclipse-to-boot.html
Carol get a tapestry size 26 needle and it wall take perle thread and a bead
My attempt at both stitches are here:
http://queeniepatch.blogspot.jp/2014/04/tast-106-looped-cretan-stitch-and-its.html
Hi Sharon,
Beaded looped Cretan stitch sampler is posted on my blog-
http://jizee6687.wordpress.com/category/tast-2014/13-107-beaded-looped-cretan-stitch/
Thank you,
Chitra
Here are my stitches 104 & 105
http://hokkaidokudasai.blogspot.jp/2014/04/take-stitch-tuesday-104-and-105.html
Thanks!
Hi Sharon,
A very interesting stitch. I have started this stitch sampler here-
http://jizee6687.wordpress.com/category/tast-2014/12-106-looped-cretan-stitch/
Thank you,
Chitra
Your examples are an inspiration! Thanks for sharing!
Thanks for the instructions Sharon. It took some persistence but I did get it right, at least I think I did! You can see my attempts at http://princessbubblescreates.blogspot.ca/
Love this stitch, I have an unfinished project-a bag- where this stitch will be perfect. Thanks.
Sharon, your work is always so gorgeous! I look forward to trying these stitches.
Here is a link to my attempts of stitches #97, #103, & #104:
http://monkeyandmutt.blogspot.com/2014/04/take-stitch-tuesday-tast-412014.html
My samples are at http://crazyqstitcher.wordpress.com/
I will be using this stitch more.