
Have you ever wondered how to add, subtract or switch out pages in a wire bound sketchbook? This is how you can do it.
I recently split a wire bound sketchbook. Why might you want to split a wire bound journal? You might want to insert pages that are of different papers so that you can use different media. Or you may want to play with format and have fold out pages. You may wish to treat the wire bound sketchbook as a loose leaf system until the studio/visual journal is complete. Ever since I found that paper in 4 ring binders still manage to slip, slide and get damaged I have used this system in a wire bound sketchbook to rearrange pages in studio/visual journals. Pages move a little but not half as much as they do in folders. In my next project I want to include different papers and have fold out pages.

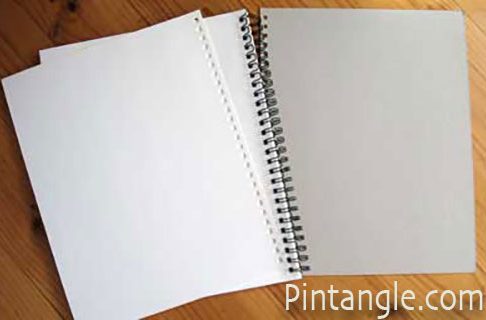
I am not sure if people are aware of this but with many brands of wire bound sketchbooks you can open the wires up and remove the pages and insert others. You simply turn to the back of the journal and carefully prise the wires open slide the paper off the wires. In the photo above you can see the wires stretched open. You need to be careful and lift out only a few sheets at a time but it can be done. What is more to the point what can be removed can also be substituted.

Using a page from the sketchbook I marked where holes needed to be on 3 mm MDF (Medium Density Fiberboard). This formed a template for a stack of paper. Next I took it out to Jerry who clamped the stack paper between two sheets of 3 mm MDF the top sheet being the template. Behind the block Jerry used a scrap of wood which in this case was a piece of old flooring. Doing this means you get a clean hole through the paper.
Jerry carefully lined up the drill bit with each hole marked on the template and using a drill press created the holes in the block of paper.
Please note In this photograph the drill is not running. The guard was removed in order to take the photograph so people could see what was going on. Once photographed it was promptly put back.

A you can see the block of paper now has holes in it. You can add the pages back into the sketchbook. These are ready to paint, manipulate, fold or cut any way I choose. The choice of pages can include different papers that are large enough to fold out pages in my next project.
I have used this technique to drill holes in glassine, rice paper, transparency film, heavy cartridge, grid paper, tracing paper, drafting film, brown paper, envelopes, and paper bags. As long as they are held firm in the block it works. If the paper is very thin or very textured such as some of the hand made papers on the market make sure it sits between two pieces of heavy cartridge. Also I usually drill a hefty block of paper as a good sized block of paper means you get neat holes.
In this studio journal I want to have a little fun. I want to be able to include interesting papers, painted papers, stitched pages with fold out sections, concertina pages, pockets to discover things in, windows in pages you can open an look through, inserts of interesting stitch related stuff, tabs to pull, surprise and delight, tags of stitching samples to remove and look at. Apart from housing stitch samples I hope its construction will reflect the sense of discovery stitching can involve.
Note A quick update:
Since writing this article I have purchased a Cinch machine ( I am not affiliated). It will punch multiple holes in stacks of papers and you can make your own sketchbooks. You may not have a Cinch machine so these instructions are useful.
Thread Twisties!
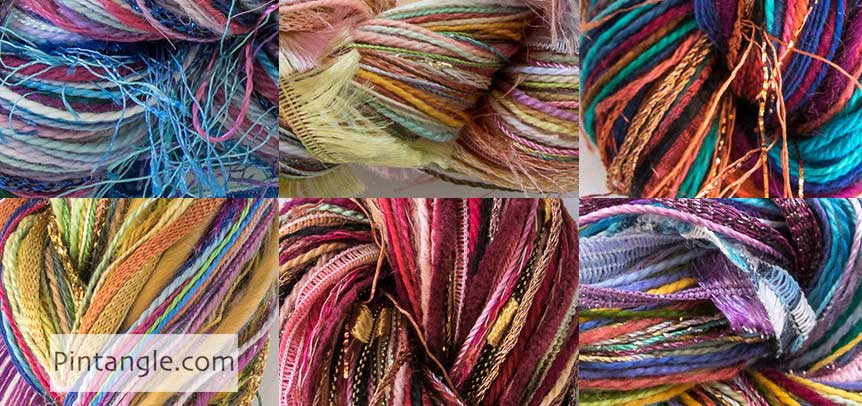
Experimenting with different threads can be expensive. You would normally have to buy a whole skein of each type of thread. My thread twisties are a combination of different threads to use in creative hand embroidery. These enable you to try out stitching with something other than stranded cotton. For the price of just a few skeins, you can experiment with a bundle of threads of luscious colours and many different textures.
These are creative embroiderers’ threads. With them, I hope to encourage you to experiment. Each Twistie is a thread bundle containing silk, cotton, rayon, and wool. Threads range from extra fine (the same thickness as 1 strand of embroidery floss) to chunky couchable textured yarns. All threads have a soft and manageable drape. Twisting them around a needle makes experimental hand embroidery an interesting journey rather than a battle. Many are hand-dyed by me. All are threads I use. You may find a similar thread twist, but no two are identical.
You will find my thread twisties in the Pintangle shop here.

Debbie you can do either it up to you – there are no rules
I
OK, I hate to show my stupidity, but is this journal just for notes, sketches, drawn stitches, etc.? Or are you going to actually do stitches with threads in it? I'm wanting to do a notebook/journal with the actual stitches saved in it but they would be on fabric. Am I confused?
There is a bookbinding method of adding pages called 'stubbing in' that you may want to try if the journal is glued or sewn at the spine or if there are only a few pages to be added. Measure the page vertically and horizontally. We’ll assume the spine/holes to be on the left side. If there are holes, measure from the holes to the edge. Deduct 1/2 inch from the horizontal measurement. Cut a one inch strip of paper the length of your vertical measurement. Draw a line down the center back of the strip and add glue or double stick tape. Place the vertical edge of the new page on the center line and press to adhere. Place the edge of the strip along the spine (or holes) and press to adhere. Place wax paper to either side of the glue area until thoroughly dry.
Thanks, Sharon, for the inspiration, the instruction, and the best eye candy!
Thank you for letting me know about the tutorials. What a great idea!
A similar tutorial on customising wire bound books for journalling can be found at http://aliedwards.typepad.com/_a_/2006/11/new_favorite_ph.html
Really useful information – thanks!
The visual journal is a great idea! I’ll have to use different techniques for building mine, because I’m not set up here to do drilling and such, but it will be fun to play along!
Sharon,
I would love to learn more stitches and take part of the 2007 Tuesday challenge. I am undergoing some significant lifestyle changes, which include a 22 yr son who can no longer drive…so this will be good for me. I do not have flickr or a blog, can I still participate?
thanks, Holly
Thanks for the info. I’m really looking forward to seeing your journaling tips. I hope you will share the journal pages you do too. Sounds like you have some great ideas for the journal and the stitching.
Julita – thanks for the link – yes there are lots of ideas to be used from the scrap book community and the altered book community too
I think it’s interesting to have a look also at scrapbooking. The purpose is different but techniques can be useful. Here you have some nice pictures:
http://www.flickr.com/photos/eight/tags/scrapbooking/
Thank you once again Sharon! This is exactly what I’ve been wanting to do, but wasn’t sure how to start. I don’t know if you have me down for the Take a Stitch series, but I’m looking forward to it.
I even thought that if time got away from me to actually do the stitches, I could use the journal format to just draw them out. Love, love, love your idea!
This is gold! I ordered the book about visual journals for textile people…this post is an additional inspiration and “how-to” to get me past my “journal’s block”…thanks, Sharon!
Thanks for this tip Sharon. I knew you could do something like this but have never explored doing it. This will make it so much easier. Really looking forward to Take a Stitch Tuesdays too.