
Raised Close Herringbone
The Raised Close Herringbone stitch is usually worked in the shape of leaves and incorporated in floral sprays. It is a self-padding stitch that adds texture and interest to a spray. I recommend using a blunt tapestry needle when working Raised Close Herringbone Stitch. This avoids splitting the stitches.
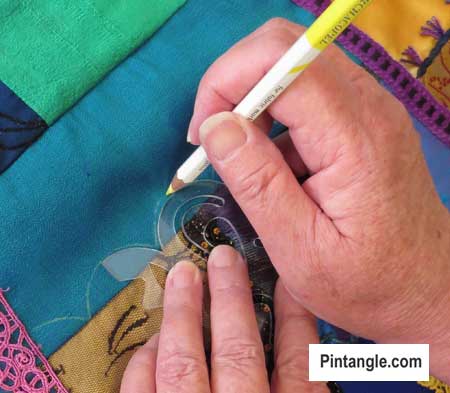
Before you start, mark a leaf shape on your fabric. And use a pen that you can easily erase, such as a quilter’s pen. The stitch will cover the outline.
How to Work Raised Close Herringbone Stitch
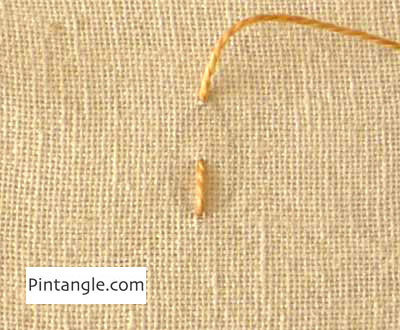
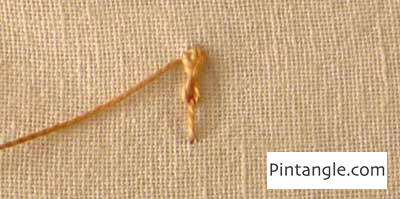
Make a straight stitch from the base of the leaf to the middle, on the centre line, bringing the needle out slightly to the left of the tip of the leaf.
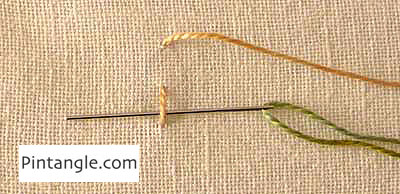
Slide the needle under the straight stitch, as illustrated.
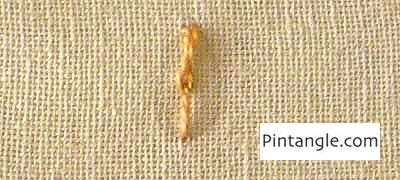
Insert the needle back into the fabric at the tip of the leaf, to the right of where the thread emerged, so that when you pull the needle through the fabric, you cross the working thread.
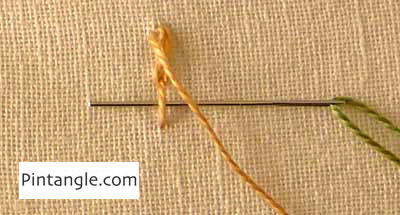
Bring your needle out on the left of the leaf tip and a little down the side of the leaf, and pass the needle under the straight bar stitch.
Take the needle back into the fabric a little down the side of the leaf on the right side of the leaf, as illustrated, so that when you pull the needle through, you have crossed the working thread.
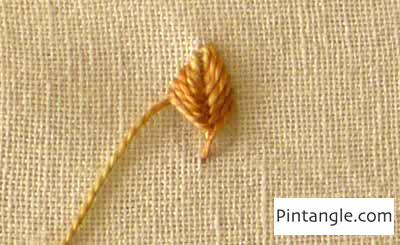
Continue in this manner, working down the leaf. Widen your stitches as you work to follow the shape. As you come towards the base of the leaf, make your stitches slightly narrower to follow the leaf shape.
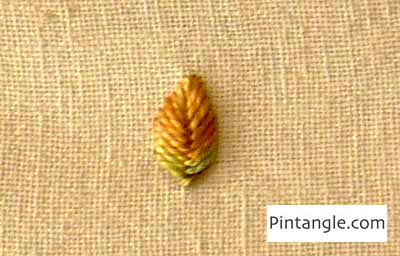
In my sample of Raised Close Herringbone Stitch, I used a hand-dyed variegated thread with an autumn tone!
Have you seen my Stitchers Templates?
Create your own designs with Sharon’s easy-to-use stitchers templates. Combine shapes to create hundreds of patterns and designs to embroider. It is the ultimate mix-and-match fun for stitchers of all skill levels. I created them to be as versatile as possible. I include four multi-patterned templates in each set. You will find them easy to use, totally clear to help you position them on your work, and they are nice and compact to fit in your sewing box. Each set comes with an e-book filled with patterns and designs that you can create and use as a jumping-off spot for your own designs. They are available now in our shop here!
Happy stitching!

Hello, I was searching this stitch Raised Close Herringbone Stitch” but I don’t know how is called in Italian. I wonder if there’s a chart where I can see the name in English and the name in Italian? Anyway, I also wonder if these stitches, like “Raised Close Herringbone Stitch” or “Spider web S” are modern stitches? As I have an ancient little manual of stitches in Italian, but there’s only classical stitches, I can’t find these ones..
I wonder if there’s a book with all these photos, so well illustrated step by step by photos like in this page, and if there’s a complete magazine at colors like this? Please let me know, thank you! I’m a beginner so I’m very confused about how make stitches and embroidery!
Thanks!
Sorry Vale I do not know what these stitches are in Italian
My book Creative Stitches for Contemporary Embroidery is like the book want
Hello again, I’ve found there’s a stitch in Italy called ‘Punto Felce’ that looks very similar (or maybe it’s the same),anyway thank you I was able to make it. 🙂
Here is my sampler after adding this stitch.
http://hobbysewing.blogspot.com/2021/04/tast-6-beyond-tast-6-2021-herringbone.html
Hi Sharon. Love the look of this stitch. Can’t wait to try it. Thanks!
Thanks for introducing this stitch to me. Such a lovely stitch. My samples with this stitch are here.
http://hobbysewing.blogspot.com/2020/09/tast-6-beyond-tast-6.html
My sample is here http://thendralscraft.blogspot.com/2010/10/tast-2010-raised-closed-herringbone.html
I love this stitch and all its possibilities.
Blogged: http://mindblogglings.blogspot.com/2010_10_01_archive.html#4032544168373925554
I have posted my samples on my blog & flickr
http://linsartyblobs.blogspot.com/2010/10/tast-31.html
Here are my leaves: http://textileexplorations.blogspot.com/2010/10/tast2-raised-close-herringbone-stitch.html
I've added two versions of this lovely stitch in the Pool andt
http://www.flickr.com/photos/crazyqstitcher/
http://crazyqstitcher.wordpress.com/
I wanted to make a few more borders, but I couldn’t resist this stitch. My sampler is here:
http://www.flickr.com/photos/28957501@N04/5036943824/
And I wrote about some of the details on my blog:
http://fat-quarter.blogspot.com/2010/09/raised-close-herringbone-stitch.html
I'm posting the new stitch on my blog. What a cool one! Thanks.
Wendy use anything to hand – I usually use linen but most of the surface stitches can be worked on anything from denim to silk
This is wonderrful! I already have a needlepoint background stitched and waiting for surface embellishment – I'll get right on it. Thanks! Leaves – my favorite thing.
I'd like to join in at this very late stage (I'm happy to work at my own pace!), but I'm not sure what material to use to start with. Any suggestions?
Very interesting stitch, thanks a lot