Picot Chain Stitch is an interesting variety of chain stitch that can be used as a linear stitch. Picot simply means knot or loop. This version has a picot on each chain stitch creating a slight ridge down the side of the line. In order to work this stitch it is best to know how to work basic chain stitch as this is a development of that basic stitch. Since Picot chain is part of the chain stitch family, like most chain stitches, Picot Chain stitch follows a curve well. It also makes an interesting edge to small projects or can be used to created a slightly textured line.
Picot chain stitch is best worked in a thread with firm twist such as cotton perle #8 or #5. The trick is to use a hoop to achieve an even tension and nice line of picots.
The demonstration sample is worked in cotton perle #5.
 Work the stitch down the line. Start by creating a basic chain stitch.
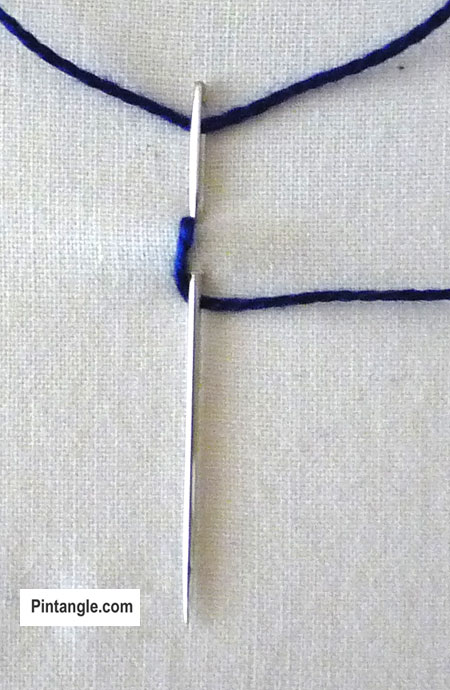
 To created the picot, pass the needle under the right side of the stitch.
Note you are not taking the needle through the fabric just threading it under the loop.
Pull the thread through. When you re-insert the needle for the next chain stitch put the needle inside the chain and at the same time make sure that you are inserting the needle into the middle of the partly formed picot loop.

Make another chain stitch.
 Repeat the picot continuing down the line. As you can see and extra ridge is formed down one side.
 I discovered this stitch in Edith Johns book Creative Stitches. I hope you enjoy Picot chain stitch!


My sample is on my Flickr photo stream.
http://www.flickr.com/photos/stitchinwoman/
I've done the stitch and posted the sample on my blog
http://linsartyblobs.blogspot.com/2010/11/tast-38.html
Here is my result: http://textileexplorations.blogspot.com/2010/11/tast2-picot-chain-stitch.html
I do found interesting with this stich and gave a trial. I posted my trial in my blog (http://viji-crafts.blogspot.com/2010/11/picot-chain-stitch.html) and flicker site.
Thanks for the tutorial. viji
The stitch is on my blog. http://focus-on-fiber.blogspot.com
Hi Sharon
I have finished week 37 and this weeks stitch as well and now it will be put away for 2 weeks while I sail off into the sunset.
See you when I return.
Doreen
http://doreeng.blogspot.com/