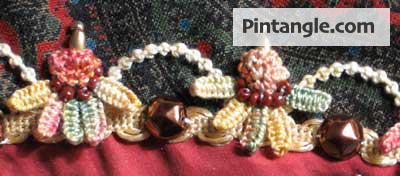
 Detached buttonhole is a detached filling stitch which produces a solid area in a 3D embroidered shape. You can also work this stitch over forms. The sample above is Detached buttonhole worked over a bead. This stitch is used in needlelace and Stumpwork. It is great to create 3D forms in thread.
This stitch is formed in the same way as buttonhole stitch but it is worked into itself rather than into the foundation fabric hence the name. With this stitch you are actually constructing a layer of fabric over the foundation fabric adding texture or high relief to a piece.
Stretch the fabric in an embroidery hoop as it is important to work this stitch at an even tension.
How to work Detached Buttonhole Stitch
To work the stitch you first lay a line of foundation stitches down. You can use any linear stitch that you can attach buttonhole stitches to. For instance back stitch and chain stitch are both suitable as foundation stitches. When choosing your foundation stitch think about how that stitch would follow the shape you want to create. For instance in the sample above my foundation stitches had to sit around a bead, so I used small chain stitches.
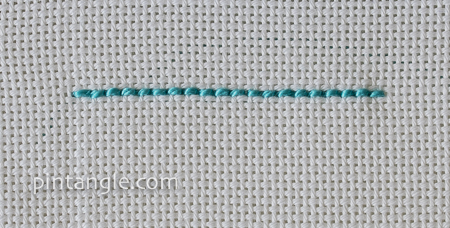 Work a line of back stitch and chain stitch.
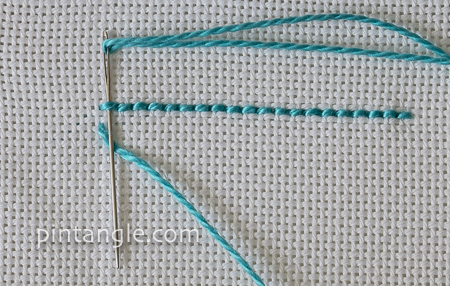 Working from left to right work a row of buttonhole stitches over these threads without entering the foundation fabric.
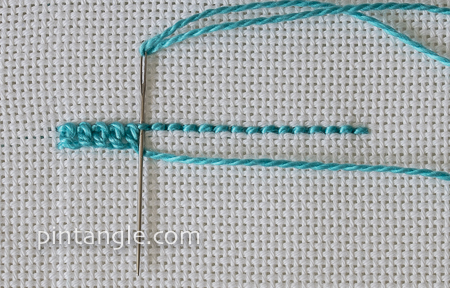
In order to not pierce the foundation threads and fabric use a blunt ended needle such as a Tapestry needle of suitable size.
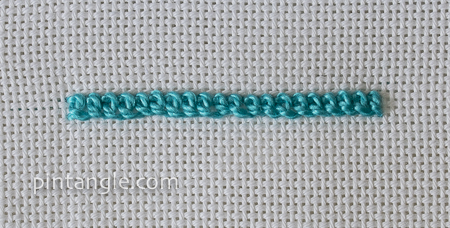 These stitches should be worked closely together and for the best results use a firm thread.
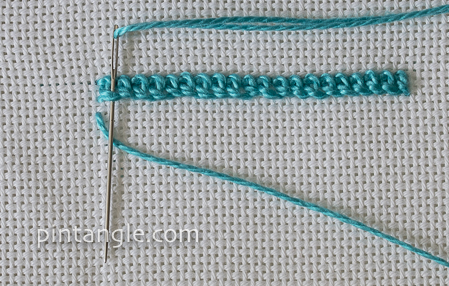 Work a second row into the loops of the previous row, once again without entering the foundation fabric. If you want your pice to be totally 3D simply turn your work and continue to work row upon row.
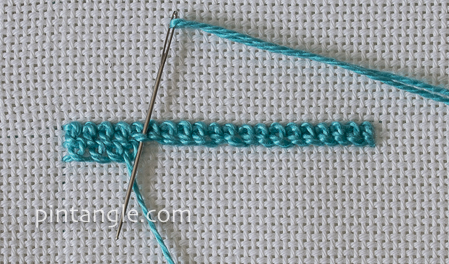 Continue in this manner working from side to side until you have filled the shape required.
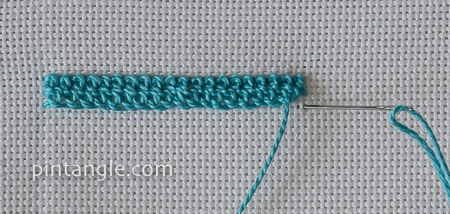 To create shapes in this stitch you increase by working two stitches into one loop or decrease by not working a stitch into the loop at the end of each row.
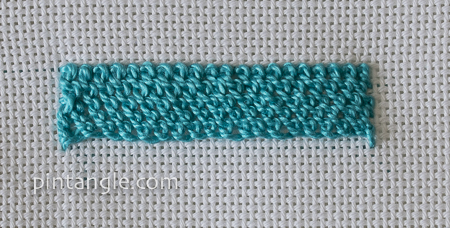 To produce a neat edge the final row should be worked in a slightly tighter tension. When complete use small straight stitches to secure the edge to the foundation fabric.
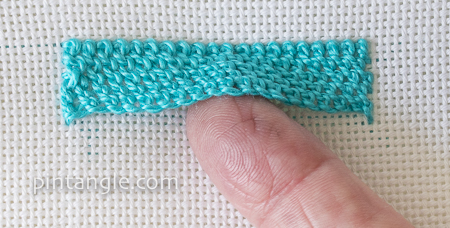 This sample is attached at the edges to create a pocket. You can however work Detached buttonhole in a freeform manner by just building row upon row without taking the thread to the back at the edge of the shape. For instance Buttonhole Wheel Cup is the same stitch worked in a circle to create a cup with a few rows and tube if you work more rows.
You can raise this stitch by working it over padding such as felt. Cut the padding to shape but slightly smaller than the area you wish cover. Stitch the padding into position before working detached buttonhole over the shape until it is covered.
I hope you enjoy Detached Buttonhole!
Stitchers Templates
As someone who loves embroidery, I designed these templates with other stitchers in mind. With my templates, you can create hundreds of different patterns to apply to your stitching and crazy quilting projects. They are easy to use, totally clear so you can position them easily and they are compact in your sewing box.
To see what they look like, find out about the free ebook of patterns that come with them visit the information pages.
Or go directly to the Pintangle shop to purchase them.


I’m sorry, but I’m not quite following what to do at the end of the first line of buttonholes…do you go back to the left and begin the next row, or turn it somehow, or …? Thank you.
Kay Yes you are correct – take the thread to the back and bring it out at the start of the next row. Hope that makes sense
In your opening photo you have used this stitch in what looks like petals. How do you create that? Is it done on a slim piece of felt or do you make a row of chain stitches like crocheting?
Love following TAST and creating a book – up to date so far – but I struggle coming up with ideas for uses for the different stitches.
Cheers Lene
HI Lene the ‘petals’ are a different stitch. They are made using double drizzle ( it is in my book page 122 of Creative stitches for contemporary embroidery). The detached buttonhole are the little caps above the double drizzle. Hope that makes sense
Thank you Sharon, I found it
It’s also spell in french “point de dentelle à l’aiguille”. Thanks for this fabulous stitches.
Thanks Michelle it is always good to know what it is called in another language
It is such a beautiful stitch, simple but very attractive, and to the uninitiated, looks very complex.
Thanks Queenie – I will be exploring detached buttonhole more as it is the foundation for needlelace stitches and its my new curiosity to follow
You can work a couple of rows of Detached Buttonhole and then anchor them on the fabric again, stretched out or not. That way you can build hills and bumps on the fabric.
I highly recommend your CQ stitchers templates. Love them.
Thanks Marianne I appreciate you letting people know this
I love this sample!
Hi Annalise – I am using it on 2020 block right now – its a fun technique