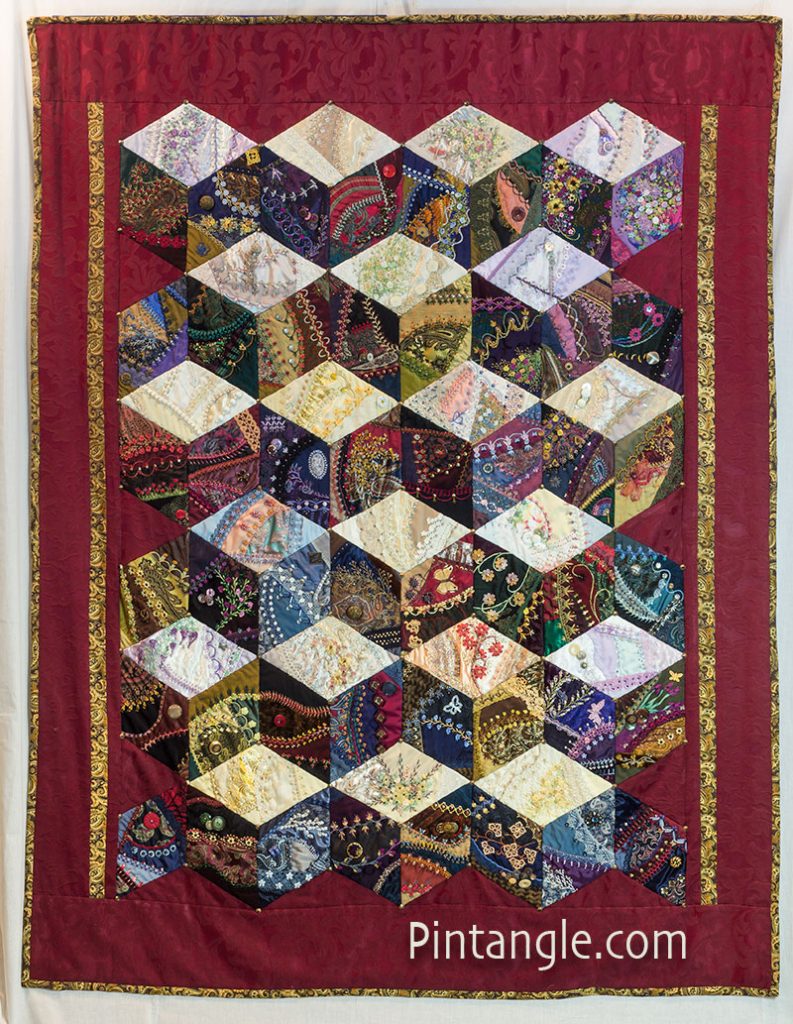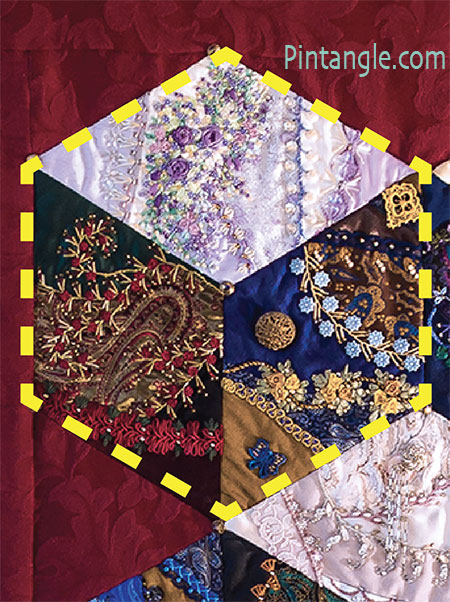
For those who have always loved my ‘Diamonds are forever’ crazy quilt, this year I am proposing a free block of the month stitch-along. A ‘block’ in this case will be 3 diamonds set in the tumbling blocks pattern.

In the photo above you can see I have drawn a dashed yellow line around what I am calling a ‘block’. Each month I will publish the pattern for 3 of the diamonds that make up one of the baby blocks on the quilt. You can paper piece the block or just roughly follow the pattern and use the sew-and-flip method. Remeber there are no rules in Crazy Quilting!
When embellishing, you can follow what I have done, adapt my ideas or totally embellish the blocks as you see fit. Where I can, I point to stitch tutorials here on the site. In some cases, information about a technique will be in my books. In some cases, you may not be able to follow exactly what I have done as others may have the same ribbons, lace, beads, etc. as I have. Crazy quilting is not like other quilting in that sense. Crazy quilting celebrates invention and creativity so crazy quilters constantly adapt or take an idea and turn it into something else. That is part of the joy of crazy quilting. My aim is to spark ideas, feed your creative self and get people stitching. It will be an adaptable stitch-along where we celebrate inventiveness. There are curved seams on some of the blocks, but I think most of you will handle it OK. If your skill level is not up to a curved seam, feel free to straighten the seam out! I am really looking forward to seeing what you do with this and how far you take it.
Block Size
The blocks on this quilt measure 6 inches on the side and 10 inches across from point to point. You could scale this up or down. I have always been tempted towards a diamond with 5-inch sides, for instance. Obviously, if you reduce the block size, you need to increase the number of blocks for the same size quilt. Or you could just make a smaller quilt. The diamond area (without borders) of my quilt measures 1-metre (about 40 inches) across and 1.5 metres (about 60 inches) down.
I have a pdf file pattern of the diamond size I used to download here. Please note: there is no seam allowance. I had trouble fitting it on one sheet of paper.
My tip is to add a very generous seam allowance. Sometimes when embroidering a block it will shrink a bit. For this reason, I always re-trim my blocks before joining them together. So give yourself a large seam allowance, then if you have to trim quite a bit, it’s OK!
Gather your supplies
This quilt works on the principle that you stitch a light-tone, medium-tone, and dark-toned diamond, which you then stitch together into a hexagon. You need to work each diamond in a similar tone. So gather together your fabrics and sort them into 3 groups: a dark, medium, and light group. Have a mix of plain and patterned fabrics. I usually use patterned fabrics or textured fabrics against a plain fabric. This way, when I embroider the seam, the bulk of the embroidery sits on the plain fabric, to show up the embroidery. On some patterned fabrics, the embroidery gets hidden, so I try and avoid that. It’s a lot of work for little return if you know what I mean.

Then do the same with lace, ribbons, buttons, beads etc. In other words, have a big pile of lace, ribbons, and buttons that will sit on light fabrics, a pile for the mid-tones, and so forth. When you do this, you will see where your embellishments need topping up. You may want to get out the dye pot, visit your local needlework store, or browse Etsy for stuff to use for embellishments. Once your supplies are in tonal groups, put each pile in a separate baggie. That way, each month you can draw on supplies from the light bag for one diamond, supplies from a mid-tone bag for the next diamond, and finally, supplies from the dark bag for a dark diamond.
A little about threads.
I strongly recommend that you have on hand some cotton perle thread #8 and #5. If you have only ever used stranded cotton floss lash out and buy yourself some different threads. They truely make all the difference. Stitches worked in cotton perle have their own character as they stand a little proud of the fabric. Stranded cotton floss is very good for cross stitch and the like but many of the surface embroidery stitches work up better in Perle or other threads with a firm twist.
Other Resources
There are two large crazy quilting groups on facebook. Between Crazy Quilt Divas and Crazy Quilt International, there are many well-known and highly experienced crazy quilters who are only too willing to help, answer questions, offer tips and advice, and generally cheer on anyone who is crazy quilting. I am chattering on both forums constantly and if for some reason I miss your question, others in the community will answer it for sure!
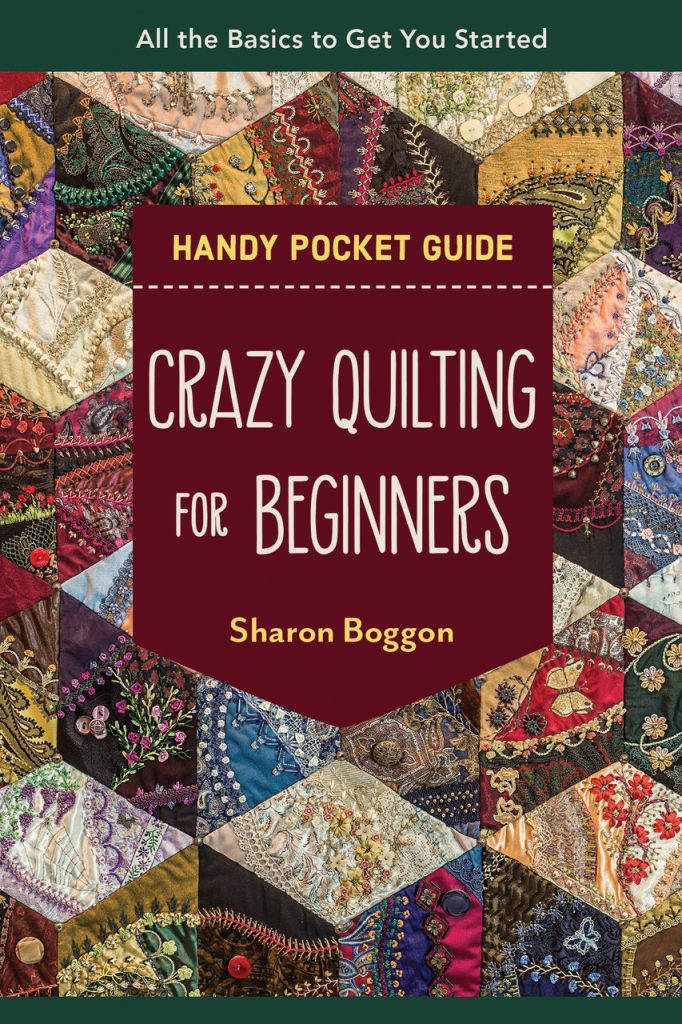
The quilt is on the front of my books The Visual Guide to Crazy Quilting Design and my new book Crazy Quilting for Beginners Handy Pocket Guide . You do not need my book to join in on this stitch along but I strongly recommend that you have at least the pocket guide if not the full Visual Guide to Crazy Quilting Design.
When will it start?
I will release a pattern of a ‘block’ of three diamonds in the middle of the month each month. Save the date as I will publish the first on 12 January next year.
No need to sign up for the challenge. If you want to be notified when I publish the block patterns, you can subscribe to Pintangle. If you are on a desktop machine the subscription field is in the sidebar. Alternatively, if you are on a tablet or phone – scroll to the bottom to find the “Subscribe to Pintangle” field.
Any questions? Ask in the comments below and I will reply.

Have you seen my handy Pocket Guide?
My book Crazy Quilting for Beginners Handy Pocket Guide is out now. This pocket guide is a beginner’s guide that covers all the basics — but just the basics! If you want to start crazy quilting this resource will get you started.
Follow Pintangle and have it delivered to your inbox
You can have Pintangle including TAST delivered to your inbox — In the side bar use the Subscribe to Pintangle box or If you are on a mobile scroll to the bottom the of the page to find the Subscribe to Pintangle option. In either case type in your email address and click on the Subscribe button below. Then check your email inbox for a confirmation email and click the link to confirm your subscription. If you don’t see a confirmation email, check your spam folder — sometimes the computer puts it there.


Sharon it says I already subscribe and nothing in junk box,
Just letting you know so sorry for the trouble, I saved the link you posted when the question came through and Ill tefer to that;)
Marilou I will check into to it.
thank you
Hi Sharon,
I’m sorry to bug you — I could have sworn I saw the first hexagon, with detailed information about what stitches and what kinds of thread you used, etc, but now I can’t find it anywhere. Is it still up? Thank you!
Hi Karen do you mean this post? https://pintangle.com/2023/01/12/diamonds-are-forever-crazy-quilt-stitch-along/
I never received a email and Im on the mailing list, I looked for it last Thursday the 12th and nothing showed up so thank Karen for the above question. I also appreciate the link:) Thank you Sharon, hopefully future post will come through.
Lovely tutorial for sure:)
Marilou – check your spam folder for the email and if it’s not there subscribe again. Make sure you confirm when the confirmation email comes through – if it does not arrive check your spam folder. Hope this helps if not email me via the contact page
Thank you!! I bookmarked it this time 🙂
How Fun !! I joined in time !!!
This sounds like fun and a great way to use a variety of colors and textures.
Is there a fee for this event?
Lynda it is free but highly recommend you buy my book
Hi again Sharon! Yet another question, sorry.. I was wondering what color and weight of sewing thread you would recommend to assemble my 3 triangles into a block, and my blocks to join each other by machine? My diamonds are light yellow, mid purple and dark purple patches in mostly solids with a few pansy prints thrown in. Also do you recommend any particular sewing thread for me to machine piece my crazy patches on each muslin diamond? I usually totally hand piece and just use whatever matching sewing thread I have to hand. I am rereading your amazing Visual Guide to Crazy Quilting design book, but haven’t gotten up to this topic yet. I also bought your Handy Pocket Guide to Basic Crazy Quilting Design for myself, and like it so much I ordered one as a Christmas gift for a friend who wants to try CQ, in our library knit/crochet group. She loved your newest book! She passed it around to all our members, and I thought your should hear some of the all positive comments. “Really well written book” “Such gorgeous photos” “Fabulous how to” “Great small size for your workbag”. Thank you for always generously sharing your time and talent, and education with the needlearts community.
Hi Marianne For the diamonds, I use regular sewing thread to assemble the diamonds and I join them together using the machine. Colour and tone of thread I try and match the diamond. So dark thread for the dark block, light thread for the light and so on. Thanks so much for such wonderful feedback about the book I am so pleased you like it and find it useful.
I would Love to join in!
Hi Sharon, excited to try the diamonds pattern but concerned about stitching the 3 diamonds together. Directions or advice would be helpful. I have your first book but it only shows the flip and stitch technique.
Hi Carol I am not sure what you are asking but I just stitch the three diamonds together using a sewing machine. It’s a bit fiddly in the middle so take it slow. I stitch from the middle outwards on each diamond block. I hope that helps.
Thanks so much.
Looking forward to this BOM. I’ve done several at quilt shops but never with crazy quilting. Thanks for providing the forum.
Interested in the block a month program
Interested
Liebe Sharon!
Danke für dein wundervolles Angebot! Ich wollte Crazy Stickerei schon immer ausprobieren und melde mich gerne an.
Fröhliche Weihnachten
Biggi
Biggi I used google translate – enjoy crazy quilting!
Merry Christmas again, Sharon, and thank you. I have a question about threads. I have pulled my threads from your lovely twisties which vary amazingly in color and textures. But for my other threads, perle cotton, silk twists and ribbons, etc. Should the colors match the block colors or have some contrast or high contrast to the block fabrics 3 tones? I wasn’t sure which. Thank you so much for your generosity of your talent and time for this exciting Stitch along project.
Hi Marianne – to have the quilt read in a 3D way each ‘tumbling block’ is made up of light dark and mid tonal values. Threads can have some contrast so you see the embroidery but not a huge amount. That said if the odd block in the quilt has embroidery on it that has a radical contrast it’s no great disaster the over all effect of the background fabrics will pull it together. The tonal values apply to everything – threads buttons ribbons laces etc Hope this makes sense!
I would like to do this
Sharon Join in and enjoy!
Yes, Sharon, makes perfect sense, thank you. That was what I thought you might say. But I wasn’t sure. Just started rereading your Visual Guide to Crazy Quilting Design and it is extremely helpful, chock full of expertise, and full of great tips and amazing photos. Very grateful to you!
I am so excited to start this!!! I bought your new book. I already receive your weekly emails – do I need to re-sign up for the stitch-a-long?
Hi Becky no need to sign up – if you subscribe to Pintangle – eachmonth you will get a notification about the next block
Thank you!
I am so excited to start this project. Thank you so much for doing this!
So looking forward to this. WE met you in Connecticut at a crazy quilt gathering put on by Maureen Geeson and I’ve been hooked since!
Carol as a teacher that is wonderful to know
Please add me to newsletters
I’m so excited! I’ve been wanting to make a crazy quilt for my sister, but it’s intimidating! The is just the thing I need to get started!
I am very interested in learning your method of crazy quilting, have always wanted to do this.
Have wanted to make this quilt since I saw yours. Thank you so much.
Sharon this is going to be great. Thanks. I hope I’ll be able to keep up!
I am excited to work on this. Thank you! Do I need to use fancy fabrics or can I use what I have in my stash, which is patterned cotton fabrics? I’m worried that pattern on every piece will get too busy! Should be investing in some plain fabrics?
Hi Lauren Yes you can use your stash of quilters cottons but I would invest in some plain cottons to mix in as usually I sit a patterned fabric against a plain fabric so I can embroider on the plain fabric as embroidery on some patterned fabrics does not show up. It’s a lot of work for little return if you know what I mean. Thanks for asking the question as I will add this advice to the post above so others think about it too.
Thank you for your time and talent. So generous of you. I have separated my fabric into the three tones using light yellow and mid and dark purple colors.
I am going to use cotton pansy prints and upcycled fancy fabrics in solids. Do you think this combination will do okay? Enjoy your summer holiday. Merry Christmas to you and your loved ones. With gratitude, Marianne in NJ. Have my thread twisties and Bead soups from pintangle.com ready also. Need to dig out the rest of my fibers and embellishments.
Hi Marianne your cotton pansy prints and fancy fabric solids sound just fine! The main thing is to have the solids to show off the embroidery. Since Yellow and purple are complimentary colours this should be a very vibrant quilt once done. I think this is going to be fun.
Thank you! Jingle bells!
Thanks Marianne – I hope you and yours have a wonderful Christmas and great 2023
Looking forward to the challenge.
I would enjoy doing the crazy quilt
fabulous challenge!!
Looking forward to this.
Good Morning Sharon,
Do we need to sign up for this special BOM or will it arrive with our regular email subscription? Looking forward to this new project. Thank you so much for sharing all you know.
Janet
Janet No need to sign up to the challenge.The posts will arrive in your email since you are a subscriber
Wonderful and generous offer. Thank you. I’ve been trying to inspire myself to start embroidering again. This is just the calling I need. I look forward to participating!
Thank you, again, for sharing your genius and skill.
Regards,
Suzanne
Suzanne I am so pleased to hear that you made my day!
Hi,. I am looking forward to doing this pattern. I have been making strip quilts with flannel, so I need a change.
I am very excited to see what i can lesrn from you
Hi, will there be any videos for this project? I’m definitely more of a visual lrarner
and also a crappy typist lol *learner
A Dunlop – No videos but there are hundreds literally of step by step tutorials in my stitch dictionary. Each photographed. Videos would turn this project into a nightmare for me they take too much time to make and edit. Also making videos would involve re-making the entire quilt and the idea is to use the existing quilt and give out the pattern for the blocks each month. So turning a fun thing into a not fun thing. I have just re-photographed the quilt it took two sessions over two days. Next I have to crop, straighten, take into illustrator to draft off the pattern. Save each pattern for each block as a pdf then load it online. All before writing the post for the month about how to stitch the block. These things take time. This is also a free thing. I hope you understand why I will not be making videos.
I LOVE crazy quilting! Can’t wait to get the firtv6]
Anita – I am excited about this stitch along too – I am just busting to see what people do