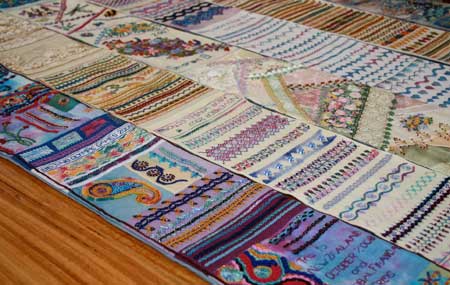
I recently rounded up all the sampler pieces I worked last year and pieced them together then added them to my For the love of stitching band sampler.
I had an email asking how I back my sampler and I promised to blog what I did, this is what I do.
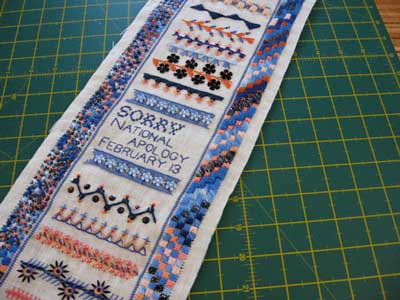
First, I trim the sampler pieces to make sure they are straight and even
Next I join all pieces end to end, so the form one long strip.
I cut a strip of fabric for the back.
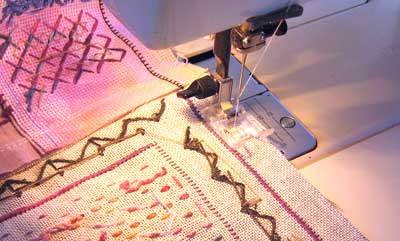
I attach the strip of backing fabric using a single row of machine stitches down each side of the strip. I don’t over lock the seams or anything. If for some reason I need to be able to get to the back of the sampler or if I want to separate them I don’t want a complicated unpicking session. I want to be able to more or less pull one thread and undo the lot. So the backing fabric is held on with one line of stitches.
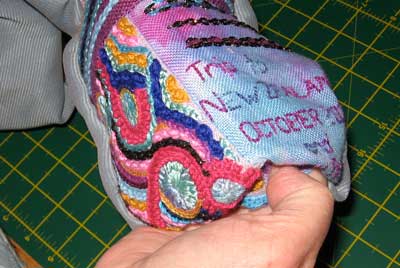
I then turn the tube inside out
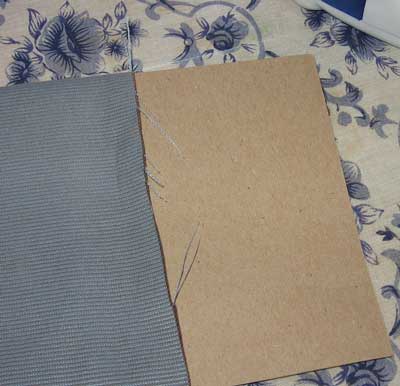
To get a sharp edge I use a piece of cardboard that is the exact width of the sampler.
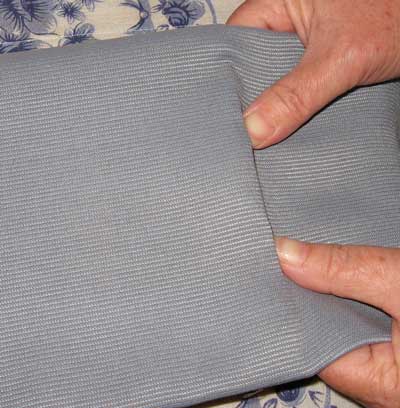
I press the back of the sampler and as I go edge the card along inside the sampler. I Don’t press the front of the sampler just press the back on a well padded ironing table so that the embroidery is not squashed flat.
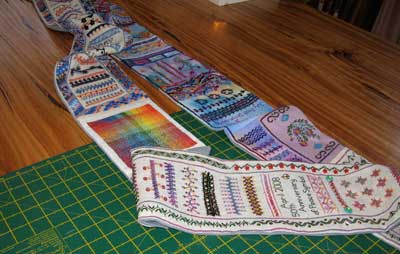
I then add the tube to the main roll. To do this I hand stitch it.
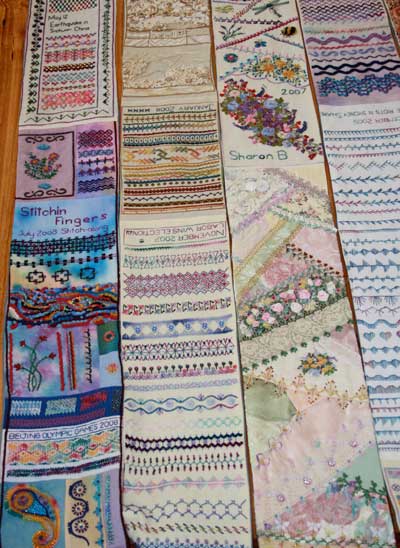
I was a bit worried that the latest new section would not fit in as it is made up of patch worked hand dyed evenweave fabrics but when I added to the sampler it did not look out of place.
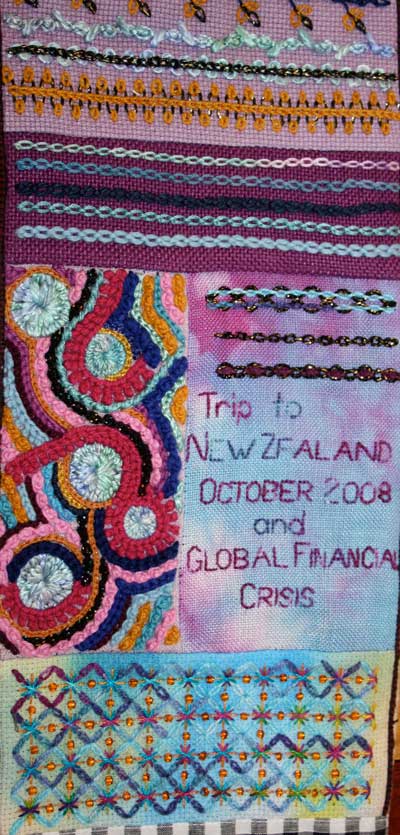
Apart from the chicken scratch I have been working on a series of chain stitch experiments. They are worked on the patchworked section I am talking about.
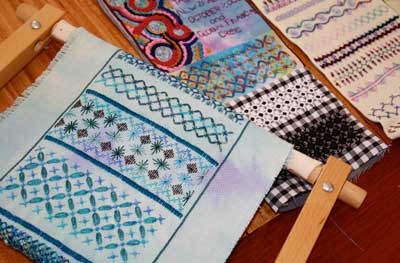
With most of these samplers have been worked using a hoop but this latest one that included the chicken scratch variations for the January stitch explorer challenge is being worked using a scroll frame.
Oh! I nearly forgot with the latest extension the sampler brings its length to 44 ft 5 inches or 533 inches (1353.83 centimetres) or 14.8 yards (13.53 metres) long.
Sampler FAQ
For the full back story on this piece visit the Stitch roll or Sampler FAQ page.


Thanks Sharon. I got your email. I will need to think about this as I don’t want them joined together permanently.
Regards,
Ruth
Sharon, many years ago I remember seeing a photo on your blog of how you joined sections of your band sampler together. I am fairly sure it involved buttons. Could you please give me the link to that post if possible. I am starting to back my four amnd want to join them together.
Hi Ruth – I sent you an email – but quickly dropped in to say I just stitched each section together no buttons
I am hooked! I've started my own "band sampler" which may one day look as glorious as yours. For now, I'm adding a bit each week with each new stitch featured in TAST …. such fun! Thanks for sharing & inspiring & teaching, but mostly thanks for the fabulous photographs of your work and for the links to others in the Take A Stitch Tuesday bunch.
wow. How did you do that rainbow type block in the 7th block down??? Please post a tutorial, please please please
I am in awe. That is an amazing accomplishment and what an excellent representation of your experience.
linny t
faffing is slang – that said its such a good word people always know what I mean. It is in the urban dictionary
http://www.urbandictionary.com/define.php?term=faffing
Ha! I’ve never heard the word "faffing" before, but I have a feeling that’s what I’ve been doing all day long the last couple of months… Well, not completely. But almost! I do have my panel sampler almost completely constructed! I WILL get started stitching on it tonight so I can get today’s date on it!
Hi Laura
I thought I would just add that the secret to these sorts of projects is to keep things very simple otherwise time is spent on the ‘fuss’ rather than the actual project.
The other thing I do is just make it regular. People say they don’t know how I have time but I suggest just find 15 minutes a day to stitch but do it regularly. You would be amazed how much that adds up to over a year particularly if it is focused on stitching and not what I call faffing – and I am capable of faffing all day if I am not careful.
Wow – every time I see a close-up of a section of your sampler, I want to see more! It is so gorgeous! So glad you have the backing instructions – very simple, I would have complicated it to death. I cut a bunch of strips to start my sampler, but my sewing machine is two states away. I found a spool of sewing thread, however, and I’m going to hand-stitch a couple of strips together so I can start before my mom gets back into town and I can sew them more securely with the machine. Thanks so much for the inspiration!!
Ansu – just pick some fabric – some thread and start – develop it from there. Its one of those their is no right or wrong way things and it is the process of learning that is important.
Awe inspiring
eager to start,but dont know from where to start?
this is just amazing. I don’t know what to say. I would not have thought there are so many beautiful stitches to do. thank you for this link.
Oooh. Good tip on getting edges crisp. I don’t know why I never thought of it!
Susan the first section is a batch of linen I purchased as a special buy years ago. It is hand dyed by me.
Maggie the sampler is not made for display I do hand it around in a class/workshop situation. Its not for decoration but for use and is kept rolled up when not being looked at.
Sharon, looking at the sampler side by side in the last photo, Made me think. If all pieces were joined in side by side what a tapstery that would be. Thanks for the fabric info. Have a wonderful summer’s day. Hope a little rain has fallen. We are cold even down South. Rene
It is such an amazing achievement, when you look at it you must be really pleased with all the work you’ve put into it.
The sampler is so beautiful. How are you going to display it eventually?
Shsaron this is gorgeous, very inspiring. Can you tell me whether you dyed your own fabric or if not where you obtained it
regards
Susan
wow !! This is amazing …your sampler is just growing in size every year. This inspires me to start one.In fact, all your work get my creativity flowing but I am so overwhelmed I don’t know where to start. Let me begin with a sampler now….move on to your monthly challenge.
I really admire your work.
smiles
Leena
Seeing details of these samplers is a treat. Seeing everything all at once is positively awe-inspiring!
All I can say is WOW!!!!!