

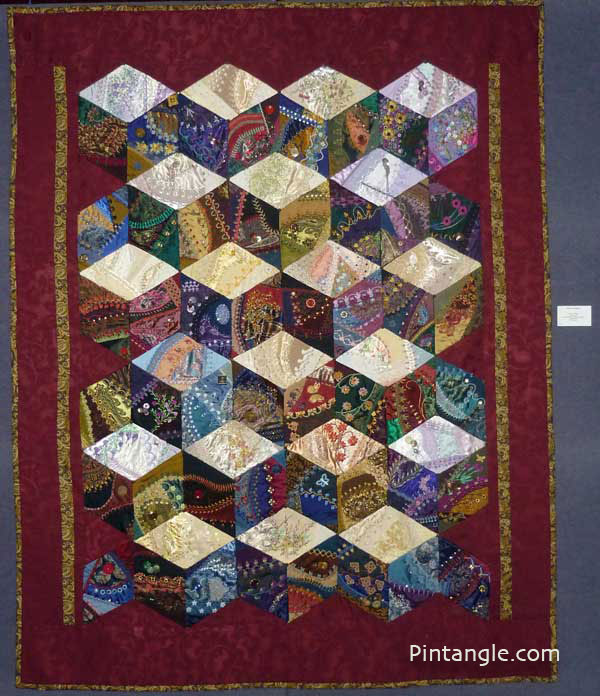
Many people ask how to assemble a crazy quilt. This is how I assembled the Diamonds are forever crazy quilt. It is basically how I assemble any large crazy quilt. In this case the blocks are diamond shaped but if my blocks were square it would be the same process.
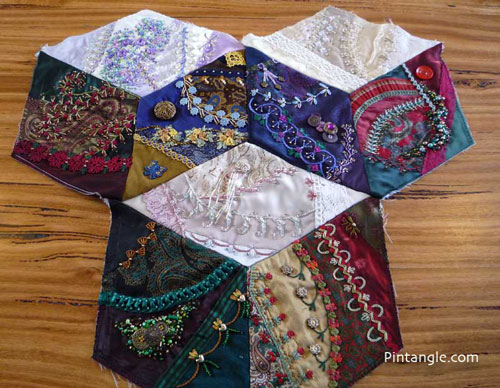
If I have not already planned the set of the quilt. the first thing I do is to lay the quilt blocks out so I can see how they are going to read. In the case of my Diamonds are Forever quilt I spent quite a bit of time faffing about with blocks, rejigging where they sat and finding the best place for each diamond so the blocks read well.
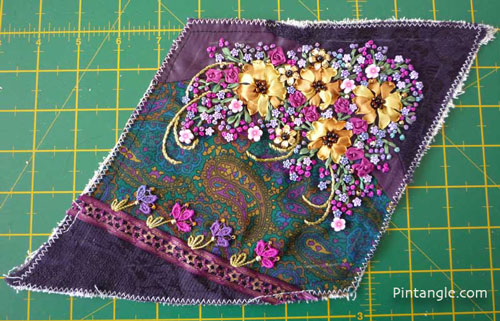
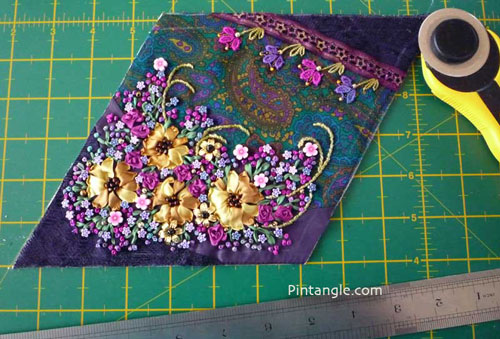
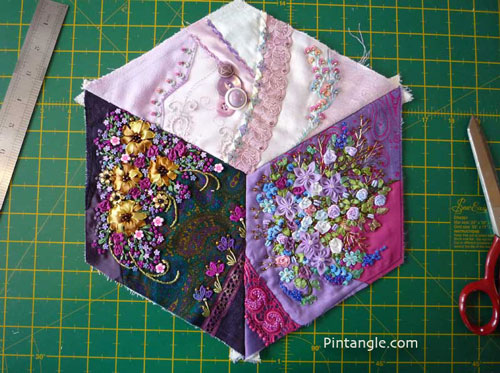
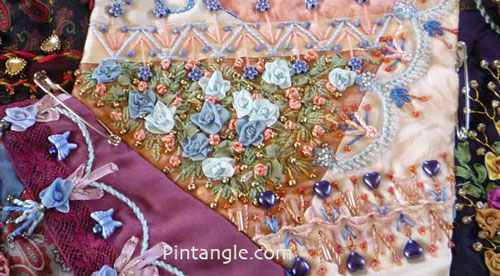
With this particular quilt I knew if I wanted the quilt to hang well I needed to make sure the angles in each diamond were correct and that stitching had not distorted them. As you can see from the photo above sometimes my blocks distort a little. I always have a large seam allowance so I have some wriggle room at this point. My first task was to trim all the blocks to the right size and diamond shape.
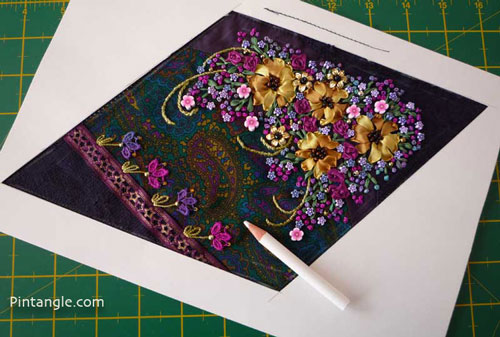
To make sure every block was the same I made a template from cardboard. This template includes seam allowances.
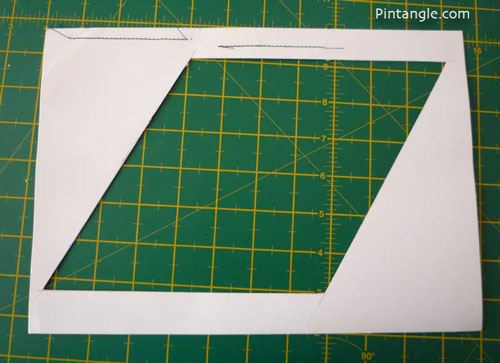
I mark the edge of each block using a quilters pencil.
When I trim the edges of the block I place the ruler on the outside of the block and make the cut. If you place the ruler over the block because of beads buttons etc the ruler will not sit flat and you will make an uneven cut.
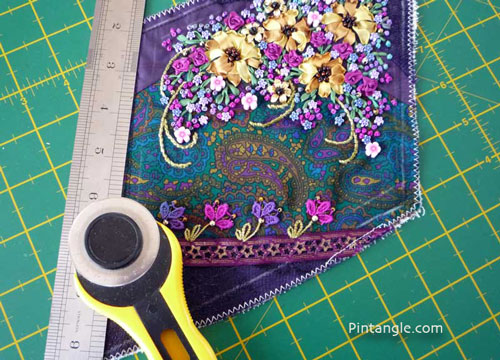
Here is the block trimmed
How to assemble a crazy quilt – joining the blocks
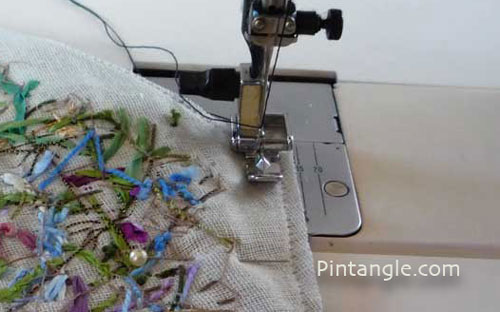
I then pin the pieces together and stitch together. When I assemble crazy quilt blocks I use a zipper foot. There is a lot of bead work on the blocks. Much of this bead work goes right to the seam allowance, so a zipper foot helps to stitch right up next to the beads without busting too many needles! I use the side of my zipper foot a guide for the seam. Some people put masking tape on the plate area of the machine to act as a guide but I eyeball it.
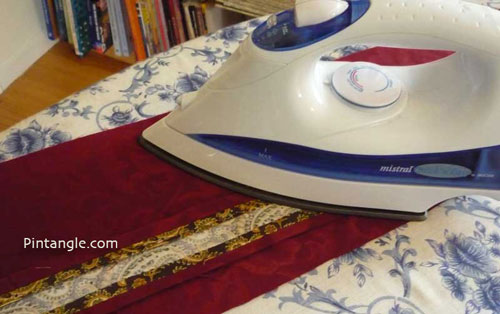
Once the block is together I press the seams open. I press gently and not with a hot iron. The fabrics are not cotton so I make sure to press at a cooler temperature. When I press I use extra padding with a towel on the ironing table. I do not press too firmly as that will flatten any silk ribbon embroidery on the block.
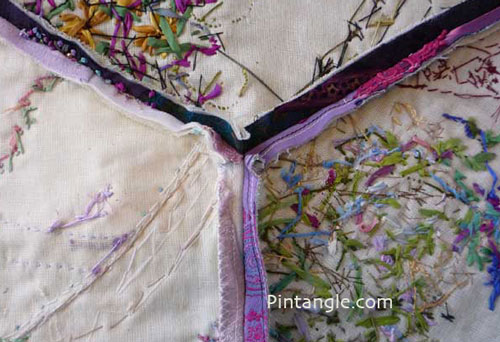
To make sure the seams stay flat I use Herringbone stitch to keep them open. This stitching does not go through the whole block. The foundation fabric that backs the block is caught by the stitching.
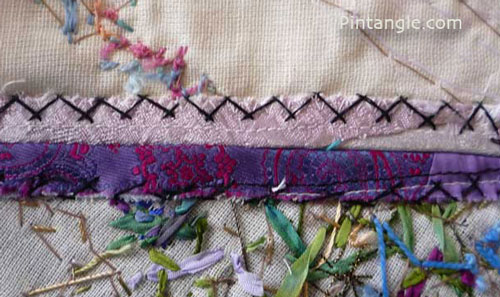
This can be a bit time consuming but it is worth it as the blocks sit flat.
Next I assemble the blocks in larger modules. I herringbone the seams flat. Then I assemble into larger modules again and once again make sure the seams sit flat by pressing them open and stitching them down with herringbone stitch. I did this until the quilt top was assembled.
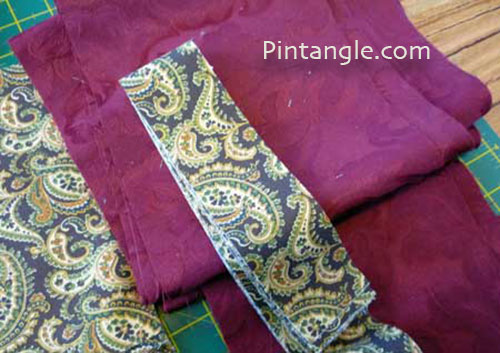
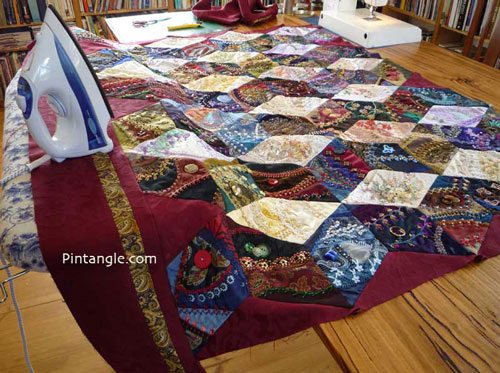
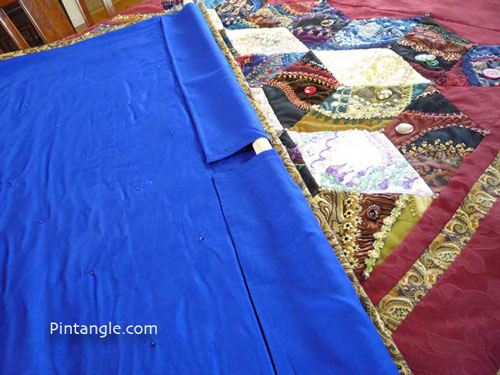
Once the top of the quilt is assembled it is time to put the border on. In the case of this quilt I have a border and strip of fabric that acts as an inner border. The bulk of the border is a maroon brocade heavy damask like cotton. The inner border and binding is a burnt gold paisley of quilters cotton.
How to assemble a crazy quilt – the border
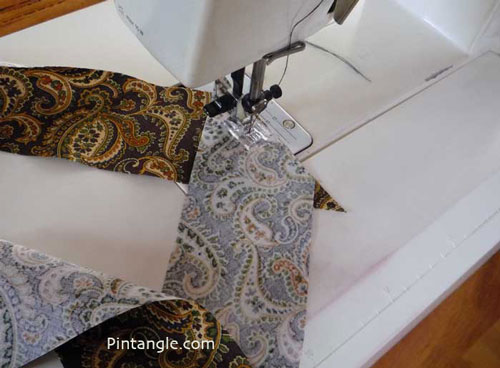
When I selected the fabrics for these blocks I looked for a paisley pattern. So I was delighted to discover this quilters cotton with its paisley pattern.
Normally a contemporary quilt is made of quilting cottons. This is not the case with crazy quilts, as all sorts of materials can be used. Not only a huge range of luxurious and highly textured fabrics available to the modern crazy quilter but also buttons, charms and beads are often added. This makes for a heavy piece of work, so when I assemble a crazy quilt I think about the weight of the quilt top.
My blocks are often heavy so for this quilt I chose a maroon cotton brocade for the fabric used in the border. It is a firm, solid curtain fabric. I wanted a strong fabric to both support the quilt and balance the weight of the blocks aesthetically. I chose an inner border and binding is a burnt gold paisley this is of quilters cotton.
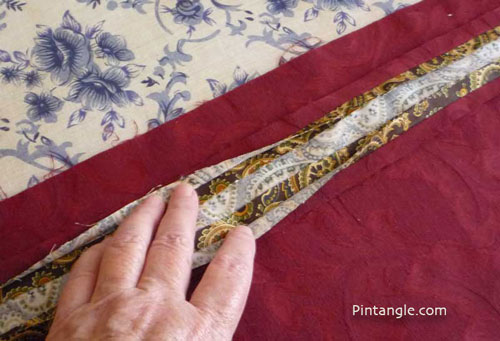
Since it is a quilters cotton and the maroon fabric are of different thicknesses I needed to interface the quilters cotton. I could have simply interfaced it but for this quilt I simply doubled the quilters cotton. In the photograph I have opened it up so you can see how it is simply two layers of the fabric. This evens up the weight/thickness of the fabric in the border.
Obviously I treated the double layer as if it was the same as a single layer and other that that I used standard quilting techniques to create and attach the border.

This is subtext for lots of pins were used!
Once the border was attached, I pushed the ironing board against the table so that the table takes the weight of the quilt as I iron.
How to assemble a crazy quilt – tie the quilt sandwich
Once the border was on, I created the quilt sandwich. I laid out the backing, the batting and the quilt top. Then I used quilters pins to hold the quilt sandwich together. Because many of the fabrics are delicate and quilters pins can leave a pin mark, I make sure the pins are used at regular intervals on the seam line.
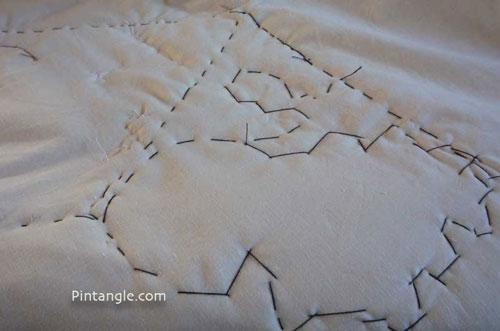
The next step is to tie the quilt sandwich no stitches visible from the front. Many Crazy quilts are simply tied and this is a perfectly OK way of doing it but I like the tying process to also stabilise and strengthen the quilt. So although this is a long process I do it. Since originally crazy quilts were not quilted I like to have no stitches visible from the front of the quilt. How do I do this? I hide the stitches behind buttons and larger beads.
This is an example of a stitch that comes from the back of the quilt, the thread travels through the bead, and I take the thread to the back of the quilt. In effect I use the bead to tie the quilt. The process hides that fact that the quilt is tied. I take the thread along to the next largish bead or button and repeat. This quilt is tied at least every two inches, closer in many instances. I do this all over the quilt top.
This process means that often threads are taken an inch or two across the back of the quilt. This is quite messy so I hide all this work with a false back. The false back also adds strength
I press the fabric I am going to use for the false back. I then lay it out and pin the false back to the quilt so that it covers my stitching.
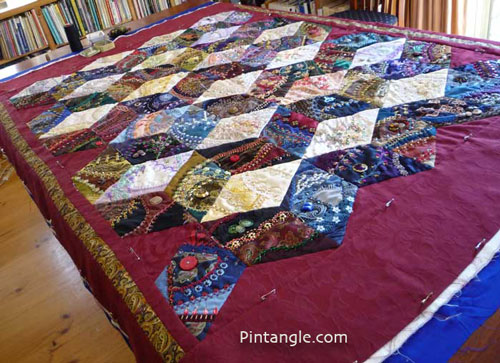
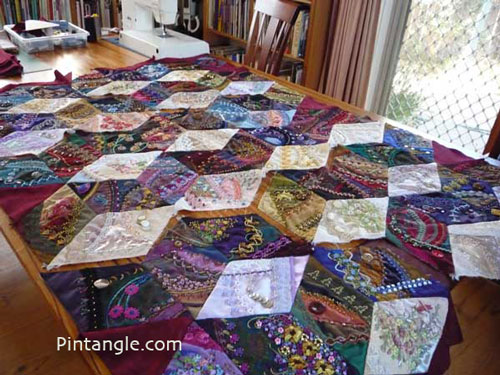
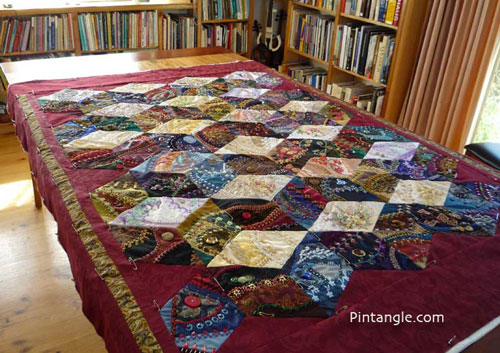
My Diamonds are Forever quilt on the table with a lot of hidden work between the back and the false back which hides the mess of tying the quilt.
How to assemble a crazy quilt – the false back
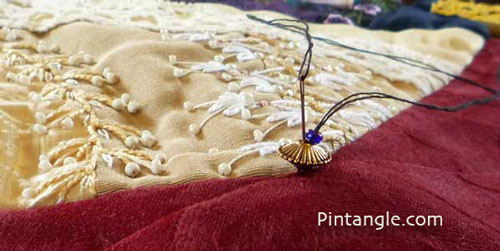
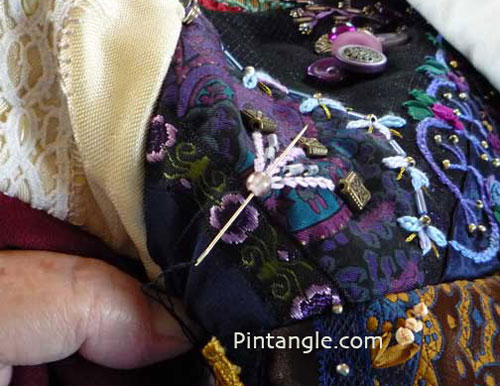
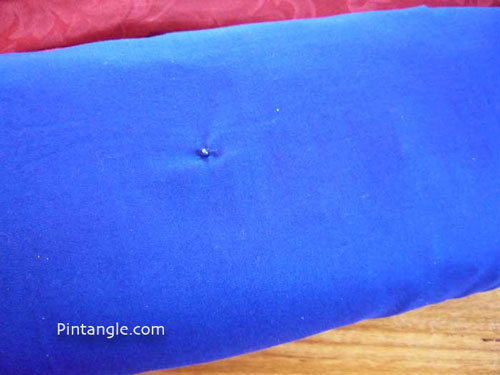
The next stage was to catch the false back to the quilt sandwich. At the point of each diamond I hid the catch stitch with a bead. Each point has one of these gold disks on the front of the quilt held on with a size 6 seed bead at the back of the quilt. In other words the thread runs through the quilt to the back where it is secured with another seed bead.
This is the bead at the back as I am working it.
This is how it looks when done. As you can see the bead at the back catches the false back to the quilt sandwich.
From here on most of the techniques used are standard quilting techniques. I have not fully described these as there is oodles of information out there on how to put a quilt together and bind it. The main difference with the way I put together a crazy quilt is that I herringbone flat the seams, I hide the tying behind buttons and beads and I make use of a false back.
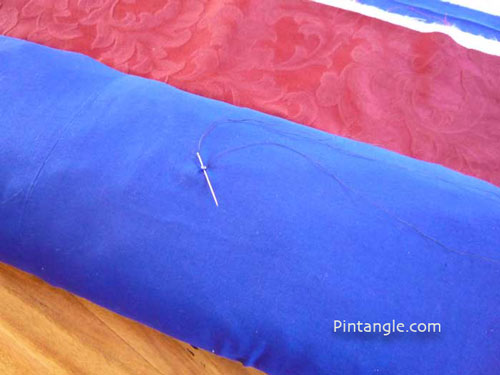
After stitching each point of all the diamonds I added the rod pocket. The rod pocket was stitched through the false back and the real back. Of course the rod pocket takes the weight of the quilt so it would be silly to just stitch it through just the false back.
I made two long pockets so that the weight was distributed evenly. I have taken this photo on the table so you can see what I mean. The rod will hang from three points. A point each side and a point in the middle. The rod pockets run the width of the quilt.
Once the rod pocket was attached I cut out the binding on the bias. I made this from the same fabric that I used along the inside edge of the border. I pieced it together in a long strip and then bound the quilt as you would a normal quilt. The top of the rod pocket is bound into the binding.
Once the binding is on there is a Da! Da! moment to enjoy before moving on to the next project!
Once again I want to remind people that this is my way of doing it. There are no rules as such in crazy quilting so you can do it anyway you want but I thought people might enjoy reading about how I assemble a crazy quilt!
My book on Crazy Quilting
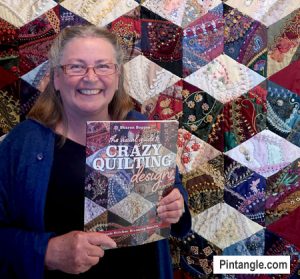
My book The Visual Guide to Crazy Quilting Design: Simple Stitches, Stunning Results shares detailed practical methods about how to design and make a crazy quilt.
From fabric choice, to balancing colour, texture, and pattern, in order to balance and direct the eye around the block. I cover how to stitch, build decorative seam treatments in interesting and creative ways. My book is profusely illustrated as my aim is to be practical and inspiring.

Thank you for all your clear instructions! I made my crazy blocks and didn’t know what to do next!
Thanks Cara I am pleased you found it helpful
Like it very much
Absolutely brilliant!
Love this. You did a remarkable job.
Hi Dixie thanks I like a good finish if you know what I mean
I have gathered so much fabric with the idea of making a crazy quilt. I first started out by going to the flea markets in and no garage sales in it and find an old blouses and skirts and pieces of clothing that I loved. But my problem is I just can’t get started. I have so many pieces of what I call embellishments,
Threads and yarns. Help incourage me. Please.
Katie Swanson.
Katie – Start with either 1 single block then do the next and the next and so on. Or a small thing – one block for a cushion for instance. All let go of the pressure – if you have a ton of stuff collected – its not like if you make a mistake you have lost a lot. The main thing is to relax start and play. Have fun its not a life and death thing!