
Fancy Hem Stitch is a simple quick stitch which I think people will enjoy. Crazy quilters I am sure will see immediately how useful it can be. Embroiderers will enjoy it not only in use on edgings but also work row upon row as a filling stitch.
I first discovered this stitch in a Batsford book called Embroidery Stitches by Anne Butler.
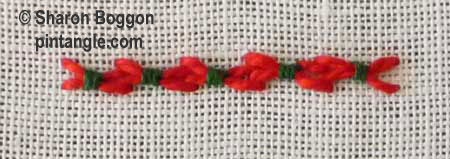
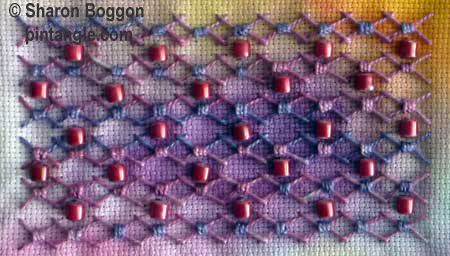 The foundation rows are the same hand movement as large stem stitches which are loosely worked and then laced. Fancy hem stitch really comes into its own when you experiment and change threads. It looks great in a thread with a firm twist or a fine braid or even a ribbon. Beads also can be added for extra zest.

How to work Fancy Hem Stitch
Work the foundation stitches in a loose manner because when they are laced they pull tight. If keeping your tension even is a problem use an embroidery hoop.
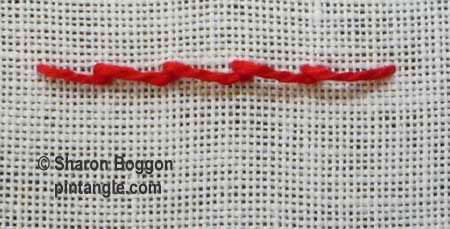
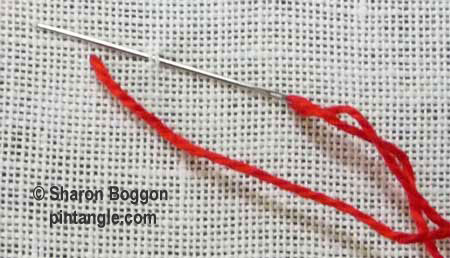 The first row is worked from left to right. Bring your needle from the back of the fabric. Make a long stitch, point the needle into the fabric, and bring it out a little along the line to make a small back stitch as illustrated. Take the needle through to create the first stitch.
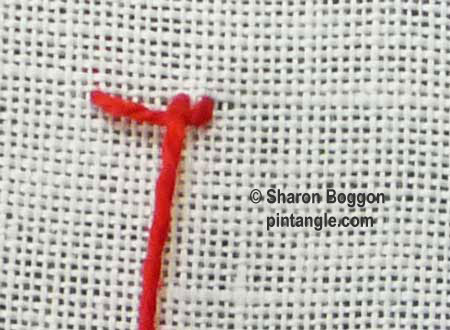 Pull the thread through the fabric. Make the second long stitch forward, along the line.
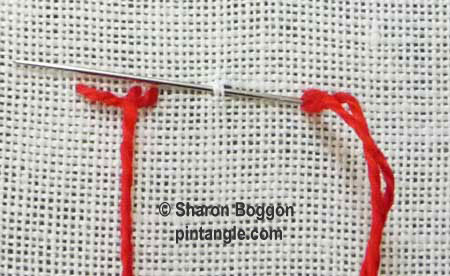 Keep the thread to the same side of the needle with each stitch while you repeat this back and forth movement along the line.
 At the end of the line take your needle through the fabric. Turn your work.
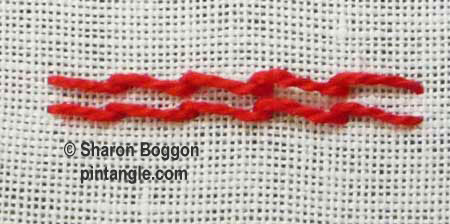 Work the second line of stitches. You should have two lines of loose stitches.
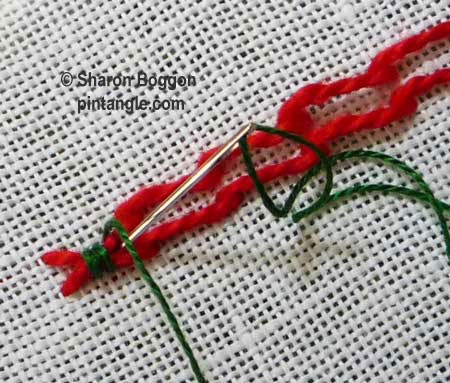
 Work from left to right. Bring the thread through the fabric in the middle of the two lines of stitching as illustrated
 From this stage on you are not taking the thread through the fabric when you are wrapping the stitches. Wrap the two stitches together with 3 wraps of the loops as illustrated.
 Take your thread to the back and bring the needle up through the fabric at the next loop, in between the two lines of stitching as illustrated.
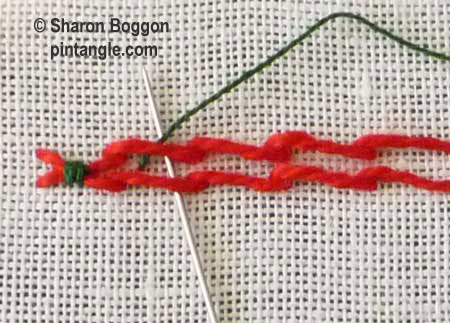 Repeat this wrapping process until you have reached the end of the line.
Follow Pintangle and have it delivered to your inbox
You can have Pintangle delivered to your inbox by using the follow feature in the sidebar. Just enter your email address, and when you get the confirmation email make sure you say yes and you are all set!
If you are on a mobile or tablet you will need to scroll to the bottom to find the follow feature.

Sharen I enjoyed stitching Fancy Hem St and hve just posted my attempt on htt://stitchinfingers
I’m trying to catch up again. Here’s my top knotted buttonhole stitch sampler:
http://fat-quarter.blogspot.nl/2013/05/top-knotted-buttonhole-stitch.html
Thank you Sharon for adding this wonderful stitch to the collection.
http://queeniepatch.blogspot.jp/2013/05/tast-67-fancy-hem-stitch.html
http://stitchinfingers.ning.com/photo/tast-67-fancy-hem-stitch
I liked this one a lot!
http://210920746822434353.weebly.com/1/post/2013/05/take-a-stitch-tuesday-2013-stitch-67.html
Looking forward to trying this one. Here is the link of my latest efforts trying the raised cross stitch flower and more buttonholed herringbone stitch. http://thethreadbear.blogspot.fr/2013/05/more-cards.html, and here http://thethreadbear.blogspot.fr/2013/05/some-cards.html, and scroll stitch here http://thethreadbear.blogspot.fr/2013/05/scroll-looped-cross-and-needlelace.html. xx Liz xx
Here is my fancy hem stitch. http://hokkaidokudasai.blogspot.jp/2013/05/tast-67-fancy-hem-stitch.html
Thanks!
Thanks Sharon, this is a cool stitch. I will definitely continue using it!
http://princessbubblescreates.blogspot.ca/
My sample is accompanied by a lot of friends I just couldn’t resist!
http://morecoldtea.wordpress.com
Barbara
Here´s my weekly post with old fancy hem stitches:
http://fat-quarter.blogspot.nl/2013/05/old-fancy-hem-stitches.html