
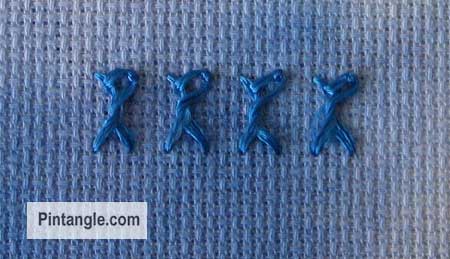
The Bonnet stitch is a variation of buttonhole that forms a line of stitches with upright twisted, looped prongs.
When you first look at the directions, some stitches look distinctly uninspiring. Bonnet stitch is such a case. It looks like a double buttonhole (I call it a herringbone with its knickers in a twist). However, I urge you to try it out. I think it will surprise you. You can use this stitch on even-weave or plain fabrics. It is quick and easy to work, and it can follow a curve well.
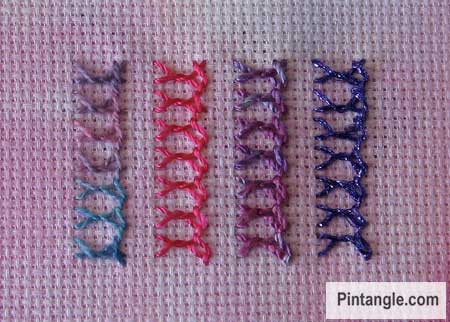
Bonnet stitch looks best in a thread with a firm twist. So if you are one of those folks using up old stranded embroidery threads to test your stitches, I can only encourage you to buy some perle thread. You are doing yourself a huge disservice if you don’t try other threads. Many of the surface stitches look like nothing in stranded threads — but work them in a thread with a firm twist, and they come alive.
The sample below shows Bonnet stitch worked in different threads. The first row is cotton Perle 8, next comes rayon thread, followed by silk, and the last row is a metallic thread.
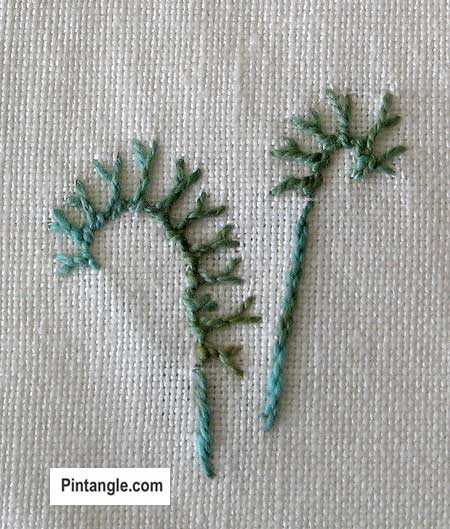
Since Bonnet stitch is a member of the buttonhole family, it can be worked easily on a curve. Worked in a freeform manner, you can produce organic textured lines.
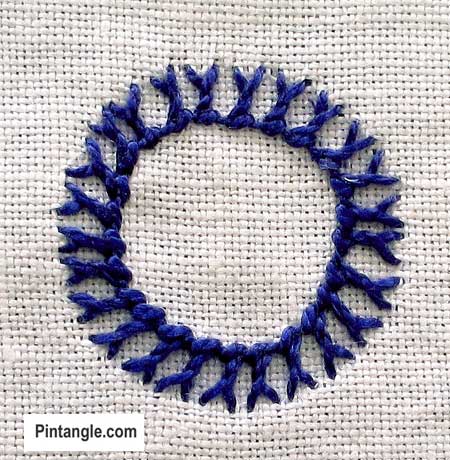
Also, you can easily work this stitch in a circle.
How to work Bonnet Stitch
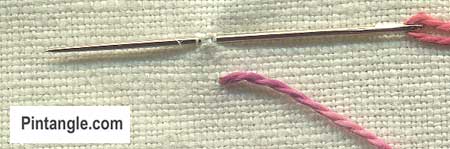
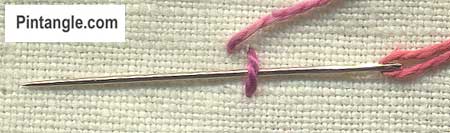
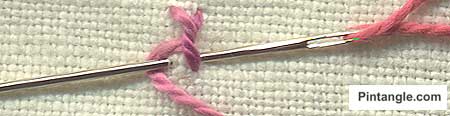
Work bonnet stitch from right to left between two imaginary lines. If you need to mark the line, use a pen that will dissolve when moist or one of the quilter’s pens that disappears after a few days.
Bring the needle out on the bottom line. Make a small stitch on the top line with the needle pointing left.
Pull the needle through the fabric.
Slide the needle under the straight stitch you just made. You are not taking the needle through the fabric, just slide it under the stitch with the needle pointing left. Pull the needle through.
On the bottom line, insert the needle where you started to stitch. With the needle pointed left and the thread wrapped under the needle as illustrated, pull the needle through.
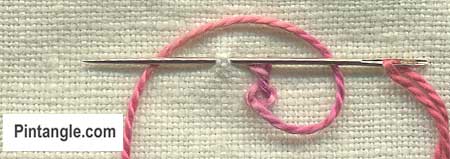
Take the needle to the top line and take a bite of the fabric as illustrated. This is the start of the next stitch.
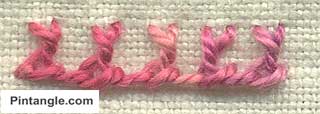
Continue along the line.
Bonnet stitch can be worked in rows or at different heights. Think of all the patterns you make with Buttonhole stitch, as you can adapt many of these to Bonnet stitch too. It is a case of experimenting a little. It is also interesting if you work Bonnet stitch at different angles or use it to couch heavy threads to the fabric.
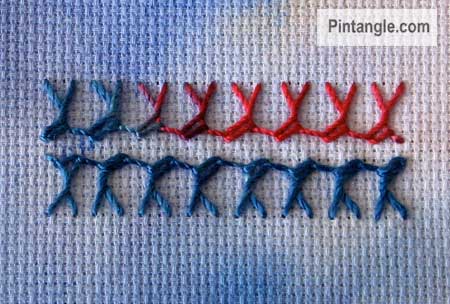
You can create patterns if you work this stitch row upon row, or in this case, in rows back to back.
Follow Pintangle and have it delivered to your inbox
You can have Pintangle delivered to your inbox — In the side bar use the Subscribe to Pintangle box or If you are on a mobile scroll to the bottom the of the page to find the Subscribe to Pintangle option. In either case type in your email address and click on the Subscribe button below. Then check your email inbox for a confirmation email and click the link to confirm your subscription. If you don’t see a confirmation email, check your spam folder — sometimes the computer puts it there.
Have you seen my Stitchers Templates?
Create your own designs with Sharon’s easy-to-use stitchers templates. Combine shapes to create hundreds of patterns and designs to embroider. It is the ultimate mix-and-match fun for stitchers of all skill levels. I created them to be as versatile as possible. I include four multi-patterned templates in each set. You will find them easy to use, totally clear to help you position them on your work, and they are nice and compact to fit in your sewing box. Each set comes with an e-book filled with patterns and designs that you can create and use as a jumping-off spot for your own designs. They are available now in our shop here!
Happy stitching!

A new stitch to learn for me. Thanks. My trials are here.
http://hobbysewing.blogspot.com/2020/09/tast-20-beyond-tast-20.html
2018 TAST Stitch #27: https://www.thecrafties.com/2018/12/tast-roundup-3/
I’m getting caught up finally!
-C
I was not very successful but this is my attempt.
http://eclecticlamb.com/2012/07/26/week-27-tast-bonnet-stitch/
Enjoyed learning this stitch. Used the stitch to decorate the space around my initials. Put the samplers in my journal that includes a reflection, gratitude list, and collage of images:
http://harvestmoonbyhand.blogspot.com/2012/07/take-stitch-tuesday-bonnet-stitch-week.html
terminé ce point mais j’ai pas été inspiré
Here is my little sample. I had trouble at first, but finally got the hang of it. http://karrinscrazyworld.blogspot.com/2012/07/tast-week-27-bonnet-stitch.html
Here is my try on bonnet stitch.
http://withbrushandneedle.blogspot.in/2012/07/tast12-week-27-bonnet-stitch.html
-preethi.
Bonnet Stitch:
http://thetruevine.wordpress.com/2012/07/08/take-a-stitch-tuesday-bonnet-stitch/
very late this time..my trials on bonnet stitch is here..
http://leelashobbies.blogspot.in/2012/07/tast-2012-week-27-bonnet-stitch.html
http://www.flickr.com/photos/stitchinwoman/7527751512/in/photostream
I love that stitch and it is fast to make!