
Two varieties of Arrowhead stitch are listed in various stitch books. One is a horizontal version, and one is vertical. Some books call the vertical version Upright Arrow, while others simply call both versions Arrow stitch. Some books refer to the horizontal version as Zig-Zag stitch.
Both varieties are good examples of quick and easy stitches. I really enjoy the geometric structure, as you can arrange Arrow stitch in numerous patterns to make borders or fills.
This is a good stitch for children and beginners.
How to work Arrowhead Stitch
Horizontal Arrow stitch is made up of a line of straight stitches worked at right angles to each other in a zig-zag formation.
Work from left to right along 2 imaginary lines, building the line as illustrated.
As you can see, you can build this stitch into patterns if you work row upon row.
Or you can work lines back to back
Add more lines to those
Overlap lines that are worked at a different scale.
Combine upright and horizontal Arrowhead stitch
Then build more on that pattern too!
You can also use this stitch to couch on a ribbon!
How to work Upright Arrowhead stitch
Upright Arrowhead stitch is equally easy and quick to work, making it an ideal stitch for beginners and children.
This stitch consists of a pair of straight stitches worked at right angles to each other.
Work down the line between 2 imaginary lines, building up the pattern as illustrated.
As with horizontal Arrowhead stitch, the geometric nature of this stitch means you can easily build up patterns and designs with this stitch. You can use it for both a border stitch and as a filling stitch.
I like to use it in contemporary work in an improvisational manner, too!
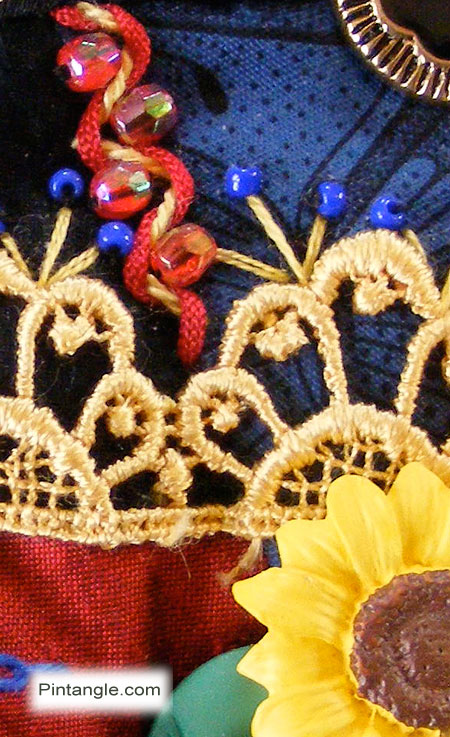
Here, on this detail from block 92 of my ‘I Dropped the Button Box’ quilt, I used Arrowhead stitch worked with cotton perle #5 thread, then I laced the line with bunka thread. I use Bunka thread for fringing, which is quite thick but has a good drape. I then added red beads in the V of the arrows.
Follow Pintangle and have it delivered to your inbox
You can have Pintangle delivered to your inbox by using the ‘follow’ feature in the sidebar. Just enter your email address, and when you get the confirmation email, make sure you say yes, and you are all set!
If you are on a mobile or tablet, you will need to scroll to the bottom to find the follow feature.
Thread Twisties!
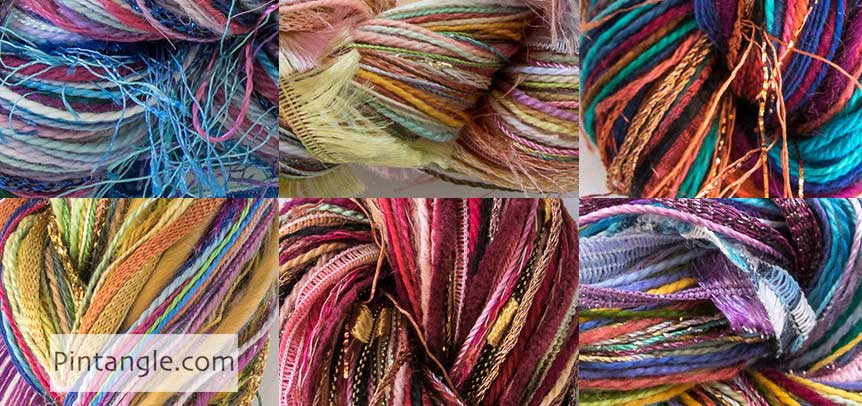
Experimenting with different threads can be expensive. You would normally have to buy a whole skein of each type of thread. My thread twisties are a combination of different threads to use in creative hand embroidery. These enable you to try out stitching with something other than stranded cotton. For the price of just a few skeins, you can experiment with a bundle of threads of luscious colours and many different textures.
These are creative embroiders threads. With them, I hope to encourage you to experiment. Each Twistie is a thread bundle containing silk, cotton, rayon and wool. Threads range from extra fine (the same thickness as 1 strand of embroidery floss) to chunky couchable textured yarns. All threads have a soft and manageable drape. Twisting them around a needle makes experimental hand embroidery an interesting journey rather than a battle. Many are hand dyed by me. All are threads I use. You may find a similar thread twist but no two are identical.
You will find my thread twisties in the Pintangle shop here.
Follow Pintangle and have it delivered to your inbox
You can have Pintangle including TAST delivered to your inbox — In the side bar use the Subscribe to Pintangle box or If you are on a mobile scroll to the bottom the of the page to find the Subscribe to Pintangle option. In either case type in your email address and click on the Subscribe button below. Then check your email inbox for a confirmation email and click the link to confirm your subscription. If you don’t see a confirmation email, check your spam folder — sometimes the computer puts it there.

Another new stitch for me to learn. I thoroughly enjoyed this stitch. My samples are here.
http://hobbysewing.blogspot.com/2020/09/tast-18-beyond-tast-18.html
2018 week 14 Arrowhead Stitch: https://www.thecrafties.com/2018/04/tast-arrow-stitch/
Thanks, Sharon! 🙂
I never post on these sites but this dictionary is so Awsome. Very nice and easy explainations. Just wow and so many displayed. Now I feel this is the go to site for me..no more wasted hours trying to find a stitch. I can’t thank you enough Sharon. Thanks so much.
Thanks for taking the time to post Nancy I appreciate it
Couldn’t resist another sample for this stitch – So versatile!!
http://www.flickr.com/photos/36140279@N03/8240119229/in/photostream
http://www.flickr.com/photos/36140279@N03/8241153600/in/photostream
Here is my Portuguese Border stitch.
http://eclecticlamb.com/2012/12/02/week-47-portuguese-border-stitch/
Yes, all caught up – below you will find my sampler for arrowhead stitch:
http://debbies-doings.blogspot.ca/2012/12/tast-week-48.html
Oh, well, I missed the deadline for highlights this week, but I am satisfied that I finished the last hexagon on my ball of stitches. Finished projects are really good things.
http://yarngoddess.wordpress.com/2012/12/02/finished-5/
Hi Sharon,
I am back to my stitch routine from today. the details of this week’s arrowhead stitch sampler are here-
http://jizee6687.wordpress.com/category/tast-2012/48-arrowhead-stitch/
Hey I’m not coming in at the last minute this time! Mine is finished and posted on Flickr and StitchinFingers
http://stitchinfingers.ning.com/photo/arrowhead-stitch-1
http://www.flickr.com/photos/bigislandrosedesigns/8236375958/in/photostream
I stitched another 2 x 2 inch sampler on my Aida. I wrote about the details on my blog:
http://fat-quarter.blogspot.nl/2012/12/arrowhead-stitch.html
my complete sampler is here:
http://www.flickr.com/photos/28957501@N04/8235429980/
I liked exploring that stitch and made two exercises: http://fabricfusion.blogspot.com/2012/12/tast-48-arrowhead-stitch.html
The Arrowhead stitch was another one I liked! Thanks See mine at http://timeusebybernice.wordpress.com/
I made the stitches and they canbe seen here : http://anaslua2.blogspot.de/
hello,
you can find al little project with arrow head stitch here :
http://pierrespapiersciseaux.blogspot.fr/2012/11/tast-48-point-de-fleche.html
Hello
My sampler for the arrowhead stitch is here:
http://dufall.blogspot.com/2012/11/tast-semaine-48-point-tete-de-fleche-le.html
Haven’t posted an update in a while–still keeping up via my mini-sampler. I’m happy we are continuing into 2013. Thanks, Sharon!
http://still-life-pond.blogspot.com/2012/11/tast-update.html
Hi Sharon, I created a bunch of grasses:
http://threads-and-patches.blogspot.com/2012/11/tast-arrowhead-stitch.html
Here’s my arrowhead stitch sample:
http://stitchinfingers.ning.com/photo/arrowheadstitch
http://brighidgettingolder.blogspot.de/
An arrowhead on an arrow:
http://queeniepatch.blogspot.jp/2012/11/tast2012-week-48.html
http://stitchinfingers.ning.com/photo/tast2012-week-48?context=user
http://latha-mycreations.blogspot.in/2012/11/tast-week-48-arrowhead-stitch.html
My attempt on TAST week 48-Arrowhead stitch.
Hi Sharon & Friends, my post for the week. Thank you all.
http://embroiderland.blogspot.com.br/
Enjoyed playing with this stitch!
http://playfulstitching.wordpress.com/2012/11/29/arrowhead-stitch/
Arrow stitch as part of a sample for my ‘small bites’ next year
http://www.flickr.com/photos/36140279@N03/8228686005/in/photostream
http://www.flickr.com/photos/36140279@N03/8228683399/in/photostream/
This is such a fun stitch to play with. Here’s my weekly post with old arrowhead stitches:
http://fat-quarter.blogspot.nl/2012/11/old-arrowhead-stitches.html
http://princessbubblescreates.blogspot.ca/ My humble attempt is here.