
Battlement Stitch is a stitch that is made up of multiple lines of Buttonhole stitch that overlap to form a deep border or act as a fill. When worked in a traditional manner, the line along the top of the stitches forms a crenellated edge like the top of a castle wall that has battlements. Hence the name! Usually, you have 3 or more lines of Buttonhole to have it qualify as Battlement Stitch. However, just as you can vary the height and spacing of regular buttonhole stitch, you can create many interesting patterns by varying the height and spacing of the stitches on the first row of Battlement Stitch. If you change the stitch, working in a non-traditional freeform manner, you can experiment with different coloured and different thicknesses of thread. Not only is it fun, but it can create an interesting area in your embroidery.
How to work Battlement Stitch
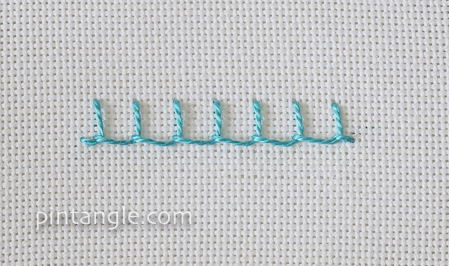
Work a line of Buttonhole stitches. If you need a refresher on how to work Buttonhole there is a tutorial here.
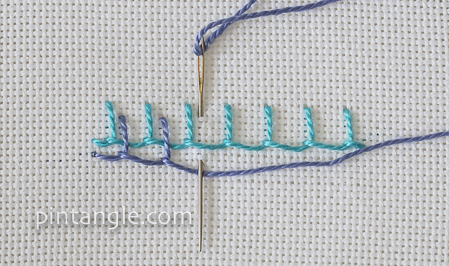
For the second journey, start with your needle emerging just below the first row’s base line. Insert your needle, stepped down and to the right on the upper line, as illustrated.
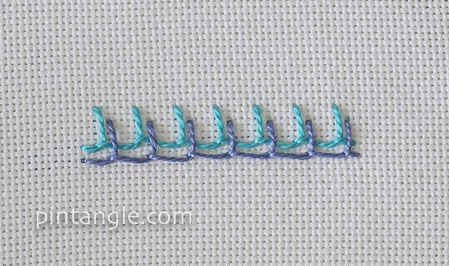
Work the second journey offset, as illustrated.
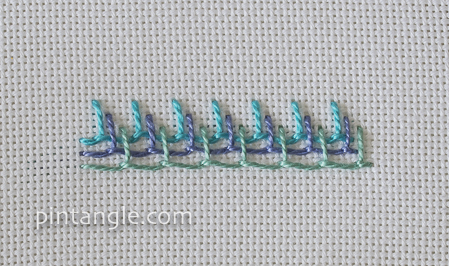
Add another row of stitches, also offset to the right as illustrated. Add a fourth journey and as many lines after as you wish.
I hope you enjoy this member of the buttonhole family and find Battlement Stitch fun!
Bead Soup

Add zing to your embroidery with Sharon’s bead soup! Check them out in the Pintangle Shop. These bead soups are not for jewelry, I’ve selected the beads specifically for use in creative embroidery and for working in an encrusted embroidery style. The types and sizes of beads are better suited for stitching to fabric, rather than for making jewelry.

I read it as Bafflement Stitch…!