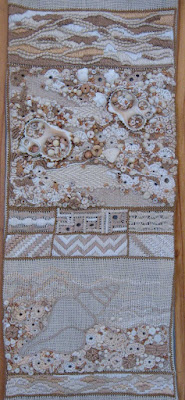
I have been asked for a picture of the Bone sampler section that I completed as a WISP last year. It was worked as part of the samples for the Sumptuous Surfaces class I offer.
Here it is. Click on the image and it will take you to a larger version. In the right hand area the magnify icon will take you to a larger version again.
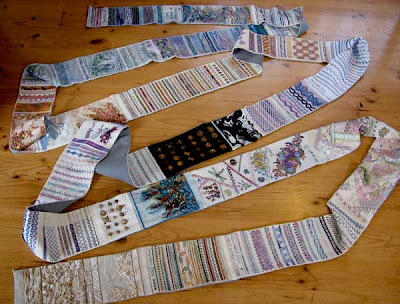
My band sampler is 6 inches wide because in my hand a 8 inch hoop feels the most comfortable. So the actual fabric is about 9 inches wide.
That said the current sampler is on a frame (which I wont show yet because it has the challenge stitch on it)
Having a slightly longer sampler and rolling it along as I go is proving very successful. Also I must admit the more people respond to this sampler the more I am stitching the current one. I just feel more inclined to pick it up.
If you are thinking about starting a band sampler with the idea of taking to an extreme (like mine is) width is important because it tis a choice you will live with for a long time. It really is about what feels right and if your sampler becomes addictive you will need to fell at total ease with the size. So my advice is to choose a width that feels right in your hand. Some hoop sizes will feel to big others will feel cramped. Try a few scrap cloths and just see what feels right.
As for fabric, I have used all sorts of fabrics. Mainly it is linen but here are sections that are Aida, Lynda, cotton, wool and even one section that is crazy quilting! Since the sampler is worked in sections that are joined together it gives lots of opportunity to try different fabrics
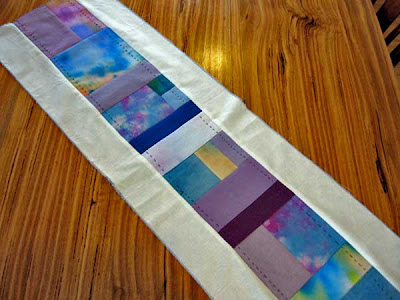
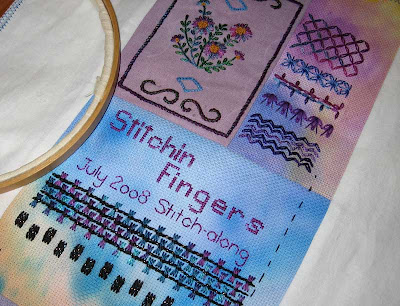
My latest sampler is of differing fabrics. I simply pieced together lots of different needlework fabrics to see what would happen how it would work up. Here is a picture of what I did.
This was taken mid year but you can see how I am working it. It’s proving great for trying out the same stitch or technique on different fabrics or simply bounding about from stitch to stitch and not getting tired of any one stitch. I have no idea how long this particular phase of the sampler will last but at the moment it is fun so I am doing it this way.
If you are thinking of starting a sampler and looking for a stitch guide to hand embroidery stitches, instructions are in my stitch dictionary 
Sampler FAQ and back story
For the full back story on this piece visit the Sampler FAQ.
All posts in the series are in the category the Love of Stitching Band Sampler.


Oh, WOW! I love embroidery – started learning from books in the campus library when I was in college in the late 80s, but it’s been a sporadic thing with me – I tend to jump around from hobby to hobby. I’m weaving right now, but also doing a little embroidery. Did a search for stitch dictionaries and found your site, and now I want to start my own band sampler! I think a 6 inch width is just perfect. Thanks so much for the inspiration!
The bone sampler is spectacular! All of your samplers are wonderful, but this one is amazing! I am not a sampler stitcher myself, but WOW. Thanks for sharing!
Sharon, Thank you so much for linking to my Flickr TAST page. Regards, Ruth P
the bone sampler section is too beautiful! I am very intrigued by the encrusted area and would like to learn how to this. time to take your class, it seems!
Hmmmmm… I am really intrigued by the idea of a band sampler. I love the fabrics you have crazy quilted together in the colorful sampler and I really really love the neutrals in you bone sampler. I might just consider playing with a band sampler for the Stitch Explorer – it seems like an appropriate medium for my goals for the challenge.