
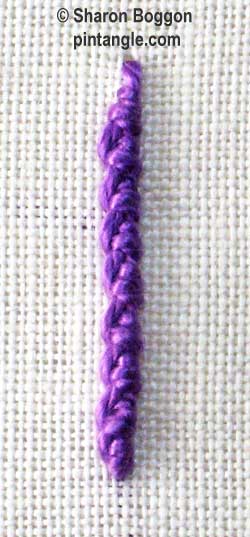
Portuguese Stem Stitch is also known as Portuguese knotted stem stitch.
This linear stitch is a variation of ordinary stem stitch that creates a knotted, rope-like line which can be accentuated by using a heavy solid twisted thread such as pearl cotton.
The advantage of this stitch is that just about anything stem stitch can do Portuguese Stem will do it chunkier! You can work it on even-weave or plain fabrics and it follows a curve well making it ideal for outlining shapes.
Try Portuguese stem stitch in different threads. I have worked Portuguese Stem Stitch in quite thick thread too, such as anchor soft cotton which is as thick as 5 ply wool. It is effective on heavy fabrics such as denim because it is a slightly heavy stitch, which seems to stand clear of the fabric. On the other hand, if you work it in a fine thread it can take on a delicate organic appearance.
How to work Portuguese stem stitch
I find Portuguese Stem stitch is best worked starting at the bottom and working towards the top.
Various books say to work from left to right but I do not do it that way. Try it the way the books say but if you find you are working in an uneven manner turn the work.
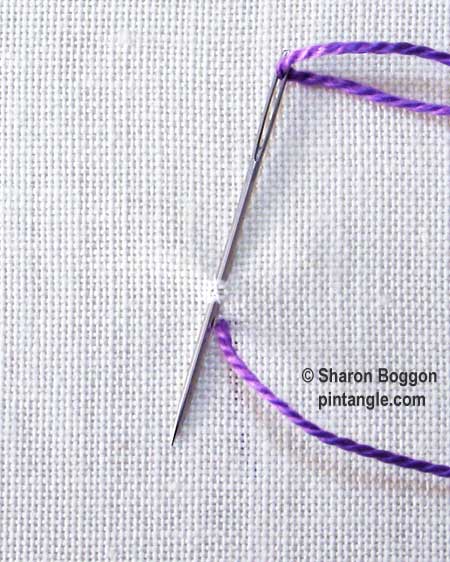
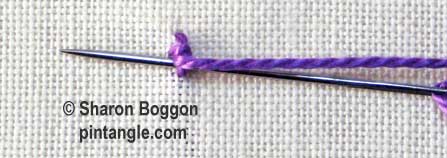
Bring the thread through from the back of the fabric and make a small stitch picking up a small piece of material as you would if you were working a stem stitch.
Bring the thread out to left. The first stitch should look like this.
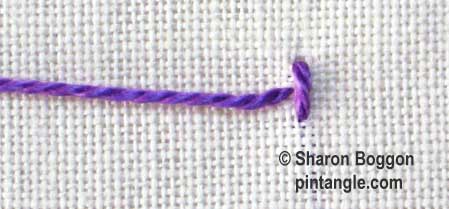
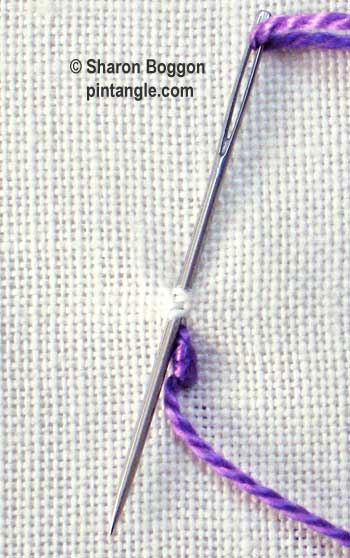
Take the needle and thread it under the first stitch. Make sure do not pick up any fabric.
You are actually whipping this stitch. It should look like this.
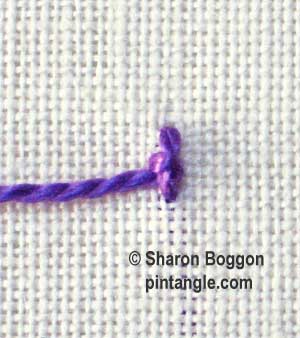
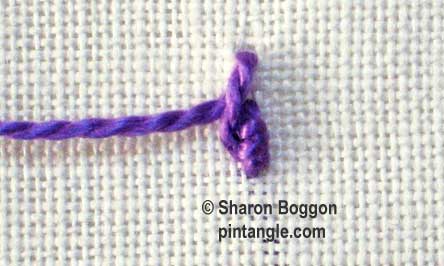
Whip the stitch a second time. These two whipping stitches form the knot like appearance.
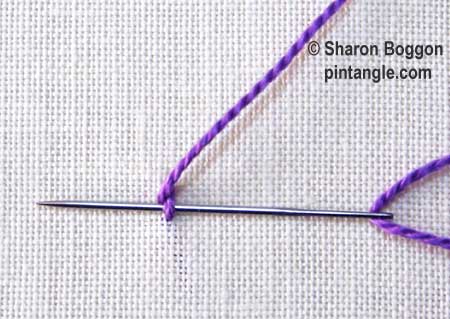
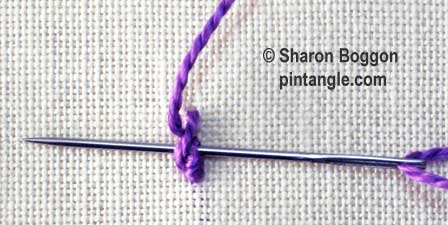
Move along the line and make a small stitch picking up a small piece of material as you would if you were working a stem stitch. Bring your thread out as illustrated.
Take the needle and thread it under the stitch. Once again you are whipping the stitch so make sure do not pick up any fabric.
Whip the second time and continue the row.
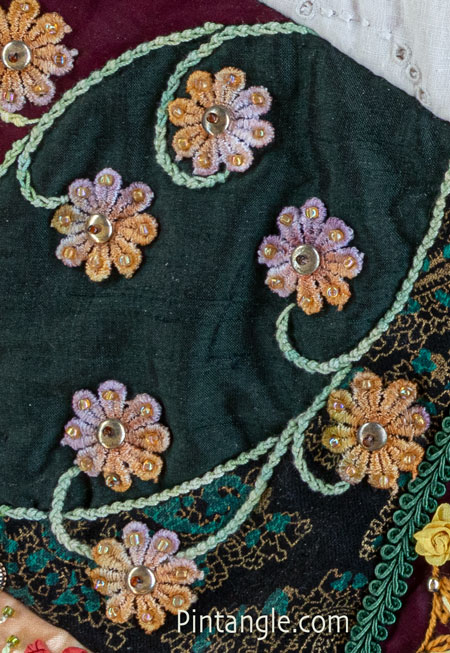
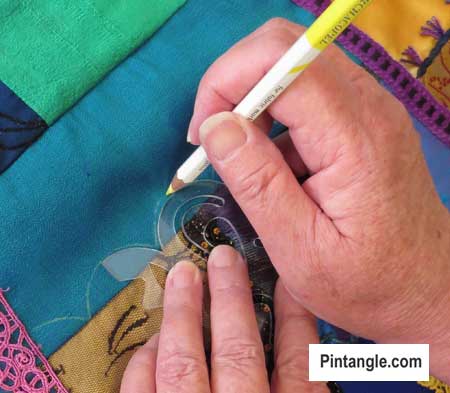
Here I used Portuguese stem stitch on a crazy quilt block. Using a water-dissolvable pen I traced the curves from my stitchers templates, then using a hand dyed cotton crochet thread I worked the lines in Portuguese Stem. I added the hand dyed lace flowers and secured them with beads.
Follow Pintangle and have it delivered to your inbox
You can have Pintangle delivered to your inbox — In the side bar use the Subscribe to Pintangle box or If you are on a mobile scroll to the bottom the of the page to find the Subscribe to Pintangle option. In either case type in your email address and click on the Subscribe button below. Then check your email inbox for a confirmation email and click the link to confirm your subscription. If you don’t see a confirmation email, check your spam folder — sometimes the computer puts it there.
Enjoy your stitching
Have you seen my Stitchers Templates?
Create your own designs with Sharon’s easy-to-use stitchers templates. Combine shapes to create hundreds of patterns and designs to embroider. It is the ultimate mix-and-match fun for stitchers of all skill levels. I created them to be as versatile as possible. I include four multi-patterned templates in each set. You will find them easy to use, totally clear to help you position them on your work, and they are nice and compact to fit in your sewing box. Each set comes with an e-book filled with patterns and designs that you can create and use as a jumping-off spot for your own designs. They are available now in our shop here!
Happy stitching!

Thank you for the tutorial of this new stitch. My trials of portuguese stem stitch is here.
http://hobbysewing.blogspot.com/2020/09/tast-4-beyond-tast-4.html
Here is my small sampler of stitches 56-60 http://berrybakewell.blogspot.co.uk/2013/08/tast-56-60-sailors-stitch-sailors-edge.html
I used the bullion buttonhole on my second pebble:
http://fat-quarter.blogspot.nl/2013/07/bullion-buttonhole.html
Here’s my line of Stitch #73: http://210920746822434353.weebly.com/1/post/2013/07/take-a-stitch-tuesday-2013-stitch-73.html
I really like this stitch although you can see I had some tension issues…
I used the buttonholed double chain in a project. I wrote about it here:
http://fat-quarter.blogspot.nl/2013/07/embroider-embellish-create-update-1.html
A most enjoyable stitch, but why do some call it Portuguese Knotted Stem Stitch, there is no knot in it?
http://queeniepatch.blogspot.se/2013/07/tast-73-portuguese-stem-stitch.html
http://stitchinfingers.ning.com/photo/tast-73-portuguese-stem-stitch
Hi Sharon,
I started this stitch sampler today-
http://jizee6687.wordpress.com/category/tast-2013/23-73-portuguese-stem-stitch/
Thank you,
Chitra
I wrote about my crested chain stitch here:
http://fat-quarter.blogspot.nl/2013/07/crested-chain-stitch.html
My samples for stitches 26 to 30 are at http://todayinkenogami.blogspot.ca/2013/07/take-stitch-tuesday_9.html
Here are my samples for this week – http://hokkaidokudasai.blogspot.jp/2013/07/tast-73-portuguese-stem-stitch.html
Thanks!
Thanks Sharon for these instructions! I really like this stitch and will try using it again!
http://princessbubblescreates.blogspot.ca/
This is one of my favourite stitches! Here’s my weekly post with old stitches with a link to my tutorial for a neat corner:
http://fat-quarter.blogspot.nl/2013/07/old-portuguese-stem-stitches.html
I’ve gotten weeks 6-11 done in the past couple of weeks: http://colorize.daisyw.net/2013/07/08/tast-progress/
Looking forward to doing this one. Here are my samples for TAST 70, and 72. Thanks Sharon.
http://linsartyblobs.blogspot.co.uk/2013/07/tast-7072-embroidery.html