

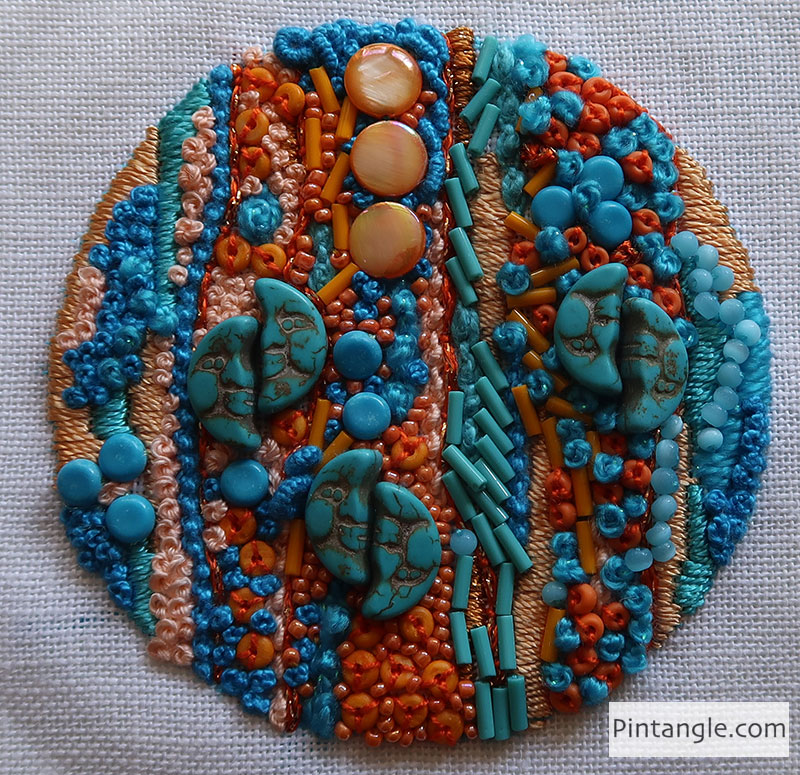
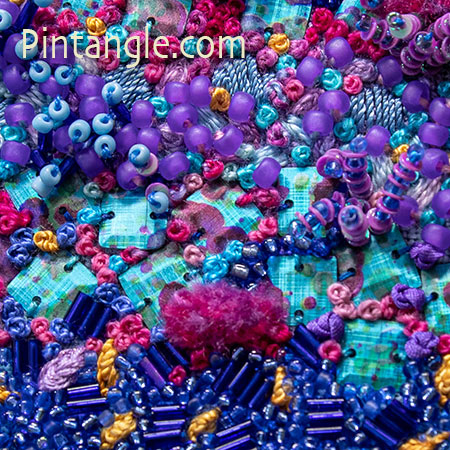
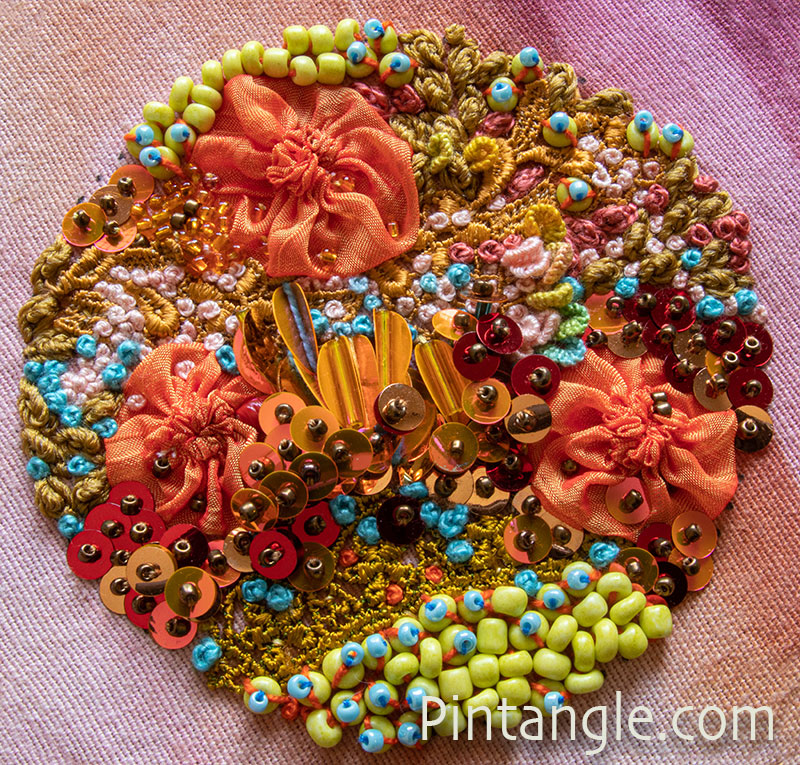
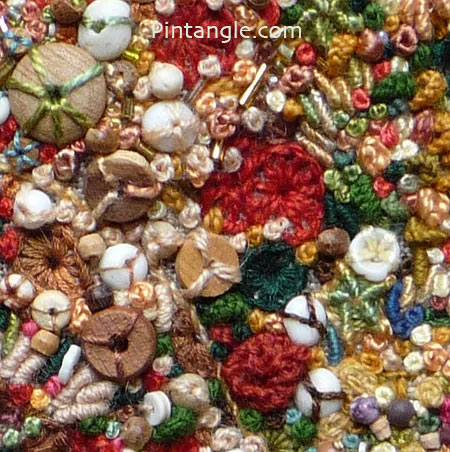
Encrusted embroidery is a contemporary embroidery technique where the fabric surface is encrusted with beads and stitches. You mainly see this style of embroidery worked in monotone creams, bone, and white shades but this technique can be worked in any colour. For instance, I recently completed this colourful piece.
Materials needed for encrusted embroidery
You can choose any sort of fabric to work this type of embroidery, but you do have to think ahead a little. Think about the type of stitches you are attracted to and want to use. Do you like surface embroidery only? Or, do you like the contrast between low relief flat areas of stitching, and the highly textured areas? If you like flat areas in the design how are you going to create that?
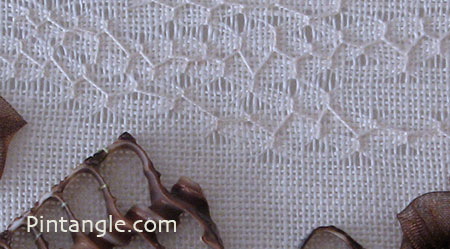
One option is to leave areas of the fabric empty of stitches. In some of my encrusted embroidery projects, I leave a silhouette shape blank and free of stitches. I enjoy playing with negative shapes a lot so over the years I have worked a few pieces playing with negative space. My Gecko panel was worked in the nineties!
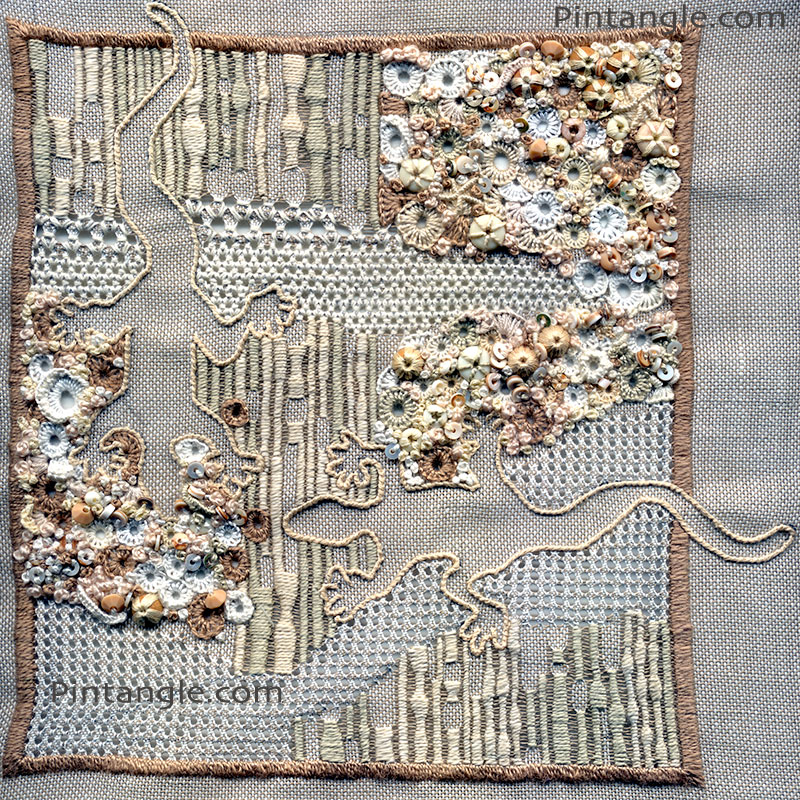
The other thing you can do is use a technique like pulled thread to create a contrast between flat areas and textured areas of your piece. In pulled thread embroidery, stitches are worked with the fabric under tension. As you work, you tighten the stitch with a little tug. The tug pulls the warp and weft of the fabric creating little holes that form patterns. I used pulled thread embroidery techniques in the Gecko panel in the photograph above.
Another type of embroidery you can incorporate into this style is canvas stitches. These stitches are often used in Needlepoint but these stitches can be easily worked on even-weave fabrics like linen. You can use Satin stitch and Padded Satin stitch as I did in my file cover which I wrote about here. I used pulled satin stitch in the Gecko panel above. When working encrusted embroidery, there is no reason why you can’t mix in other techniques and styles of embroidery. It is one of the fun aspects of this type of embroidery.

If you like the surface embroidery stitches you can choose just about anything such as quilters cotton, cotton, linen etc. But if you think you might like to work some of the flat areas using pulled thread stitches you need to choose a linen or needlework fabric that is suitable for a pulled fabric technique. I choose linen in a lower count. Usually, I choose 25-count Dublin Linen.
How to choose Thread for encrusted embroidery
My main two go-to threads are cotton perle #5 and Cotton perle #8 but apart from those, I suggest you try all sorts of threads. Experiment with thick, thin, metallic, ribbon, yarns, high gloss, and shiny, or dull. Today we have a huge range of textured and novelty threads often found in knit and crochet yarns. These can be couched to the surface of your embroidery. If you use a large variety of threads it means that your stitches will look interesting. Each person will be attracted to a particular range of threads and each person will use those threads in their own individual manner. Using a variety of threads in a piece in your own individual way helps develop your style. So don’t forget to have fun with threads!
How to choose Beads for encrusted embroidery
Choose a variety of beads and look for a range of sizes. I aim for 4 or 5 sizes. Apart from different colours look for unusual shapes, different textures, and materials. Look for matt and shiny too! With advances in technology, we have printed beads and sequins coming onto the market, so we now have the possibility of patterned beads too!
Stitches to use in Encrusted embroidery
Apart from couching to couch thick threads to your work, any of the textured stitches are good to use in encrusted embroidery. There are standard stitches for encrusted embroidery such as French knot, Bullion Knots, and Whipped Wheel but there are many more stitches that can add interest to your piece. Take a look at the tutorials in my stitch dictionary part of the site. Try stitches like Buttonhole Bars, Buttonhole Wheels, and Buttonhole Wheel Cup is fun as you tuck beads into the cup. Colonial Knot can be used as an alternative to French knots if you don’t like working them. Oyster stitches or Berry stitches are great and Woven Detached Chain Stitches produce great textures. Stitches like Cast on Stitch and Drizzle stitch are loads of fun. Ghiordes Knot or Turkey Knot produces a fuzzy surface which can be a total contrast to bright beads. Needlewoven Picot can be worked in long strips and twisted then secured to your work. For light areas don’t forget Seed stitch and Double Seed stitch. You could even use Freeform Cross stitch sprinkled with a few Woven crosses!
For stitches to use in the flat or less busy areas of your piece I have already mentioned pulled thread embroidery stitches or you can pull many of the surface embroidery stitches too. For instance in the demonstration below I use Cretan stitch and pull it. In my file cover, the bottom right-hand corner is Satin stitch and Padded Satin stitch. Filling stitches are another obvious choice such as Back Stitch Trellis. Other filling stitches are Diagonal Straight and Back Stitch, Wave stitch and Cloud Filling stitch. Lines of Interlaced Up and Down stitch look great. I recommend people take a look at Chinese Cross Stitch as it is a little-seen stitch but makes a wonderful fill. You can use many of the surface embroidery stitches to create patterned fills. I often say in my stitch directions that a line of stitches can be used row upon row to fill an area. Stitches like Herringbone and Closed Herringbone that when you work line after line of them they make a pattern. Crossed Buttonhole and Closed Buttonhole both look good worked row upon row. These and many more can all be used as a filling stitch and cover an area quite quickly. Follow some of the links here to tutorials and browse in the Stitch dictionary here on Pintangle. Take some creative time out for yourself and explore a few stitches. Some you will enjoy working others will frustrate you. Your choice of stitch is personal as they become like the marks you make and part of your personal style.
How to work an encrusted embroidery piece
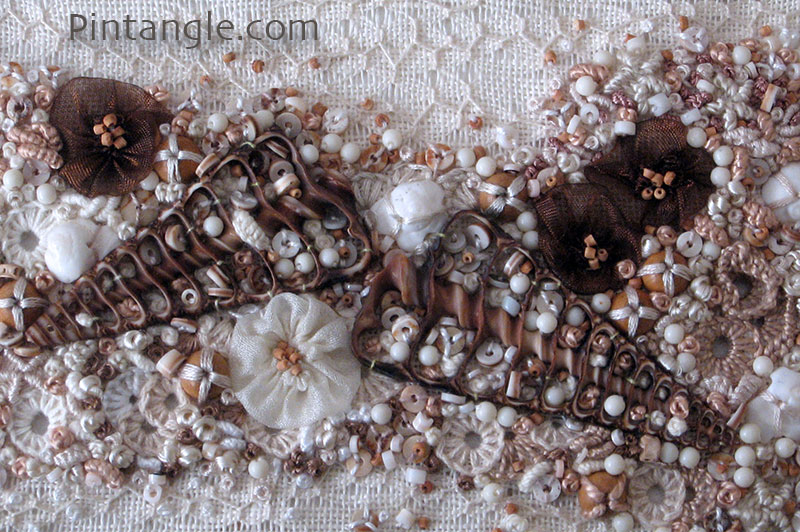
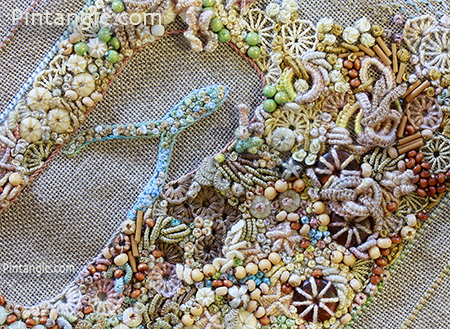
As a demonstration of this technique, I am sharing the steps I took to make this fabric postcard which was worked on Dublin 25-count linen.
Your first step is to mentally divide your piece into areas of high texture contrasted with areas of low flat stitches. If you have a heavily encrusted area of beading and stitches you need some areas that are quieter to act as a foil.
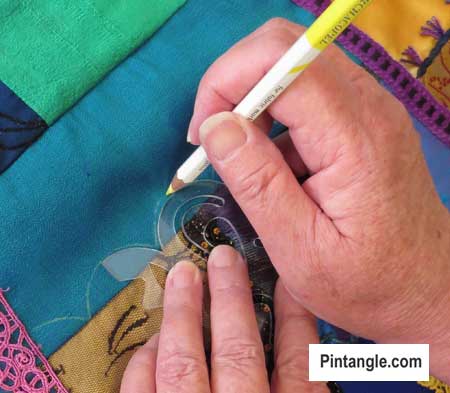
Define the edge of your piece. The first thing I do is to create a boundary. I do this because otherwise my eye takes in the whole hoop and the design expands as I stitch. So I create a line of stitching. In this case, it is a line of cross stitches but in other projects, I have used a line of tacking or basting stitches to act as my boundary. In other words, your boundary does not have to be an embroidered line if you don’t like the idea. Just have a temporary line of stitches so that you do not work over your edge. Any stitch or technique that will act as a boundary and contain the project is fine.
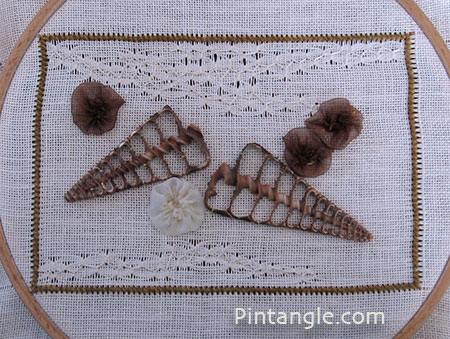
I divided the area into 3 bands. I wanted the middle band to be heavily textured and the top and bottom bands to be quieter. My quiet areas are pulled Cretan stitch worked using a cotton perle #8. It is Cretan stitch that has been tugged to ‘pull’ each arm of the stitch. I chose Cretan stitch because I felt it would look like a net and I was aiming for a beach theme.
The next thing I did, was to stitch in place a few points of interest. These are the large beads or things that will draw the eye. In this case, I used 2 pieces of sliced shell and some Suffolk puffs or Yo-Yos that are made of chiffon.
Once the main points of interest were established I had a few hours of fun tucking textured stitches and beads in and around the middle band across the fabric postcard. I just kept stitching until the area was covered! I mainly used a mix of Buttonhole Wheels, Buttonhole Wheel Cup, Bullion Knot, French Knot, Cast on Stitch, and Whipped Wheel stitch. I used a mix of threads some thick some thin, some bright, and some dull. Apart from the sliced shells, the beads are half-round wooden beads, broken shells, shell heishi beads, wood seed beads, glass seed beads, and plastic 4mm round beads.

Tips and things to think about when doing encrusted embroidery
If you are wanting to try this style of stitching, my tips are to think about density and how close together your stitches are. You can pack them tightly together to create interesting textures or space them further apart and let the background fabric show through to create a lighter, more airy, feeling. You can layer stitches on top of each other to build up rich and intricate surfaces.
When layering stitches think about the thickness of your thread. For instance, working a thin thread over a thick thread can be interesting. The other interesting contrast is working a thread with a high sheen or a metallic thread under a more plain thread like wool. I actively encourage every stitcher I meet to be adventurous with threads. Don’t be afraid to use and incorporate different threads into your design.
Changing the scale of your stitches will add visual interest to your work. If stitches are all the same size it can visually flatten the area.
This is a really enjoyable type of embroidery to do so relax and have fun!
And don’t forget, if you have any questions, just ask in the comments below and I’ll see what I can do to help out 🙂
If you want to see other instances of this style of working take a look at my
Summer Seaside an Encrusted Embroidery wall Panel
From Studio Journal Design to Embroidery
Follow Pintangle and have it delivered to your inbox
You can have Pintangle delivered to your inbox — In the side bar use the Subscribe to Pintangle box or If you are on a mobile scroll to the bottom the of the page to find the Subscribe to Pintangle option. In either case type in your email address and click on the Subscribe button below. Then check your email inbox for a confirmation email and click the link to confirm your subscription. If you don’t see a confirmation email, check your spam folder — sometimes the computer puts it there.
Have you seen my Stitchers Templates?
Create your own designs with Sharon’s easy-to-use stitchers templates. Combine shapes to create hundreds of patterns and designs to embroider. It is the ultimate mix-and-match fun for stitchers of all skill levels. I created them to be as versatile as possible. I include four multi-patterned templates in each set. You will find them easy to use, totally clear to help you position them on your work, and they are nice and compact to fit in your sewing box. Each set comes with an e-book filled with patterns and designs that you can create and use as a jumping-off spot for your own designs. They are available now in our shop here!
Happy stitching!

Hi Sharon, Years ago I took a class from you, in Connecticut. I often tell friends about your looong sampler which went all around the room on the tables set up in a horseshoe shape. Do you have any pictures of that sampler?. I remember you would roll it up when you were traveling. Cant remember just how long it was. Im not able to do much sewing now but like to “relive” some moments.
HI Nark great to hear from you – I have a page that has photos and if you follow the links photos of each section
https://pintangle.com/faq-pages/sampler-faq/
have fun browsing!
Hi Sharon, I love your bead soups so many colours. Im wondering, is there a particular way to sew the actual beads on to the fabric? Do you sew them on individually or a few at a time, what about when you have one on top of another? If I come up through the bottom of the bead and down the side, or, if it’s lying down and I go through the middle, sometimes they end up too loose or too high and they skew.
Hi Kerri – I stitch a bead at a time even with the small seed beads. I use a hoop so the fabric is under tension and I make sure the stitching is snug. This is worth another tutorial post – with photos of what I do. Hopefully this is helpful for the moment.
Yes, thank you. I need to redo some of the beading on my Pintangle sampler as the beads don’t sit well or have come loose, however I didn’t sew them on individually so I’ll try that.
Sharon ,
Just wanted to let you know how fast delivery is coming of your marvelous new bead Soups. I ordered on September 20th, and just three short days later, they have already landed at New York, USA customs for clearance! So excited, won’t be long before they arrive in New Jersey. Thank you again for offering these generous mixes.
Thanks Marianne we try and get the orders out the door as soon as possible and Ausie Post has its good and bad days but have got better in the last few years. I hope you have them soon!
Oh, my! These are beautiful, Sharon, the sort of pieces you can spend hours studying and still see something new!
Thanks Triche pleased they are worth as second look
Thanks Sharron for sharing this. I have long admired your crusted embroidery. You’re giving me the itch to try some for myself!
Jacki give it a try – the reason I write stuff like this is to temp people! So try it and for me it’s then mission accomplished.