
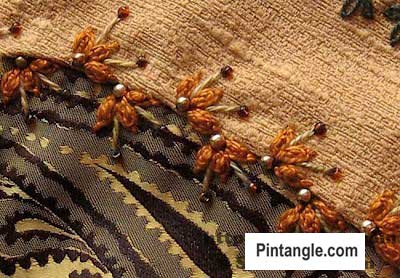
The Oyster stitch is a member of the chain stitch family, and although it looks complex, it is not difficult. Oyster stitch is also very versatile, as you can often adapt it to use in situations where you would use chain stitch. It creates a textured, slightly raised stitch that is fun to work and adds variety to your hand embroidery. When worked in a line, Oyster stitch becomes Knotted Cable Chain stitch. You can also work a beaded variety. I wrote a tutorial on Beaded oyster stitch here.
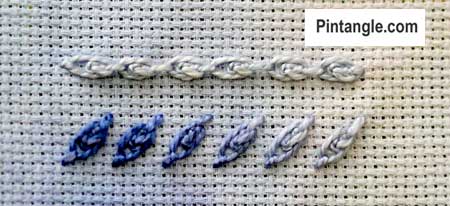
Step-by-step instructions on how to do Oyster Stitch
You start Oyster stitch with a twisted chain stitch.
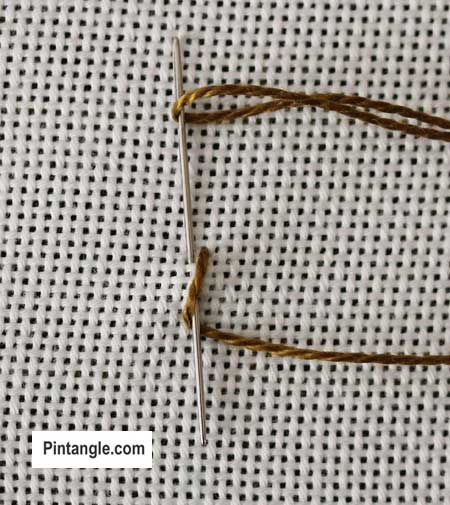
Commence by bringing the thread to the front of the fabric, insert the needle, and take a bit of fabric with the tip pointed downwards. Wrap the needle as you would a twisted chain. In other words, cross the working thread over the needle, then wrap the thread under the needle.
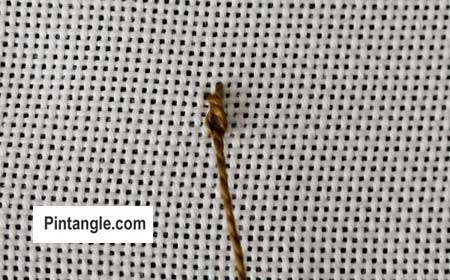
Pull the needle through the fabric to create a twisted chain stitch. Pull your working thread snug until the loop lies flat, but not so tight that it pulls on the fabric.
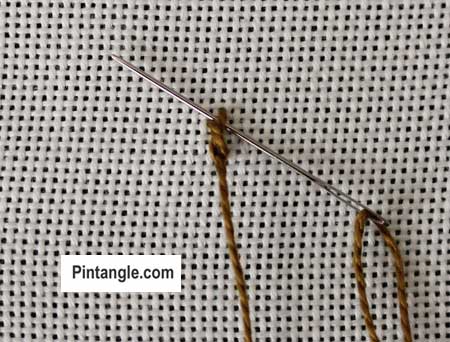
Pass the needle under the right-hand top thread above the loop that has formed. Slide the needle through without picking up the foundation fabric.
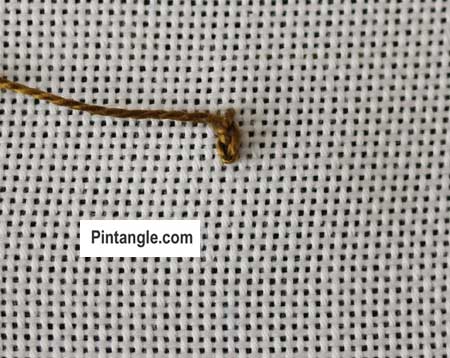
Pull the thread through.
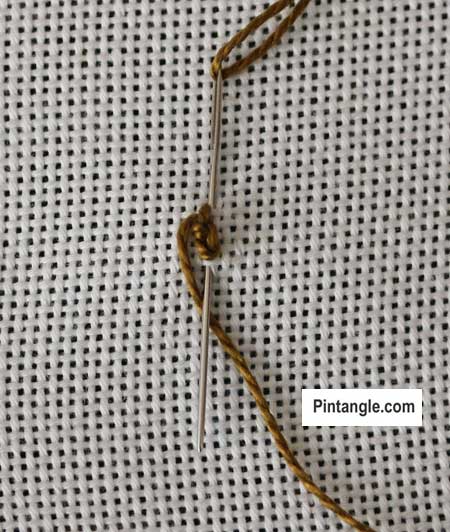
Insert the needle through the fabric at the top of the stitch, with the needle pointed downwards, slide it behind the knot so that the needle exits the cloth at the base, as illustrated.
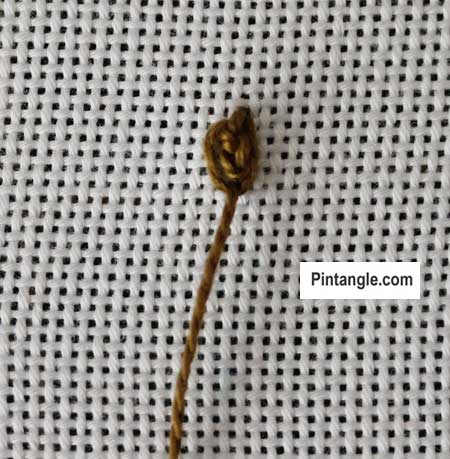
Loop the thread under the needle (as you would for a chain stitch) and pull the needle through. Tie it off by taking your thread to the back of the fabric, as you would a detached chain stitch.
Here is a video tutorial on how to work Oyster stitch
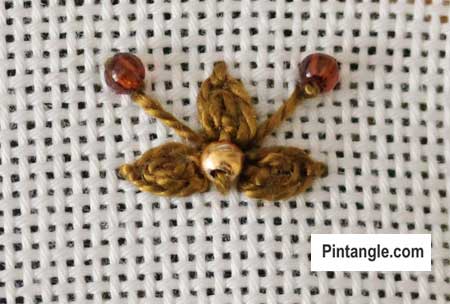
Oyster stitch can be used as buds in floral motifs or worked in a circle with the stitches pointing outwards to create flowers.
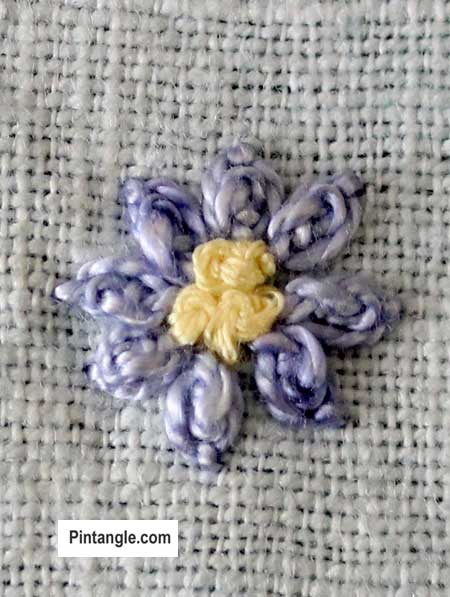
If you extend the last tie-off stitch that secures the chain to a long straight stitch, you have another variety.
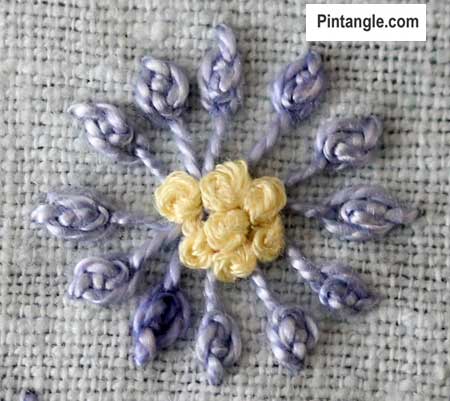
You can make these point toward the middle of the circle, or outwards to create daisy and flower-like motifs.
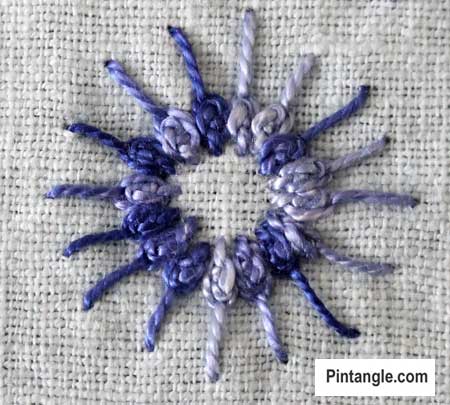
I worked these samples using a variegated cotton perle #5 thread.
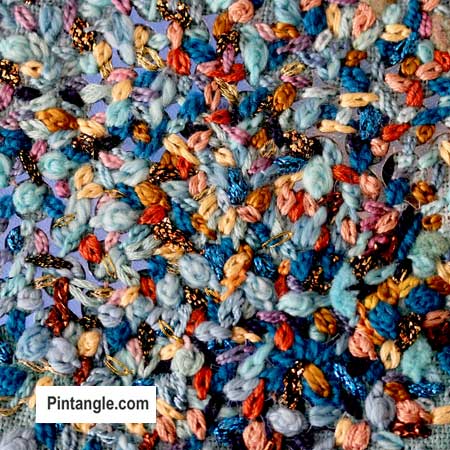
It has a highly textured appearance, so sprinklings of this stitch in contemporary work produce a knobbly relief, particularly when worked in a thread with a good twist or a fine ribbon.
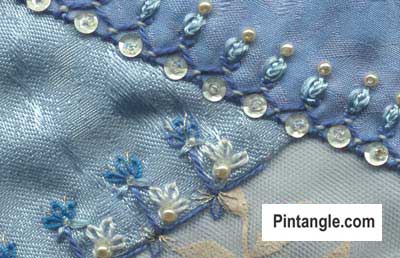
And of course, it is great for crazy quilting.
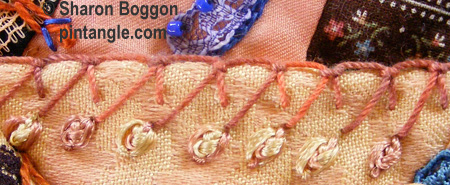
Here I worked the seam using a hand-dyed cotton thread that is the same thickness as perle #5. I used Up and Down Buttonhole stitch at the bottom of the ‘arms’, then worked Oyster stitch in rayon ribbon floss that was hand-dyed. This crazy quilt seam detail comes from block 77 in the I Dropped the Button Box series. You can see that block here
I hope you enjoy the stitch!
 Follow Pintangle and have it delivered to your inbox
You can have Pintangle delivered to your inbox by using the subscribe feature in the sidebar. Enter your email address, and when you get the confirmation email, make sure you respond to be all set!
If you are on a mobile or tablet, scroll to the bottom to find the subscribe feature.
Thread Twisties!
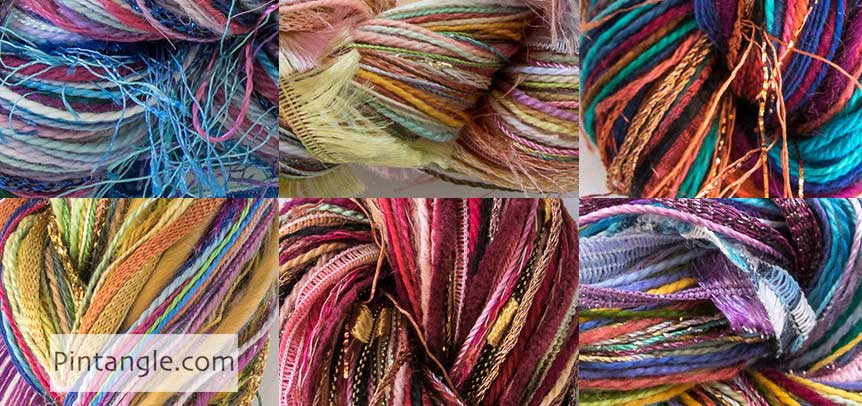
Experimenting with different threads can be expensive. You would normally have to buy a whole skein of each type of thread. My thread twisties are a combination of different threads to use in creative hand embroidery. These enable you to try out stitching with something other than stranded cotton. For the price of just a few skeins, you can experiment with a bundle of threads of luscious colours and many different textures.
These are creative embroiderers’ threads. With them, I hope to encourage you to experiment. Each Twistie is a thread bundle containing silk, cotton, rayon, and wool. Threads range from extra fine (the same thickness as 1 strand of embroidery floss) to chunky couchable textured yarns. All threads have a soft and manageable drape. Twisting them around a needle makes experimental hand embroidery an interesting journey rather than a battle. Many are hand-dyed by me. All are threads I use. You may find a similar thread twist, but no two are identical.
You will find my thread twisties in the Pintangle shop here.

I was hesitant to try this before. But after reading your guide, I gave it a go and it worked! I appreciate the detailed steps. It made everything less intimidating. Great article!
Sharon is this tutorial upside down I love the oyster stitch
Thankyou
Hi Denny No the tutorial is not upside down – why do you ask?
I come in brom the bottom I need to practice your way ,thankyou si much
This was a great stitch to learn. Thankyou.
My trials are posted here.
http://hobbysewing.blogspot.com/2020/09/tast-19-beyond-tast-19.html
Sharon. That looks a really useful stitch – very many thanks. Hope all is well at your end.
Best wishes
Andy LW
HI Andy I hope you and yours are well too – take care
2018 TAST Stitch #39: https://www.thecrafties.com/2018/12/tast-roundup-3/
I need to play with this one more – I can see a lot of options with designs and borders!
-C
Used the oyster stitch for sunflowers on a fall project: https://chasehandcraft.com/2018/11/10/oyster-stitch-tast-39/
Sharon, I don’t believe you’ve ever met a stitch that was not “quick and easy to do.” I don’t think I would have known about oyster stitch without TAST. Thanks.
JOWynn you make me laugh -I sort of have my favourites and I guess I share them most but I do have moments where I think “this stitch is annoying or frustrating”
I agree with you..I too have never known this..Thanks to TAST, I am enjoying the new stitches introduced weekly.
The oyster stitch is so pretty. There are so many things to create with it. I will set down and try it today. I imagine it will look more impressive with a good thickness of thread. You open up so many creative juices with your tutorials. Thank you. patty
HiPatty pleased it has got the creative juices going!
Finally finished with my July Stitches. Take a look at
http://sparemomentstitching.wordpress.com/2012/10/03/july-tast-and-cqjp-in-september/
voici mon point de cette semaine
Here’s my complete failure with the oyster stitch:
http://harvestmoonbyhand.blogspot.com/2012/07/take-stitch-tuesday-oyster-stitch-week.html
Even though others had success and can do the stitch beautifully, mine look rather pathetic.
So, if there’s anyone who struggled with this stitch…you’re not alone. Take comfort in your work by looking at my examples.
The oyster stitch is difficult, I’ve found myself having to cut the thread after doing a knot with it, but it is still beautiful 🙂
This time I have two weeks in one so I could catch up more easily, but I’m still one week behind.
http://fanaticalseamstress.wordpress.com/2012/08/02/punto-vasco-y-punto-ostra/
Here is my Oyster stitch sample.
http://eclecticlamb.com/2012/08/02/week-30-oyster-stitch/
I’ve finally posted on my blog about trying Oyster stitch. I’ve been a bit lax about leaving comments on here about my blog recently because I’ve been so busy and everything’s been done in a rush. I’ve been just about keeping up with the stitches, as long as I keep them simple. http://kirajones.co.uk/?p=835
I stitched a swirl on one of my samplers and I used it on a project I’m working on:
http://fat-quarter.blogspot.nl/2012/07/oyster-stitch.html
Just in time for the next stitch!
This was a great stitch to do. So much texture. My sample is on my blog here: http://dinkydideequilts.blogspot.com.au/2012/07/oyster-stitch.html
I finally got the hang of this stitch. It wasn’t easy but once I figured it out I was good to go. Blogged about my experience here with my step by step photos for lefties.
http://therosejournal.blogspot.com/2012/07/for-lefties.html
Blogged here: http://airynothing.net/Blogs/anblog/2012/07/29/tast-oyster-stitch-catch-up
I stitched the Oyster stitch on my Crazy Quilt block for July (CQJP) and also variations of the stitch on my Stitch Journal page. All can be seen at the following link.
http://free-form-stitching.blogspot.co.nz/2012/07/tast-oyster-stitch-crazy-quilt-project.html
Thank you Sharon for introducing me to another stitch that I have not tried before.
I finally did my oyster stitch sample.
You can find it here:
http://cantheleopardchangeherspots.blogspot.com/