Herringbone Square Stitch is a variety of Herringbone, as it is simply Herringbone worked in a square. Don’t let its simplicity deceive you. You can work it as an isolated motif stitch but it is a great stitch to arrange in patterns so that it becomes an interesting filler.
You can work it on plain or even weave fabrics but if you use a plain fabric you will need to mark with small dots the insertion points of the needle in order to work this stitch square.
How to embroider Herringbone Square Stitch
Follow the steps illustrated as this is herringbone worked in a square.
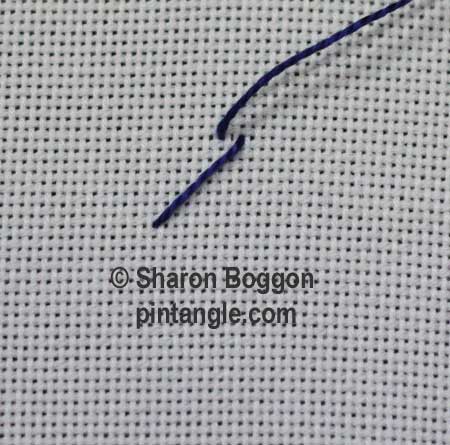
Start on the left-hand side of the square and take your needle diagonally up and, pointing your needle towards the left, make a small horizontal stitch as illustrated. This is the first corner of the square.
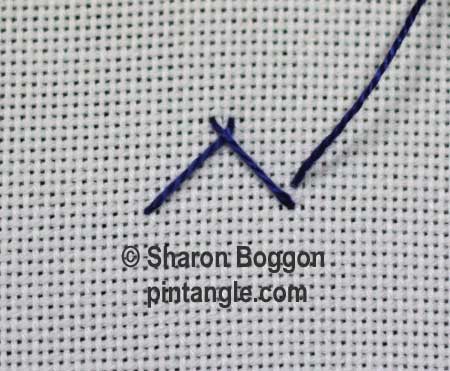
Take your needle diagonally down and, pointing your needle upwards, make a small vertical stitch as illustrated. This is the second corner of the square.
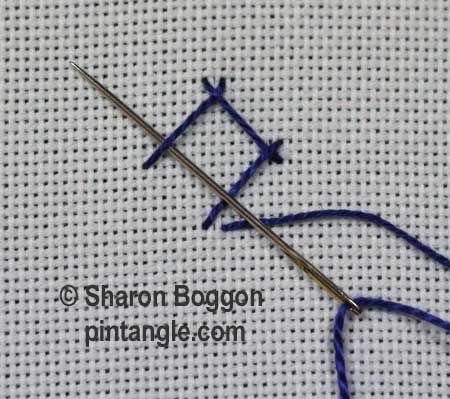
To make the third corner of the square, take your needle diagonally downwards and, pointing your needle to the left, make a small horizontal stitch as illustrated.
You make the last bar of the stitch by passing the needle under the first stitch. This underpass is important to be able to do many of the lacing stitches so don’t forget it!
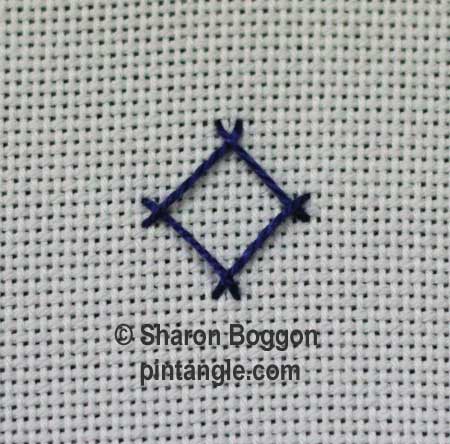
How to work Laced Herringbone Square Stitch
The second stitch is one of the many varieties of Laced herringbone. I have seen this stitch referred to as Square laced herringbone, laced square herringbone, and square herringbone accent stitch, but I call it Laced Herringbone Square.
You can work it on plain or even-weave fabrics as an isolated stitch or arrange them in patterns. It is particularly interesting to experiment with threads. The lacing process does not involve many passes of the needle through the fabric. This frees you up to try all sorts of thicker threads for the second stage of the stitch. You can also tie this stitch off with a bead which adds zest to a piece if needed.
If you have trouble with tension when lacing, and the work puckers and pulls, work this stitch, use a hoop or frame. The lacing is quite firm. It is the tension of the lacing that gives the stitch a different appearance.
Use a tapestry needle for the lacing stage so that you do not split the thread.
Begin with a square.
Work a herringbone square to form the foundation bars for this stitch
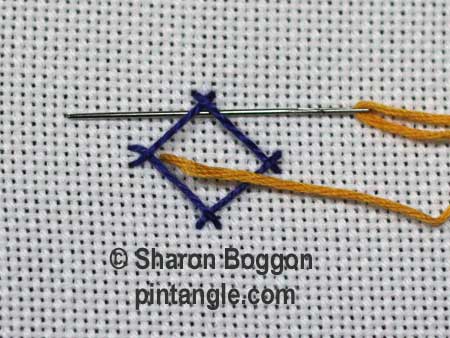
Bring your needle up through the fabric on the bottom left-hand inside corner of the stitch. Pass your needle under the crossed foundation bars of the top corner of the square from right to left. Do not go through the fabric as you are lacing, not stitching.
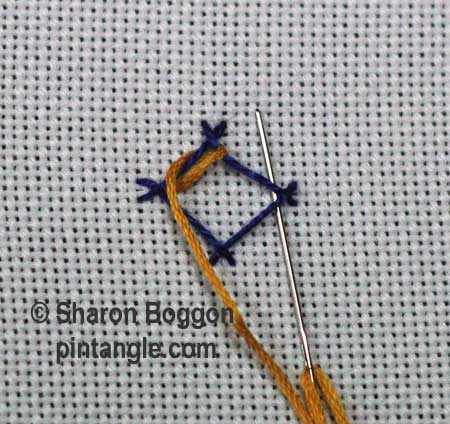
Move to the right-hand corner, angling the needle from bottom to top, and pass the needle under the crossed foundation bars.
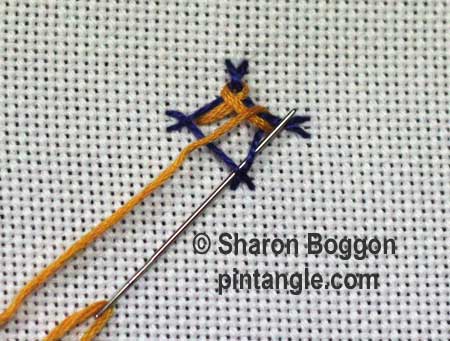
Then move to the bottom corner and pass the needle from left to right under the crossed foundation bars.
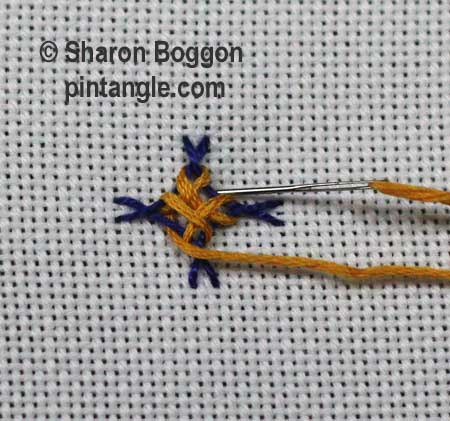
Move to the left corner where you started and pass the needle from top to bottom under the crossed foundation bars.
Now secure the stitch with four crossed straight stitches. To do this, insert your needle as illustrated into the fabric between the top corner and right corner of the square. Make a straight stitch across the laced square.
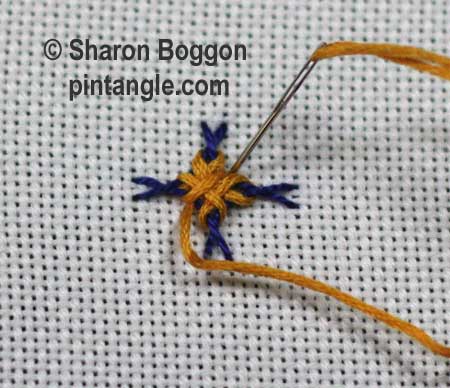
Repeat the straight stitch so you have two straight stitches worked diagonally across the lacing.
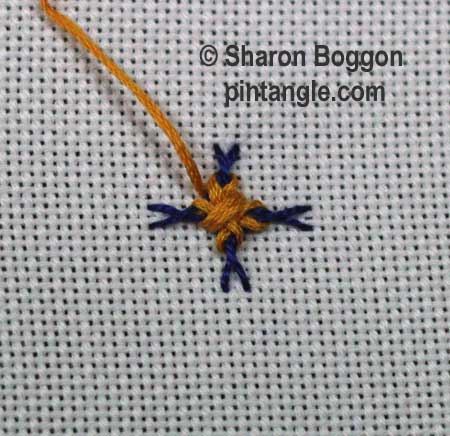
Bring your needle out between the top corner and left corner as illustrated and work two diagonal stitches to complete a double cross stitch.
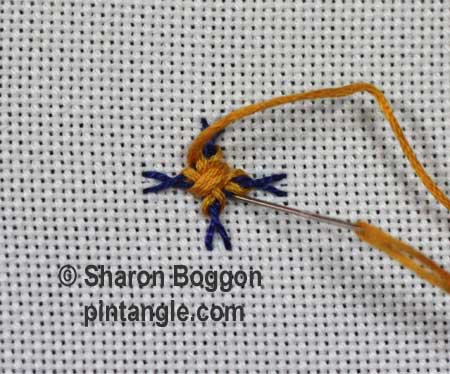
With the second straight stitch, the stitch is complete.
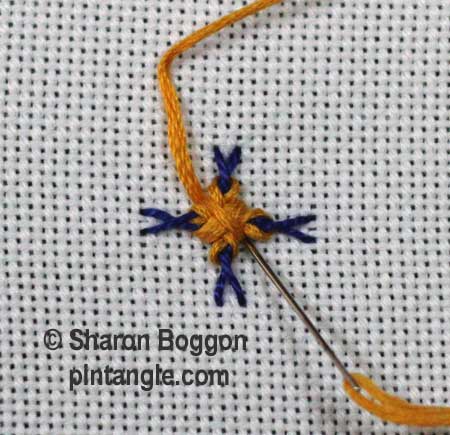
This is what the completed stitch looks like.
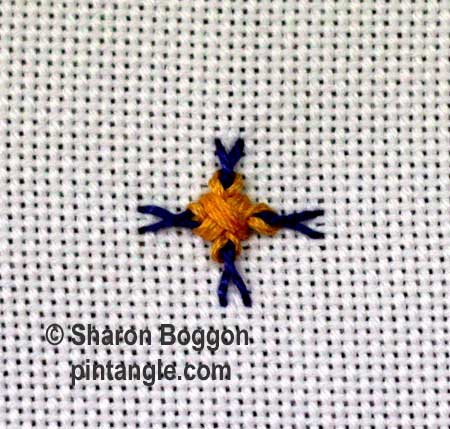 Note
Note
There are two documented versions of Laced Herringbone Square that treat these final crossed stitches in different ways. In some cases, these crossed stitches are laced with the needle passing diagonally under the laced foundation stitches. Other sources have the needle passed through the fabric as I have done. I prefer to go through the fabric as it makes the stitch sit proud on the fabric. And, if it is used on a project like a purse, for instance, the stitch does not catch as much. However, like all situations, there are exceptions, because if I have a thick interesting thread I then lace the stitch. In other words, I don’t take it through the fabric in the final wrapping stage.
My book for creative stitchers
If you enjoy my site you will gain real value from my book: Creative Stitches for Contemporary Embroidery: Visual Guide to 120 Essential Stitches for Stunning Designs
Feeling stale? Wondering how to add sparkle to your embroidery? I have aimed Creative Stitches for Contemporary Embroidery to be suitable for both beginners and seasoned embroiderers. It introduces techniques to encourage your creative interpretations of stitches. I guide you towards discovering play-points in your embroidery by varying the height and width; by stacking stitches; or by filling multiple rows with the same stitch. With creative variations and demonstrations of tiny tweaks, You will be ready to head off down your own creative path and, of course, illustrated with plenty of eye candy!
Please note if you buy one of my books via this link as an Amazon Associate, I earn from qualifying purchases.


Thankyou for the stitches. My samples are here.
http://hobbysewing.blogspot.com/2020/11/tast-44-beyond-tast-44.html
2018 Stitch 26 (Laced) Herringbone Square at https://www.thecrafties.com/2018/10/tast-roundup/
2018 stitch 26 – I included a herringbone square on my TAST pennant: https://www.thecrafties.com/2018/02/tast-herringbone-stitch/
Hiya Sharon,
here’s my effort for the Design Challenge, and the TAST stitches it involved of course. I hope you like it.
xx Liz xx
http://thethreadbear.blogspot.fr/2013/03/laced-herringbone-square-and-design.html
Here are three TAST stitches #53, 54 and 55:
http://queeniepatch.blogspot.jp/2013/03/lagging-behind-tast.html
http://stitchinfingers.ning.com/photo/tast-stitches-53-54-55?context=user
Here is my attempt to satisfy the challenge: http://210920746822434353.weebly.com/1/post/2013/03/the-first-challenge-for-tast-2013.html
I used laced herringbone square, detached chain, French knots adn backstitch (although the latter sometimes devolved into stem stitch…)
A bit late posting my effort… here is a school of laced herringbone fish…
http://www.flickr.com/photos/thestitchsmith/8508946164/in/photostream
My 4 mini-challenge stitches are part of the textile vase a wip.
http://www.flickr.com/photos/36140279@N03/8504147070/in/photostream
hello,
here are my attemps for the square herringbone stitch.
http://pierrespapiersciseaux.blogspot.fr/2013/02/tast-53-carre-au-point-de-chausson.html
I have another ideas for the next stitch and come back here when it is done.
Opp’s forgot to add my blog address.
http://pippaquilts.blogspot.co.uk/
I have caught up again so here is my tries at 51, 52, 53, 54.
Have been thinking about the challenge and how to gel 4 stitches together.
Hi Sharon,
A few samples of laced square herringbone samples are worked here-
http://jizee6687.wordpress.com/category/tast-2013/06-54-laced-square-herringbone/
Thank you,
Chitra
Here is my little sample for the stitches 52 and 54:
http://dufall.blogspot.com/2013/02/tast-point-52-53-et-54-sharon-nous.html
Hi Sharon,
Another pin cushion.
Blog – http://carorose.typepad.com/my_weblog/2013/02/tast-2.html
Flickr Group -http://www.flickr.com/photos/carorose/8498073575/in/pool-56846286@N00/
Have a nice week.
Carolyn
Hi Sharon & Friends,
My post for the stitch #53. Thank you all.
http://www.embroiderland.blogspot.com
Good evening everyone,
Well, I’ve got stitches 53 and 54 done. Now unto the challenge.
Take care,
Mary
http://theworkingneedleandpen.wordpress.com/2013/02/21/thursday-21-february-2013/
Hi Sharon,
I have started this stitch sampler by working square herringbone in rows.
http://jizee6687.wordpress.com/category/tast-2013/05-53-square-herringbone/
thank you,
Chitra
I’ve added some laced square herringbone to the armadillo I’ve been making. great stitch
http://playfulstitching.wordpress.com/2013/02/20/laced-herringbone-square/
I’m planning to start the extra challenge too.
I’ve been looking forward to this design challenge and will be taking part – unless health prevents, but there’s a long time to work it, so should happen.=)
Here is my take on Herringbone Square and Laced Herringbone Square: http://210920746822434353.weebly.com/1/post/2013/02/2013-take-a-stitch-tuesday-stitches-53-and-54.html
and I think I have an idea for the challenge as well… Still working out how it will look.
I have to finish my February book page first, but then it’s time to play with the last 3 TAST stitches. I already have an idea which way to go with the design challenge too.
Here’s my weekly post with an old square herringbone variation:
http://fat-quarter.blogspot.nl/2013/02/from-square-herringbone-to-stem-stitch.html