
Adapting stitches, pattern making and discovering what is possible with a single stitch is one of my joys in life. This has been an ongoing quest as regular readers will know. A stitch can do so much more than simply be a line of stitches. With a little imagination, your stitches can become patterns, textures and decorative surfaces that are entirely your own.
Pattern making has always been at the heart of textiles. Throughout history, makers have used repeated motifs and stitches to decorate cloth, and create beautiful surfaces. Many embroidery books introduce stitches as a single line. While these stitches are lovely on their own, they become even more exciting when you begin setting them into patterns and adapting stitches.
This idea opens up endless design options which I also explore in a video on my YouTube channel.
Building Patterns Row Upon Row
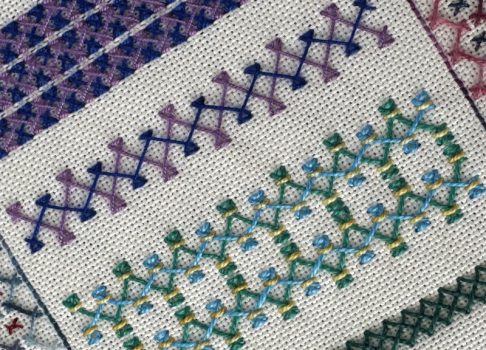
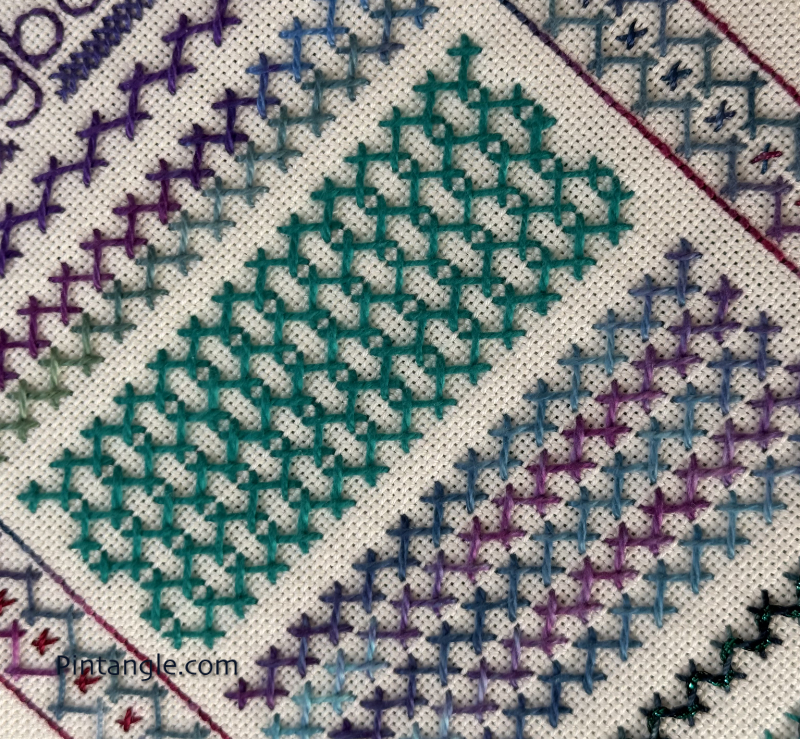
Repetition is a simple method to create a pattern and adapt stitches. By working the same stitch again and again across an area in orderly rows, you can build rich, decorative surfaces that are full of rhythm and movement.
Adapting stitches works with both simple basic stitches and more complex versions of the stitch. Here, Herringbone Stitch is worked Row upon Row. The top block stitched in green thread is offset. The bottom block worked in a variegated purple blue thread is row upon row.
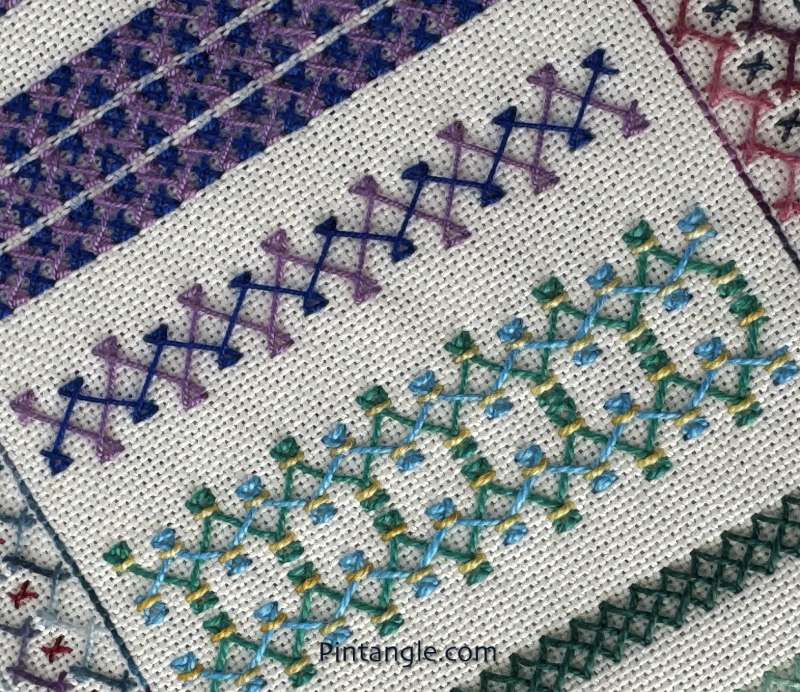
In this photo tied double Back stitched Herringbone is worked row upon row to create a pattern.

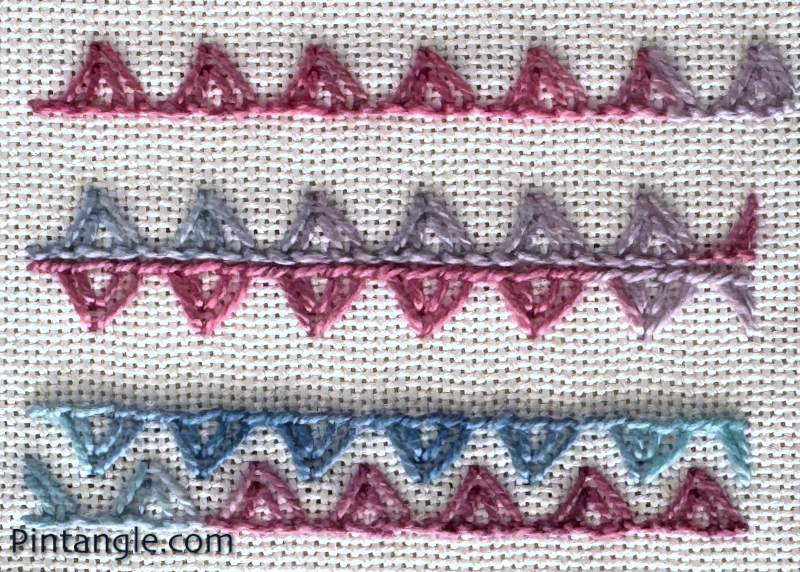
Play with Height and Scale
For instance, if you look at this sample of Buttonhole stitch the first line is made from blanket stitch which is the same stitch as buttonhole only spaced apart. This is followed by a line of buttonhole stitches. These two lines are your basic stitch which you often see represented this way in various embroidery books. If you look at the second two lines of the sample you will see blanket and buttonhole stitches that change their height. Each stitch is stepping up by one or two threads to the peak, and then downwards to the valley. The only thing that has changed is the height of the stitches, yet by adapting stitches it creates a pattern. The 5th line of stitches also creates a pattern of two short and two long stitches. It’s surprising how many different effects you can achieve simply by altering the size of the stitch.
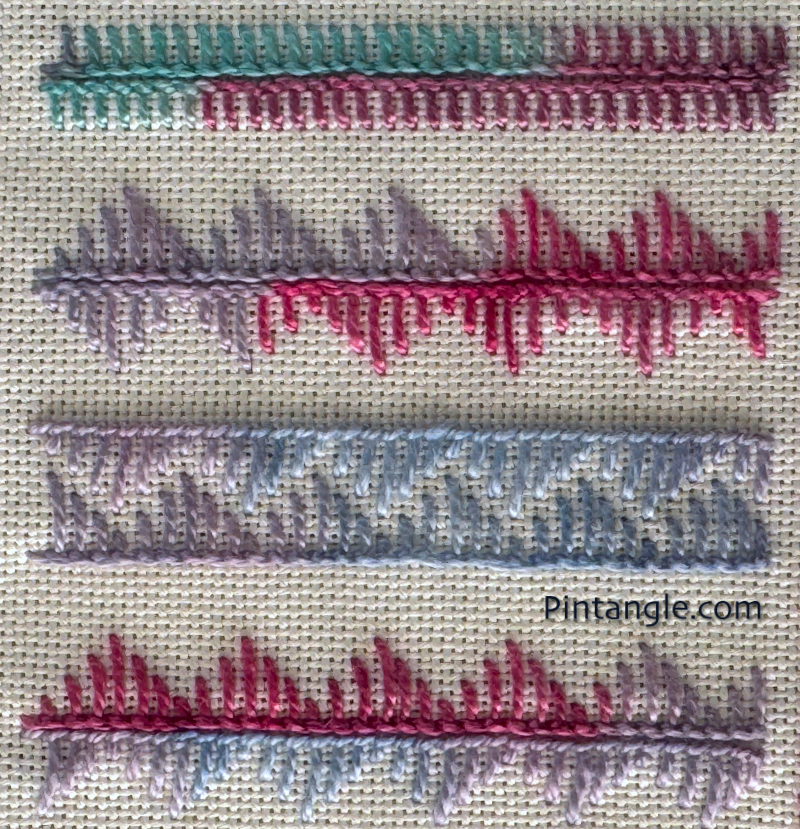
Work Rows Back to Back
Many stitches also work beautifully when arranged back-to-back. Spacing and Height changes make a difference. In this sample, the top row is built up from regular Buttonhole stitches worked back to back. Notice the spine of the stitched line is created by the base of the buttonhole stitches. The second line is two rows of Buttonhole. I have changed the height of the stitches, and worked them back to back.
Try Face-to-Face Rows
A favourite way to develop a pattern is to mirror every second row so that the stitches face one another. This will create a structured and decorative pattern. I worked the third line of the sampler face to face which creates a strong band.
Offset the Rows
Another easy design trick is to offset each row slightly. To do this you work the stitch either back to back, or face to face, and move the second row of stitches along the line by half a stitch. You can see offset buttonhole in the last line of the sampler above.
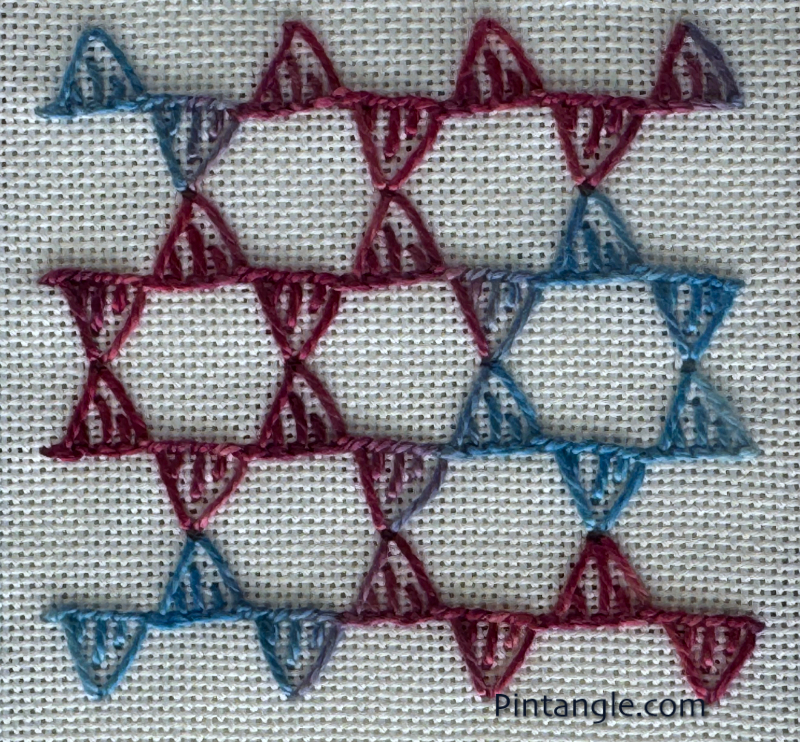
In this sample, I have worked a variety of buttonhole called Double Closed Buttonhole. (You will find instructions for this stitch in Creative Stitches for Contemporary Embroidery Volume 2.) In the first line you can see a line of Double Closed Buttonhole. For the second line, I worked two rows back-to-back; and the third line is made up of two rows worked face-to-face.
Give Yourself Permission to Play
The best part of making patterns is that there are no fixed rules. Here I have set up a pattern by alternating a variety of Closed Buttonhole which you will find in Creative Stitches for Contemporary Embroidery Volume 2. I also show you how I arranged this stitch in my video above.
Start with one familiar stitch and see what happens. Here both bands of Double Chevron stitch on the sampler are the same, except that for the top band I added a tiny accent stitch of a small red cross. It is very easy to introduce different colours, different threads or beads. One simple stitch can generate dozens of unique patterns.
This kind of exploration is one of the most rewarding parts of developing your own embroidery style. Rather than following someone else’s pattern, you’re creating your own visual language—one stitch, one row, and one playful experiment at a time.
Why I’m So Excited About This
If you’ve been following along for a while, you’ll know I have a new book coming out: Creative Stitches for Contemporary Embroidery Volume 2.
One of the reasons I wanted to write this second volume is that I know how much creative potential lies within a single stitch. It’s easy to think of stitches as something you simply learn and reproduce, but they’re really starting points or jumping off points for exploration.
Like the first Creative Stitches for Contemporary Embroidery, Volume 2 is a stitch reference book designed to encourage this kind of experimentation. It introduces 114 new surface embroidery stitches, giving you an even larger vocabulary to work with when developing your own ideas and designs.
Both books include clear, step-by-step instructions for both left- and right-handed stitchers, supported by detailed photographs, so whichever hand you use for stitching, you can learn each stitch with confidence.
My hope is that these books become more than stitch dictionaries. I hope they become creative companions—resources you’ll return to whenever you’re looking for inspiration or wondering, “What would happen if I tried this stitch another way?”
Every new stitch is another opportunity to play, experiment and create patterns that are uniquely your own.

Playing is such an important part of embroidery for me!
Thanks Rachel
I’m new to ‘just doing stitches’ – I do play with fabric paints machine embroidery various simple hand stitching on my piece of work – have tried a ‘sampler’ – wasn’t overwhelmed tho’ – I enjoy making books and boxes – …. and the ideas and suggestions from you and your books have really interested me – my winter project is to make a large square book and using a stitch – make pages of samples – think I’ve worked out in my mind how to make sure it will work as each page will be heavy – so now tho’ my garden is crying for me to attend to it – thank you for your ideas. Joan Powell
Hi Joan the fabric book sounds really fun to make and a great idea – I run a group on Facebook that is for people who make fabric books – if you are on Facebook you may enjoy it – here is the link https://www.facebook.com/groups/1968574283398317 if you apply answer the three questions -they are there to help me keep the spam bots at bay