

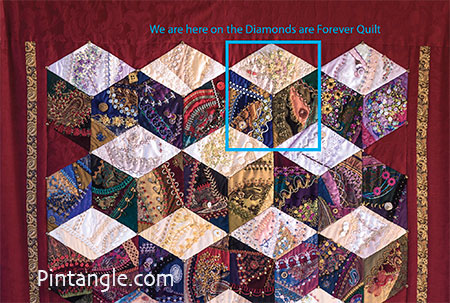
The third tumbling block for the Crazy quilt stitch along is to be found in the top right hand corner of my Diamonds are Forever Crazy quilt. I have included a photo of the quilt and marked the block so people get a sense of where they are headed.
The quilt is on the front of two of my books: The Visual Guide to Crazy Quilting Design and my new book Crazy Quilting for Beginners Handy Pocket Guide. You do not need my books to join in on this stitch along but I strongly recommend that you have at least the pocket guide, if not the full Visual Guide to Crazy Quilting Design.
You can download the pattern for the diamonds that make up the third tumbling block for the Crazy quilt stitch along. Here is light tone diamond 1, mid tone diamond 2, dark tone diamond 3. The pdf file is to scale, but it has no seam allowances. Be sure to set your printer to print to the actual size. Do not use the ‘fit to page’ option as it will reduce the diamonds by half an inch or so. When you print them out, they should have 6-inch sides. I advise you to use Acrobat as a PDF reader (its free).
In the last month people have been sharing their blocks in the facebook groups. They look fantastic and I am having a wonderful time over my morning coffee, commenting and generally having a good old sticky beak at what people have done. There is some fantastic work being done and even if you are not participating in the stitch along it’s worth following along just to see some of the innovative stitching that is going on.
Tips Third tumbling block for the Crazy quilt stitch along
Last month I shared a number of tips for working with crazy quilt blocks. If you want to re-read them the article is here. This month the key issue for some people is piecing curved seams. You can of course just straighten the seam as this will not change the balance or number of fabrics in the block. This is an easygoing, freeform style of quilting so don’t stress so much you don’t enjoy it. The idea is to have fun. If you are keen to learn how to do the curved seams take a look at Curved Foundation Piecing – A tutorial which is written by Allison Aller
In Crazy Quilting there are No Rules!
I am getting emails asking if it is OK to do this or that. You can adapt play re-interpret as you see fit. I am not get huffy about any of it. It is OK paper-piece the block, or just roughly follow the pattern and use the sew-and-flip method. When it comes to adding embroidery and beads you can follow what I have done, or adapt my ideas. relax and have fun. Embellish the blocks as you see fit. That is the key — to relax and enjoy yourself.
With this series of stitch along articles is to give loads of tips along the way but these are my way of doing things — you may meet other crazy quilters who have developed different ways of working. If what they do appeals try their method. Being different is OK as Crazy quilting celebrates invention and creativity.
The light toned diamond on the third tumbling block
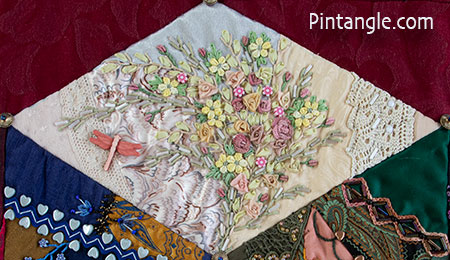
The light toned diamond on the third tumbling block is another block where a large spray of Silk ribbon embroidery covers the seams on patches 1, 2 and 3. In the pattern I have marked the placement of various flowers. The stitches I used were Fargo Roses, Bullion knot roses and Cast On stitch roses. The yellow daisies are small lace motifs. The foliage is made of Feather stitch worked in hand dyed cotton perle #5 with bugle beads added between the forks of the stitches. On some of the foliage stems I have used a silk ribbon leaf stitch which you will find on page 133 of my book The Visual Guide to Crazy Quilting Design. Detached chain stitches are also used as foliage. Bullion Knot rose buds wrapped in a fly stitch are dotted about the spray too.

The seam between piece 3 and 4 is covered with some vintage lace and I used the same trick for the seam between pice 1 and 5.
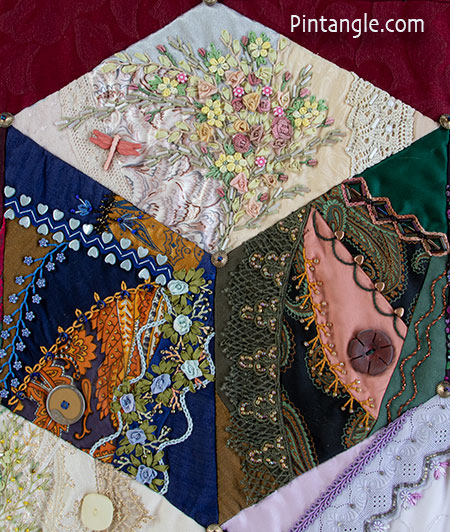
The mid toned diamond
There is much more individual seam stitching and embellishment on the mid toned diamond on the third tumbling block. There are also more patches!
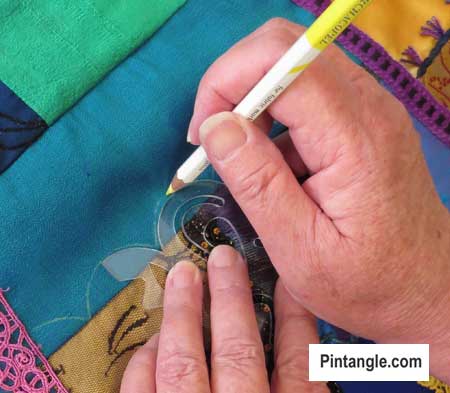
At the top of the diamond you can see a zigzag line of chain stitch. I created this by using my stencils by first marking the block using a quilters white pencil then stitched over the line in Chain stitch. The little diamond shapes are filled with bugle beads.

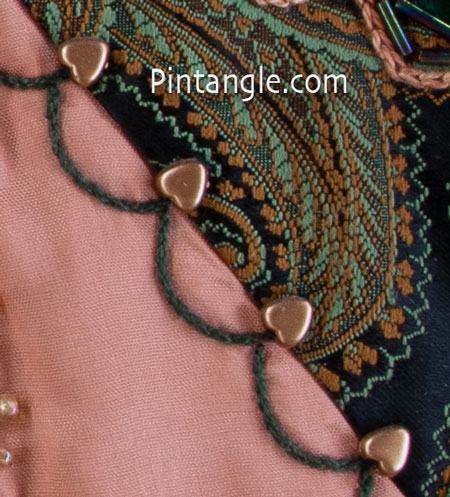
Using my stitchers templates again, with a quilters white pencil I marked out the scallops on the side of the seam between piece 1 and piece 3. I then stitched over the line in Stem stitch using a perle #8 thread. I added a little heart bead at the top of each scallop.
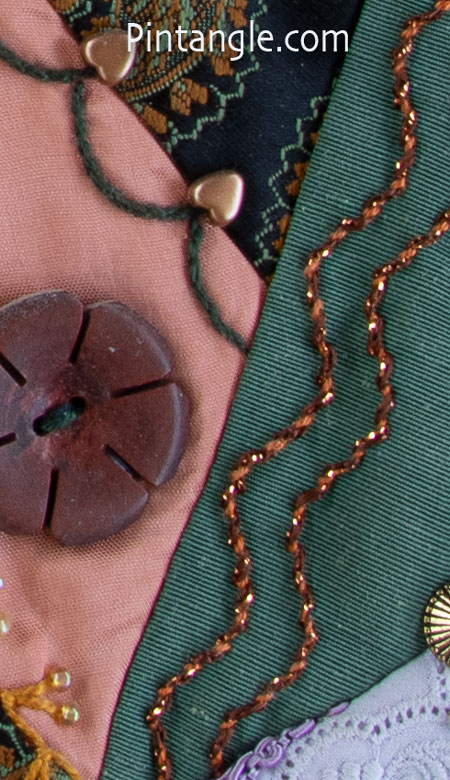
On Piece 5 I once again marked out the wavy line using my stitchers templates. The lines are whipped Running stitch, worked using two threads, The first is a cotton perle #5 in a brown orange colour that is then whipped using a brown metallic thread.
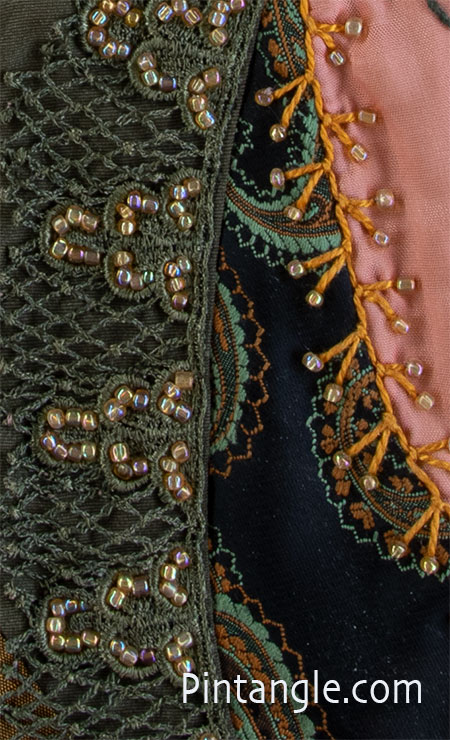
Between Piece 1 and 2 I used a cotton perle #5 thread to work a line of Alternating up and down buttonhole. I then topped the arms of each buttonhole with a seed bead. I used the same seed beads to embellish the lace that covers the seam between piece 2 and 3.
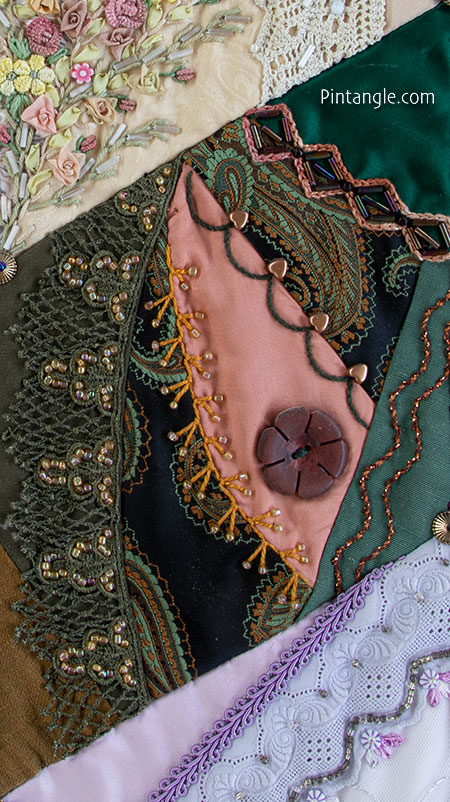
The dark toned diamond
The Dark diamond on the third tumbling block of this quilt, is actually quite bright! The orange and blue is a combination that jumps out when you look at the block individually but once it was set in the quilt it behaved itself quite well.
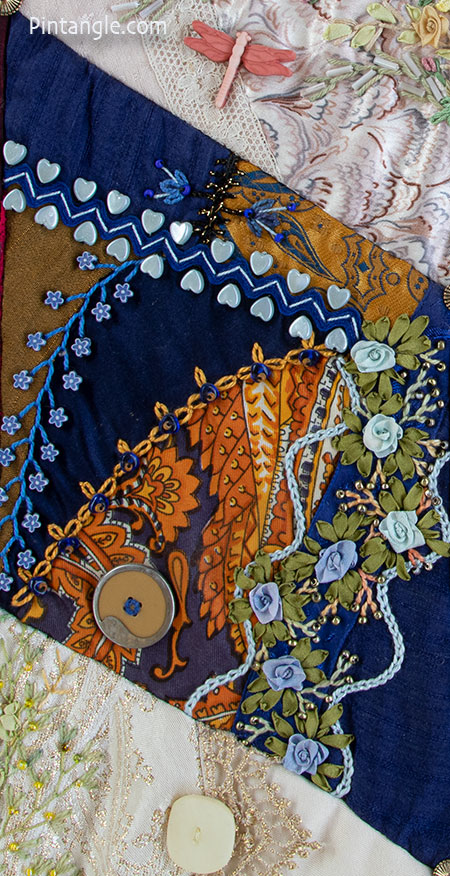
One detail that disappears is the embroidery between piece 1 and 2. It is a short seam of back to back Buttonhole stitch, worked in a black metallic thread which I would not recommend as it was the devil to work with. The seam was further embellished with motifs of 3 Detached chain stitches arranged in a fan shape with straight stitches between them. These are then finished off with a seed bead.
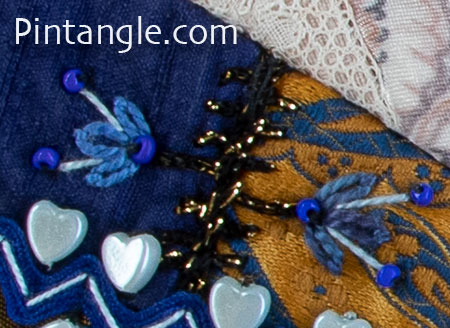
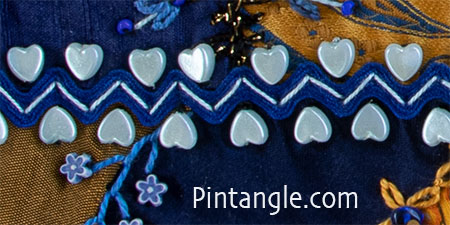
Pieces 1 and 2 form a seam that buts up against pieces 4 and 5. This seam was embellished by covering it with blue ric-rac. Using a cotton perle #8 thread I worked a line of Arrowhead stitch before adding the heart shaped beads.
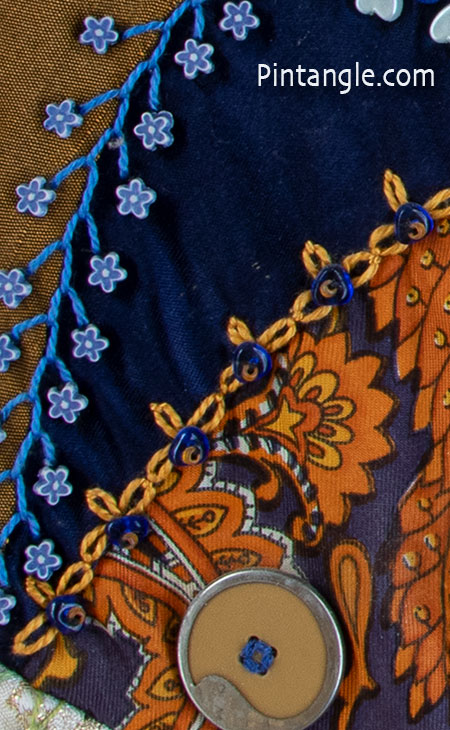
The seam between piece 6 and 3 was first covered with a dark blue ribbon. Along each side of the ribbon I used a quilters white pencil to mark the wavy lines using my stitchers templates as a guide. I then worked Detached chain stitch to cover the line. Down the length of the ribbon I worked small silk ribbon motifs made up of Fargo roses. Foliage is silk ribbon leaf stitch which you will find on page 133 of my book The Visual Guide to Crazy Quilting Design and Feather stitch.
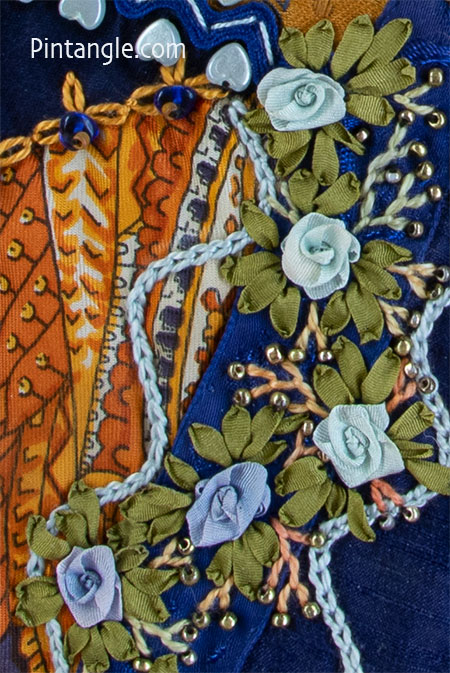
Finally the last 2 seams are embellished with Feather stitch. The little blue flowers are plastic beads. The other seam was embroidered with sets of 3 Detached chain stitches worked using a cotton perle #5 thread. Beads were attached to the middle of each set.
I hope you enjoy stitching these diamonds for the third tumbling block in this series. Here is light tone diamond 1, mid tone diamond 2, dark tone diamond 3. Don’t forget that the pdf file is to scale, but it has no seam allowances.
If you are stitching along please share what you do in either of the Crazy Quilt Divas and/or Crazy Quilt International groups on Facebook.
The quilt is on the front of two of my books: The Visual Guide to Crazy Quilting Design and my new book Crazy Quilting for Beginners Handy Pocket Guide. You do not need my books to join in on this stitch along, but I strongly recommend that you have at least the pocket guide, if not the full Visual Guide to Crazy Quilting Design.
Previous blocks in the series
Guidelines and general information about the series:
Tumbling Block 1;
Tumbling Block 2;
Tumbling Block 3;
Tumbling Block 4;
Tumbling Block 5;
Tumbling Block 6;
Tumbling Block 7;
Tumbling Block 8;
Tumbling Block 9:
Tumbling Block 10:
Tumbling Block 11:
Tumbling Block 12:
Tumbling Block 13:
Tumbling Block 14:
Tumbling Block 15:
Tumbling Block 16:
Tumbling Block 17:
Tumbling Block 18:
Tumbling Block 19:
Tumbling Block 20:
Tumbling Block 21:
Follow Pintangle and have it delivered to your inbox
You can have Pintangle delivered to your inbox — In the side bar use the Subscribe to Pintangle box or If you are on a mobile scroll to the bottom the of the page to find the Subscribe to Pintangle option. In either case type in your email address and click on the Subscribe button below. Then check your email inbox for a confirmation email and click the link to confirm your subscription. If you don’t see a confirmation email, check your spam folder — sometimes the computer puts it there.
April 13 will be the next tumbling block in this series.
Have you seen my Stitchers Templates?
Create your own designs with Sharon’s easy-to-use stitchers templates. Combine shapes to create hundreds of patterns and designs to embroider. It is the ultimate mix-and-match fun for stitchers of all skill levels. I created them to be as versatile as possible. I include four multi-patterned templates in each set. You will find them easy to use, totally clear to help you position them on your work, and they are nice and compact to fit in your sewing box. Each set comes with an e-book filled with patterns and designs that you can create and use as a jumping-off spot for your own designs. They are available now in our shop here!
Happy stitching!

Is the crazy quilt, tumbling blocks quilt a long published in it’s entirety, somewhere? It is gorgeous!
Brenda you encountered the latest post in this stitch along series. I started it this yer – so we are three tumbling blocks along. The 4th block will be published April 13 – basically I publish a block on the second Thursday of the month. The whole quilt will eventually be published this way so you are well and truely in time to catch up.