
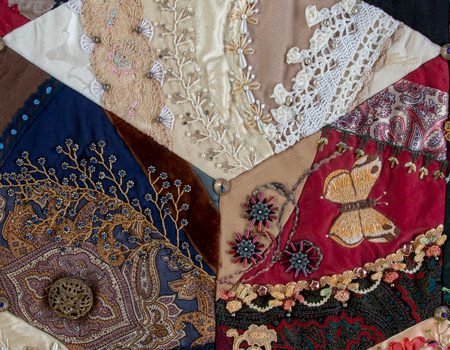
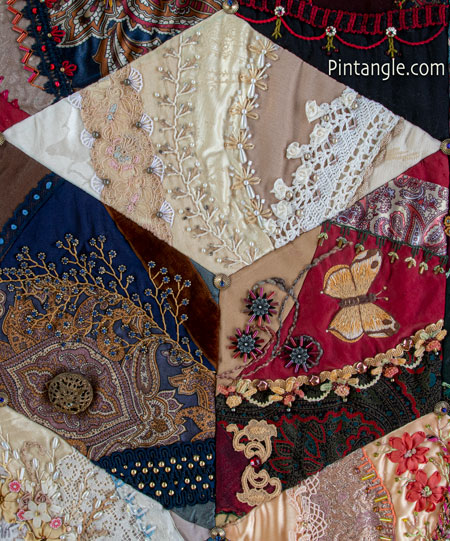
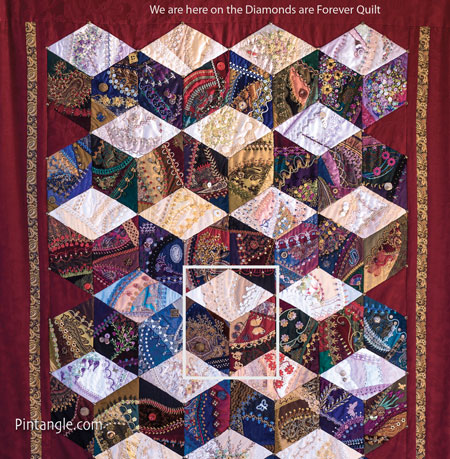
Tumbling block 13 sits in the middle of the third row down on the ‘Diamonds are Forever‘ quilt.
You can download the patterns for the three diamonds that make up the block. Here are the light tone diamond , the mid tone diamond, and the dark tone diamond.
Just to remind you — the PDFs have NO seam allowances but are to scale. Set your printer to print to the actual size. Do NOT use the ‘fit to page’ option as it will reduce the diamonds by half an inch or so. When you print them out, they should have 6-inch sides. So I advise you to use Adobe Acrobat™ as a PDF reader (it’s free).
When embellishing, feel free to follow what I have done, OR adapt my ideas to your liking. Embellish the blocks as you see fit and have fun and there are no rules in Crazy Quilting!
Tips for Tumbling Block 13
As you stitch keep beads away from the edge of the diamond and give yourself a generous seam allowance. When you piece the diamonds into blocks you will break your sewing machine needle if it hits anything hard.
As usual, stitches mentioned in the article are linked to tutorials usually in the stitch dictionary so people can know how to do them.
When foundation piecing your diamonds try and make sure that you don’t have a seam ending at one of the points of the diamond. When you come to piecing your diamonds into blocks you don’t want to be dealing with bulky diamond tips or corners.
If you need a tutorial on curved piecing take a look at a tutorial written by Allison Aller. You can find Curved Foundation Piecing here.
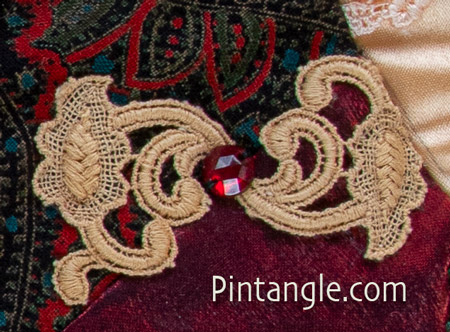
Light toned Diamond

The PDF for the Light toned Diamond Tumbling block 13 is here.
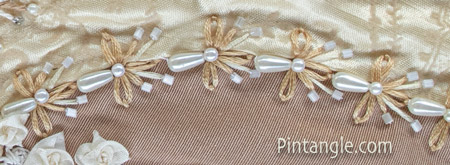
Probably one of my favourite seam embellishments is on this block between patches 1 and 2. This is simply an arrangement of 3 Detached Chain stitches and straight stitches with a thin teardrop bead and a small pearl bead. The straight stitches were then topped with seed beads. So it is simple quick and always delights me.
to cover the seam between patch 2 and patch 3, using cotton perle #5 thread, I worked a line of Alternating Up and Down Buttonhole stitches. Between the forks of the Up and Down Buttonhole stitches, I added a straight stitch also in cotton Perle #5. Then I topped all the ‘arms’ with seed beads.
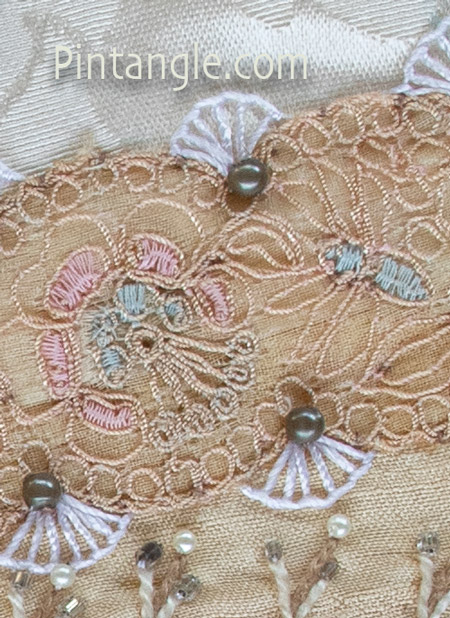
Along the edge of vintage lace, I added half Buttonhole Wheels worked in cotton perle #5
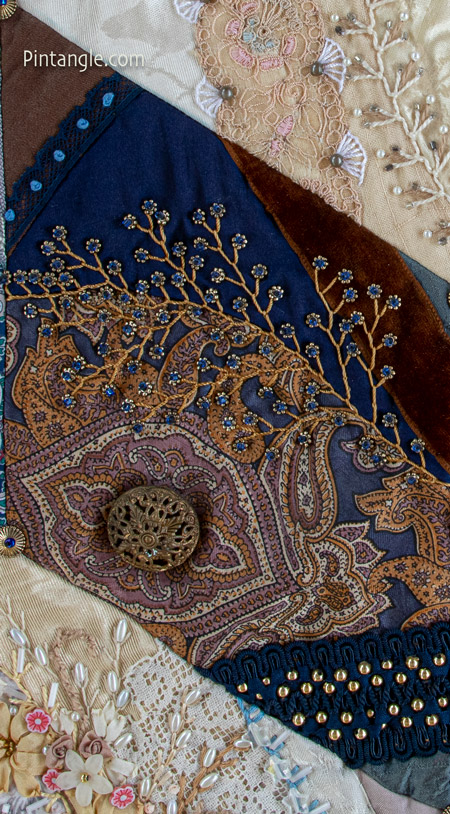
Mid toned Diamond

The pdf for the Mid toned Diamond on Tumbling block 13 is here.

I worked a thread-painted butterfly on patch 2. In so doing, I drew the outline of the butterfly and made up the rest as I went. A single strand of DMC stranded-cotton floss formed the wings. Couched chenille thread forms the body. I also used a metallic thread to add a bit of sparkle.
The seam between patches 2 and 4 is a line of Buttonhole stitches of varying heights, worked in cotton perle #8. I then topped the tallest buttonhole stitches with Detached Chain stitches and a bugle bead.
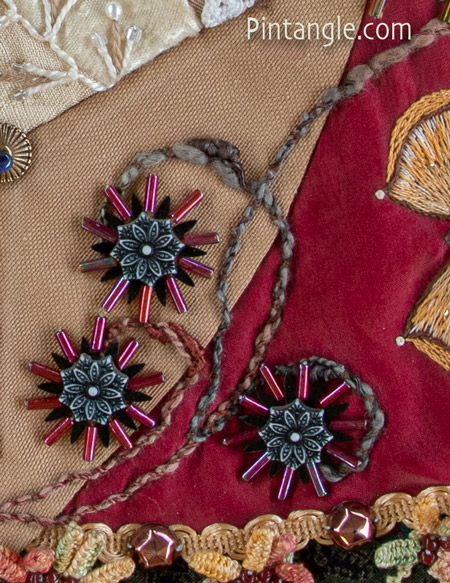
Once again I used couching to secure the brown novelty thread on the motif between patches 3 and 2. Then I used novelty beads and bugle beads arranged to hint/look like flowers on the end of the couched threads.
The seam between patch 1 and patch 2 was first covered with some commercial braid before I added a line of scallops worked in Scroll stitch. Using my stitchers templates which I sell in the Pintangle shop, I traced off the scallops using a water-dissolvable pen. I then worked them in Scroll stitch. For this, I used a hand-dyed cotton thread. In addition, in the valley of each scallop, I worked an arrangement of 5 double drizzle stitches to look like petals to the cone of Detached Buttonhole stitches. Also, in the middle of these cones, I stitched a teardrop bead. Above each ‘flower,’ I added a dome-shaped bronze-coloured sequin
The final embellishment on this block was very easy as it is a piece of lace that covers the seam with a bead in the middle.
Dark toned Diamond
The pdf for the Dark toned Diamond Tumbling block 13 is here.

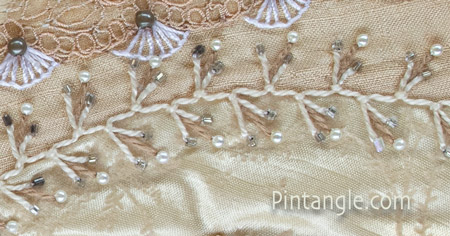
The dark-toned Diamond was embellished quickly and easily, as it is a large spray of Feather stitch that sprawls over the block. In addition, the beads on the arms of the stitches are small metallic disks often used as spacers in jewellery making. They are attached with blue seed beads.

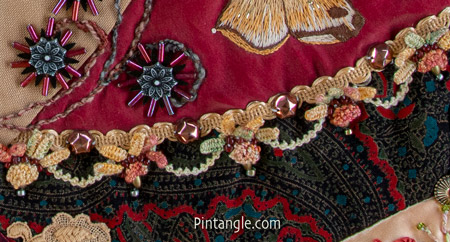
Here, I covered the other seams on the block with lace or braid. I added small gold beads to this braid.
If you are stitching along please share what you do in either of the Crazy Quilt Divas and/or Crazy Quilt International groups on Facebook.
The quilt is on the front of two of my books: The Visual Guide to Crazy Quilting Design and my new book Crazy Quilting for Beginners Handy Pocket Guide. You do not need my books to join in on this stitch along, but I strongly recommend that you have at least the pocket guide, if not the full Visual Guide to Crazy Quilting Design.
Previous blocks in the series
Guidelines and general information about the series:
Tumbling Block 1;
Tumbling Block 2;
Tumbling Block 3;
Tumbling Block 4;
Tumbling Block 5;
Tumbling Block 6;
Tumbling Block 7;
Tumbling Block 8;
Tumbling Block 9:
Tumbling Block 10:
Tumbling Block 11:
Tumbling Block 12:
Tumbling Block 13:
Tumbling Block 14:
Tumbling Block 15:
Tumbling Block 16:
Tumbling Block 17:
Tumbling Block 18:
Tumbling Block 19:
Tumbling Block 20:
Tumbling Block 21:
Follow Pintangle and have it delivered to your inbox
You can have Pintangle delivered to your inbox — In the side bar use the Subscribe to Pintangle box or If you are on a mobile scroll to the bottom the of the page to find the Subscribe to Pintangle option. In either case type in your email address and click on the Subscribe button below. Then check your email inbox for a confirmation email and click the link to confirm your subscription. If you don’t see a confirmation email, check your spam folder — sometimes the computer puts it there.
I hope you have enjoyed reading about how I stitched tumbling block 13 and I have given you a few ideas for your own crazy quilting . The next tumbling block in the series will be on February 15th.
Floral-themed Stitchers templates for hand embroiderers
With this set of stitchers templates, you can create your own floral-themed designs. You can easily combine petal and leaf shapes with the curved edges of the templates to create all sorts of floral and organic motifs. You will be able to create hundreds of different patterns to embroider. It is the ultimate mix-and-match fun for stitchers.
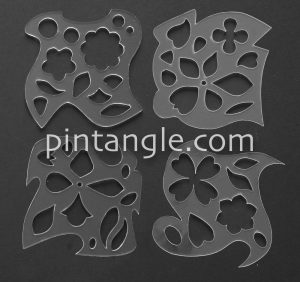
The set comes with an e-book with instructions and is filled with patterns and designs that you can create and use as jumping-off spots for your own designs.
They are available now in the shop here
Enjoy your stitching!
Follow Pintangle and have it delivered to your inbox
You can have Pintangle delivered to your inbox — In the side bar use the Subscribe to Pintangle box or If you are on a mobile scroll to the bottom the of the page to find the Subscribe to Pintangle option. In either case type in your email address and click on the Subscribe button below. Then check your email inbox for a confirmation email and click the link to confirm your subscription. If you don’t see a confirmation email, check your spam folder — sometimes the computer puts it there.

Wow Tumbling blocks combined with crazy quilting & stitching,that’s awesome! Absolutely beautiful work!
Thanks it was fun to do!