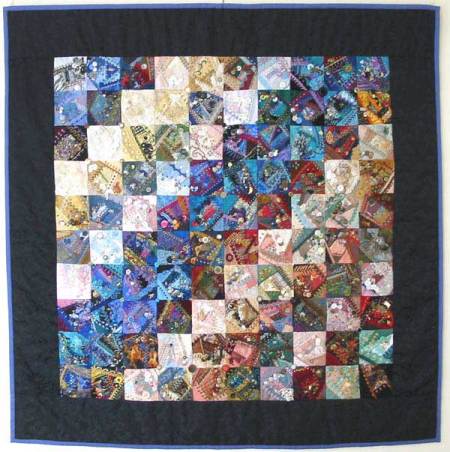
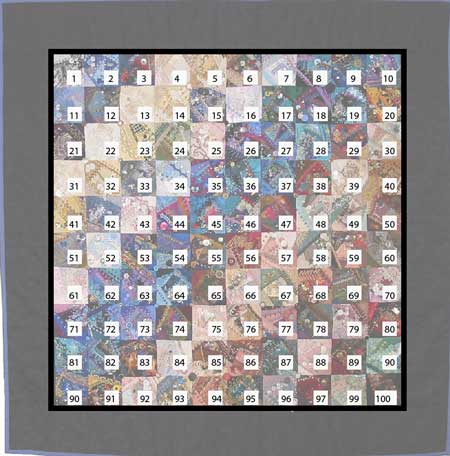
In this post I hope to tell your a little of the history of the “I dropped the button box” crazy quilt and provide a grid reference for each block which I will refer to in future posts and a picture of the quilt itself.
The “I dropped the button box” crazy quilt is actually a Y2K quilt as it has 2001 different bits on or in it. My definition of ‘bits’ was either a different fabric, lace, braid, charm, buttons or ribbon. The quilt was so named because I was a bit short on the number of ‘bits’ until I realised that my button collection would solve the problem
It was started in 2000 and completed at the end of 2002 (Yes I did not make the 2001 deadline) The crazy quilt contians all sorts of fabrics, lace, braid, charms, button and souvenirs. There are fabrics from friends given to me, or swapped at the time, scraps of costumes I have made and pieces of clothing from family members and friends. Since I am a scavenger of all sorts of things many fabrics and trims were sourced in second hand thrift stores and garage sales.

Measurements
The blocks started life as 6 x 6 inch (15 x 15 cm) blocks. By the time the quilt was assembled and seam allowances taken care of the blocks are 5 x 5 inches (13 x 13 cm)
Including the Border the quilt measures 60 x 60 inches (150 cm x 150 cm)
There are 100 crazy quilt blocks in the quilt.

Method of working:
I pieced every block first so that I could work out the set of the quilt and since this project needed approximately 800 different fabrics that could sit together I wanted to be sure I had enough fabrics to make it work.
While I pieced I added the lace and braids. This was also to avoid duplicates.
After every block was pieced and had lace braid, ribbon etc added to it I then worked through the pile embroidering and beading each block. Buttons where added last.
When I assembled the quilt I interfaced the border with a double layer of fabric as it is a very heavy quilt. It has hung on the wall for 6 years and it is still square with no sign of sagging.
In this series each block will be introduced and then each detail on the block will documented. Points I will cover are stitches worked, threads used, on what type of fabric, dyes used and if applicable include design notes. This series will appear every second day alternating with posts about my band sampler.
So settle back, swing by over coffee or your favourite beverage, for a series that will appear seam by seam, embellishment by embellishment until I reach the end.
All articles in this series are in the category Crazy quilt details
If you have not seen this quilt before you can find 70 of the 100 blocks on my website here


Hi Kristine – You ask"Do you then do anything about embellishing the joining seams after the embellished blocks are sewn together?"
I leave the seams that join the blocks unembellished but some crazy quilters embroider them – it’s personal taste and every quilt is different. I like the defined block. There are no ‘rules’ in crazy quilting so its up to the maker.
The quilt goes together by machine – or that’s the way I do it.
Hi Sharon,
I am very pleased that you have started this series about your Y2K CQ. It is gorgeous.
I have a question. You say you piece all your blocks, then embellish, then seam together into the quilt top. Do you then do anything about embellishing the joining seams after the embellished blocks are sewn together? Or are the left plain? I have read alot on CQing, haven’t done it yet, but this is the one seam I haven’t read anything about. Can you let me know?
Also, do you sew the embellished blocks together by hand or machine?
Thanks for everything you do for the fiber arts community, I for one really appreciate you.